
Introduction to the Ninja Creami Recipe
Discovering the Joy of Homemade Ice Cream
There’s nothing quite like the creamy, dreamy texture of homemade ice cream, especially when it’s made fresh in the comfort of your kitchen. With the launch of the Ninja Creami, a fun and innovative kitchen gadget, creating indulgent frozen treats has never been easier. Imagine turning your favorite flavors into a delightful dessert, tailored just for you!
Making your own ice cream might sound daunting, but it can be an incredibly rewarding experience. The Ninja Creami recipe allows you to experiment with various ingredients, from classic vanilla to adventurous combinations like lavender-honey or peanut butter cookie dough. Plus, you can control what goes into your ice cream, which means you can easily cater to dietary restrictions or personal preferences.
When I first tried the Ninja Creami, I was amazed by how simple it was to use. With just a few ingredients and the push of a button, I transformed a basic mixture into a luscious, creamy delight. If you’re curious to learn more about the science of ice cream and its delightful texture, you might want to check out this article from Serious Eats on the fundamental principles of ice cream making.
If you’re excited about summer or just looking for a way to cool off, whipping up a batch of homemade ice cream is a perfect solution. Plus, it’s an excellent way to bring friends and family together. Picture hosting a DIY ice cream sundae party where everyone can customize their own creations—it’s bound to be a hit! You can set out endless toppings, from fruits to sprinkles, and let creativity take flight.
Ready to dive into the world of frozen goodness? Buckle up, because the Ninja Creami is about to take your dessert game to the next level. Whether you’re a novice in the kitchen or a seasoned pro, this guide to the Ninja Creami will provide you with tips, tricks, and mouth-watering recipes to satisfy every ice cream craving. Soon, you’ll be a homemade ice cream connoisseur, delighting in the flavors of your choosing, right from your own kitchen!
Ingredients for the Ninja Creami Recipe
When it comes to creating a delightful Ninja Creami recipe, the right ingredients make all the difference. Here’s a quick rundown of the essential components you’ll need to whip up a treat that will surely impress.
Essential Ingredients You’ll Need
To get started, gather the following fresh ingredients:
- Base Ingredients: Choose your favorite frozen base, such as almond milk or yogurt, to create a creamy texture.
- Flavor Add-ins: Fresh fruit like strawberries or bananas can enhance your dish. Consider adding vanilla extract or cocoa powder for a flavor boost.
- Sweeteners: Use honey, maple syrup, or agave nectar for natural sweetness. These alternatives are great for those steering clear of refined sugars.
- Mix-Ins: You can include nuts, seeds, or granola for some crunch – think almond slices or chia seeds for added texture.
- Proteins: If you’re in the mood for a savory twist, try incorporating turkey bacon or chicken ham for a robust flavor.
Now that you have your ingredients ready, it’s time to blend and create some deliciousness! For more ideas, check out resources like EatingWell for nutrient-rich options and tips.
Step-by-Step Preparation of the Ninja Creami Recipe
Creating your very own ninja creami recipe is a fun and rewarding culinary adventure that many young professionals enjoy. Not only is it a delightful way to experiment in the kitchen, but it allows you to indulge in creamy treats tailored to your taste. Let’s dive into the preparation process, ensuring you achieve a mouthwatering result!
Softening the Cream Cheese
Before you even begin, the first step in crafting your ninja creami recipe starts with softening the cream cheese. Softening is crucial because it helps you mix the base smoothly without lumps. Here’s how to do it:
-
Use room temperature cream cheese: Allow the cream cheese to sit out for about 30 minutes before you start. A good tip is to cut it into small cubes to expedite the softening process.
-
Microwave method: If you’re pressed for time, place the cream cheese in the microwave for about 15-20 seconds on low power. Just be careful not to melt it!
Once your cream cheese is softened, it’s time to move on to the next step.
Mixing the Base
Now that your cream cheese is soft and easy to work with, it’s time to create your base. This is where the magic happens. For a balanced mixture, consider including:
- Cream: Use heavy cream for rich texture. You can substitute with coconut milk for a dairy-free version.
- Sweetener: Depending on your preference, opt for granulated sugar, honey, or even maple syrup for a twist.
- Flavorings: Extracts such as vanilla or almond, and even a pinch of salt can elevate your creation.
Combine these ingredients in a large mixing bowl. Using a whisk or electric hand mixer, blend them until smooth. If you’re interested in exploring flavor possibilities, you might want to check out ingredient ideas on Food Network for inspiration.
Freezing the Mixture
Once you’ve mixed your base to perfection, it’s time to freeze it. Pour your blended mixture into a compatible container that can fit into your freezer. Here are some key pointers:
- Seal well: Ensure your container is airtight to avoid freezer burn. Using a cover is essential!
- Chill time: Freeze for at least 6 hours or overnight for best results. This step is essential as it will provide the right consistency to transform into a creami delight.
Churning with the Ninja Creami
The star of the show is finally ready: your Ninja Creami! Here’s where you’ll see the transformation happen:
-
Preparation: Remove the frozen mixture from the freezer and let it sit for a few minutes, allowing it to soften slightly. This makes churning easier.
-
Churning process: Follow the Ninja Creami instructions. Place the frozen block into the machine, select the appropriate setting (typically the “Ice Cream” option), and let it work its magic.
-
Consistency check: After the initial churn, assess the consistency. If it’s too crumbly, you might want to add a splash of milk and churn again.
The anticipation builds as you watch your dessert come to life!
Adding Mix-Ins and Serving
What’s a ninja creami recipe without delightful mix-ins? Here’s how to personalize your creation:
- Layer your mix-ins: As the base churns, add in chopped fruits, chocolate chips, or even a sprinkle of turkey bacon for a savory twist!
- Serving suggestions: Scoop the finished creamy goodness into bowls or cones. Top it with additional toppings like crushed nuts or drizzle some honey for an extra touch.
As you take your first few bites, you’ll realize that not only have you crafted a delicious treat, but you’ve also made something that reflects your unique tastes and creativity.
In conclusion, preparing a ninja creami recipe is a straightforward yet satisfying endeavor. With a little patience and enthusiasm, you can enjoy a home-crafted dreamy dessert that’s perfect for sharing with friends or savoring all by yourself. So, gear up, and happy creaming!
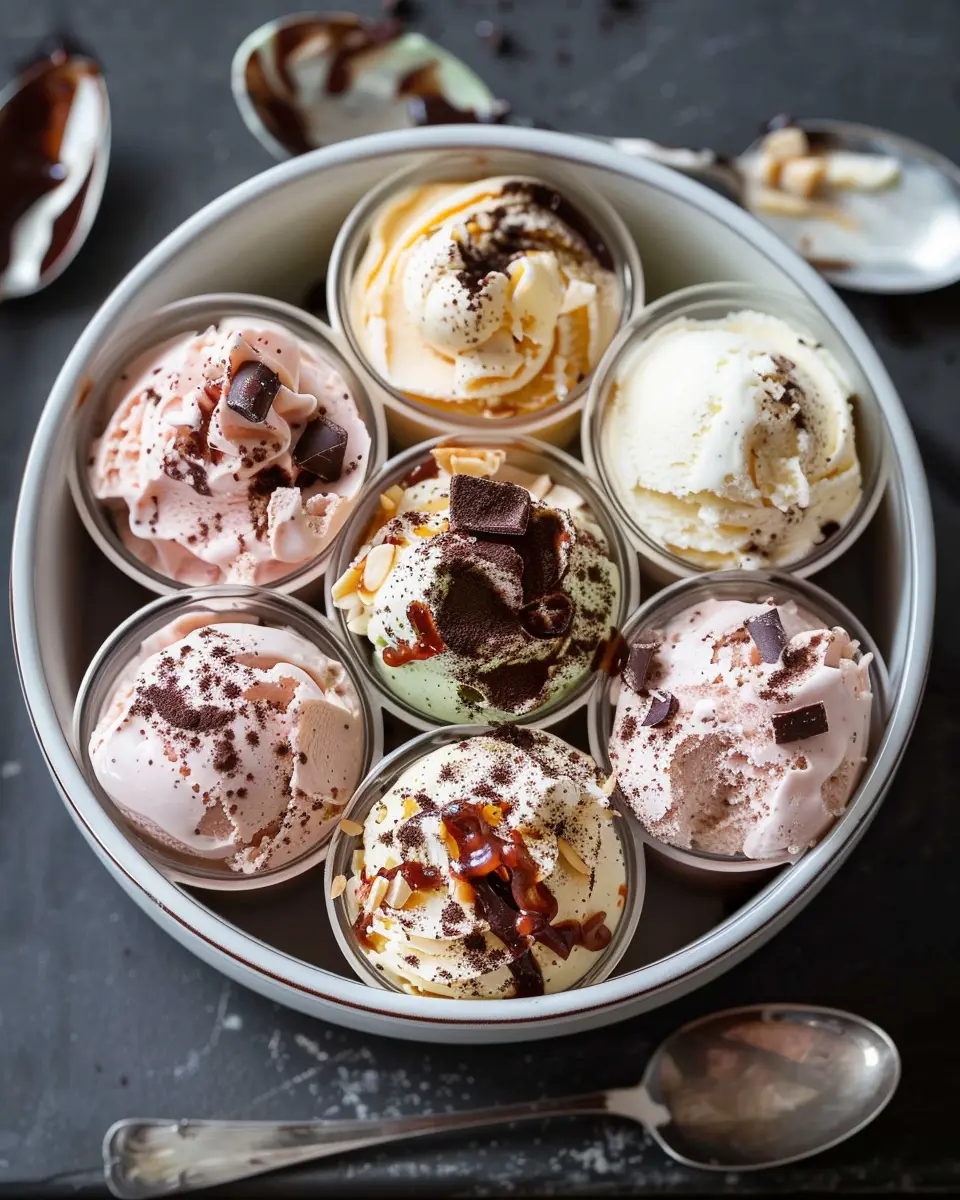
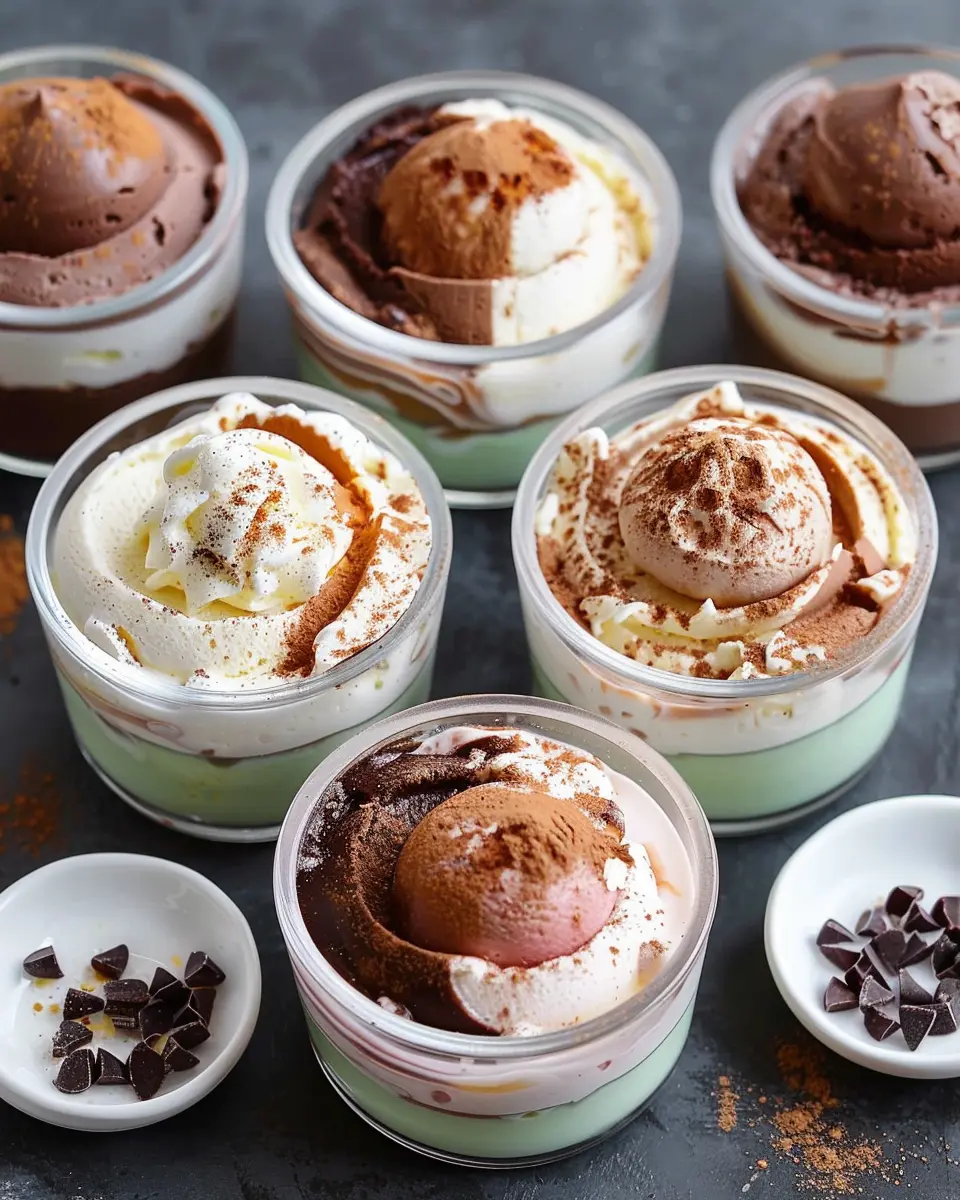
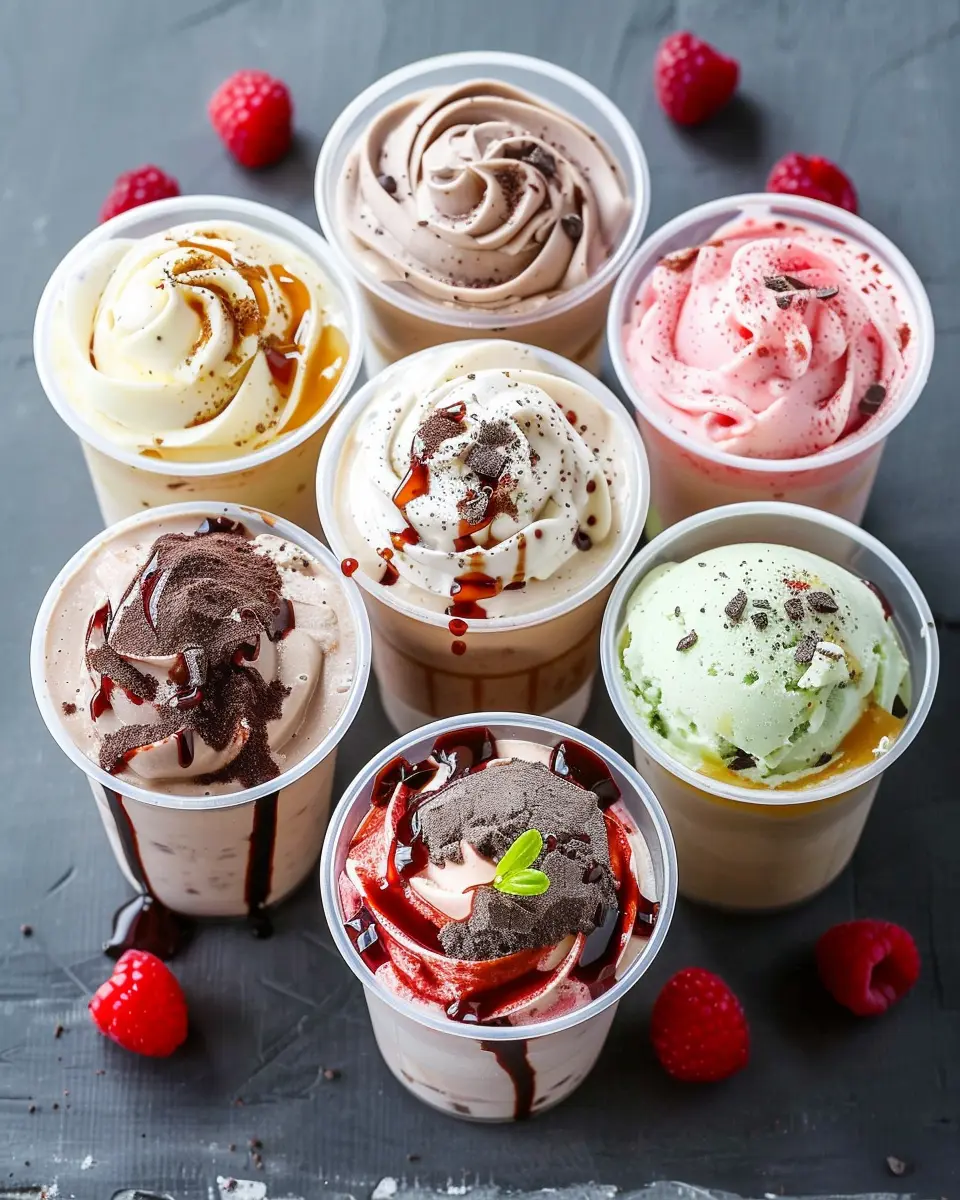
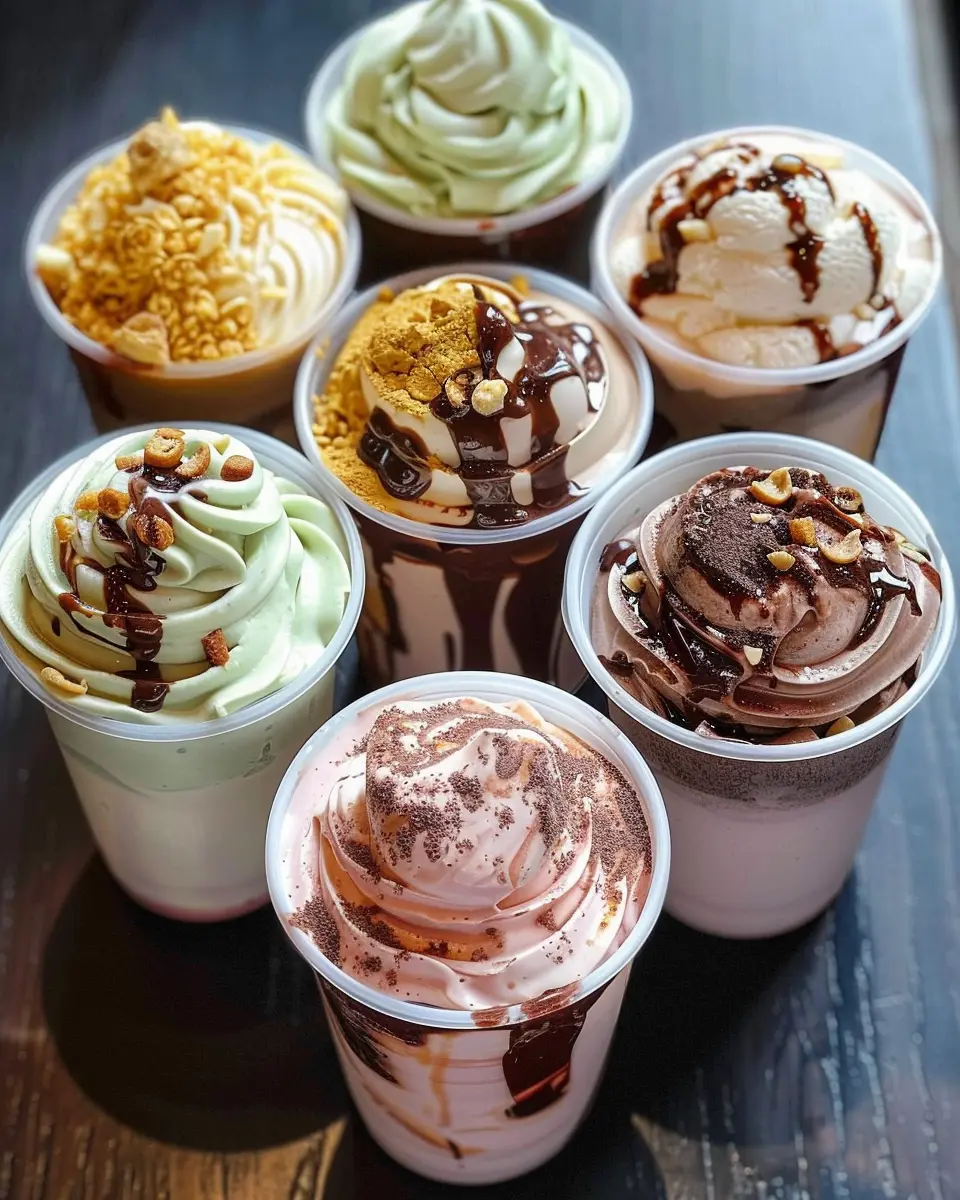
Variations on the Ninja Creami Recipe
Getting creative with your Ninja Creami is part of the fun! Here’s how to whip up a variety of delicious flavors that will keep your taste buds excited.
Classic Vanilla Flavor
Start with the base of every great ice cream – classic vanilla. Simply blend:
- 1 cup of whole milk
- 2 tablespoons of sugar
- 1 teaspoon of vanilla extract
After freezing, run it through your Ninja Creami for a creamy texture that can hold its own. Want to jazz it up? Add chocolate chips or crushed cookies for a delightful twist.
Fruity Variations: Strawberry and Mango
Fruity flavors can elevate your Ninja Creami recipe to a whole new level. For a refreshing strawberry treat, blend:
- 1 cup of fresh strawberries
- 1 cup of milk
- 2 tablespoons of honey
For mango lovers, simply swap the strawberries for ripe mango. The natural sweetness will remind you of tropical vacations, making every scoop a little mini getaway.
Decadent Chocolate Indulgence
For when you’re craving something rich, try a chocolate variant. Combine:
- 1 cup of milk
- 1/4 cup of cocoa powder
- 2 tablespoons of sugar
This will yield a delightful chocolate treat. Top it with some chopped nuts or a drizzle of dark chocolate for an indulgent experience.
Healthy Options: Low-Calorie Creami
Staying healthy doesn’t mean sacrificing taste! Combine:
- 1 cup of almond milk
- 2 tablespoons of natural sweetener (like stevia)
- Your choice of fruit puree
This Ninja Creami recipe will keep you refreshed and guilt-free. Check out resources like Healthline for more nutritious ideas!
Incorporating these variations not only expands your dessert repertoire but also lets you tailor flavors to your mood. So, which one will you try first?
Cooking Tips and Notes for the Ninja Creami Recipe
Tips for Achieving the Perfect Texture
When making your Ninja Creami recipe, achieving that oh-so-smooth texture is the goal. Here are a few insider tips:
- Chill Your Base: Make sure your mixture is thoroughly chilled before processing it in the Ninja Creami. This helps in achieving that creamy, soft-serve-like consistency.
- Optimal Mix: Blend your ingredients well to ensure there are no lumps. A smooth base translates into a smoother final product.
If you’re looking for more tips, check out this guide on texture from Food & Wine.
Common Mistakes to Avoid
Navigating new recipes can be tricky, so let’s sidestep some common pitfalls:
- Over-Filling the Container: Be mindful not to fill the container beyond the fill line. Exceeding the mark can lead to messy outcomes and uneven textures.
- Skipping the Freeze Time: Skipping the recommended freeze time before processing could yield icy results rather than the creamy treat you’re aiming for.
By following these insights, you’re well on your way to creating a stunning Ninja Creami recipe that’s sure to impress!
Serving Suggestions for the Ninja Creami Recipe
Ideal Pairings and Presentation Ideas
When it comes to your Ninja Creami recipe, the serving options are as delightful as the dish itself. To elevate your experience, think about delicious pairings that complement those creamy flavors beautifully.
- Fruits: Fresh berries, banana slices, or mango chunks add a refreshing contrast.
- Nuts and Seeds: A sprinkle of toasted almonds or chia seeds enhances texture and nutrition.
- Sauces: Drizzle a homemade chocolate or caramel sauce for that gourmet touch.
Presentation is key! Consider serving your Ninja Creami in elegant bowls or mason jars. Layering with fruits and nuts can create a visually stunning treat that’s almost too beautiful to eat. Plus, these layers can be excellent conversation starters.
If you’re looking for more serving inspirations, check out this article on creative dessert presentations to really wow your guests. Fun fact: Did you know that the way we present food can increase the enjoyment of our meals? It’s true—sometimes, we eat with our eyes first!
Time Breakdown for the Ninja Creami Recipe
When embarking on your Ninja Creami recipe adventure, it’s important to anticipate how long each step will take. Here’s a detailed breakdown to help you plan!
Preparation Time
First things first, you’ll want to allocate about 10 to 15 minutes for preparation. This includes gathering your ingredients, mixing them together, and pouring the mixture into the Ninja Creami container.
Freezing Time
Next up is the freezing stage, which is crucial for that perfect texture. Plan on 24 hours for your mixture to fully freeze. This step is key, so don’t rush it!
Churning Time
Finally, the actual churning process takes about 5 to 10 minutes. Just pop the container into the Ninja Creami and let it work its magic.
With this breakdown, you can easily fit this delicious treat into your schedule. Happy Creami-making!
Nutritional Facts for the Ninja Creami Recipe
When whipping up your delightful Ninja Creami recipe, understanding the nutritional benefits can help you make healthier choices. Let’s break it down.
Calories and Macronutrients
In a typical serving, the Ninja Creami recipe contains approximately 150-200 calories. Here’s a quick look at the key macronutrients:
- Carbohydrates: 25g
- Protein: 5g
- Fat: 6g
Selecting ingredients like Greek yogurt or almond milk can create a lighter treat without sacrificing flavor.
Vitamins and Minerals
Don’t forget about the vitamins and minerals packed into this frozen delight! With choices like bananas or berries, your Ninja Creami can be rich in:
- Vitamin C: Boosts immunity.
- Potassium: Supports heart health.
- Fiber: Aids digestion.
These elements not only add nutritional value but can truly elevate your experience! Whether you’re indulging in a late-night snack or offering a refreshing dessert after dinner, this recipe can be both delicious and nourishing. For more tips on creating balanced meals, check out Healthline.
FAQs about the Ninja Creami Recipe
If you’re diving into the delightful world of the Ninja Creami recipe, you might have a few questions before you start whipping up your own creamy creations. Let’s tackle some common queries!
Can I use non-dairy alternatives?
Absolutely! You can easily substitute regular dairy with non-dairy options like almond milk, coconut milk, or oat milk. These alternatives often blend just as well, yielding a deliciously creamy texture. Just keep in mind that some non-dairy products are thinner, so you may want to add a little more to achieve that perfect consistency. For inspiration, check out this guide on plant-based milk.
How long will the Ninja Creami dessert last?
Your Ninja Creami dessert can typically last for up to a week in the freezer. To maintain its creamy texture, store it in an airtight container. If you notice some ice crystals forming, give it a quick spin in the Ninja Creami to bring back that luscious consistency before serving.
What if my Creami turns icy instead of creamy?
If you find that your dessert has become icy, don’t worry! This can happen if there’s too much liquid in your base or if it’s frozen for too long. To remedy this, try adding a touch more sugar or fat (like coconut cream) next time to enhance creaminess. Using the Ninja Creami correctly should help you achieve that smoothness you’re craving.
Now that you’re equipped with these useful tips, it’s time to get that Ninja Creami recipe going. Happy blending!
Conclusion on the Ninja Creami Recipe
The Ninja Creami recipe opens up endless possibilities for delightful frozen treats. Don’t hesitate to experiment with your favorite flavors! Whether it’s creamy chocolate, vibrant berry blends, or a refreshing mint surprise, the joy of creating unique combinations is part of the fun. If you’re feeling adventurous, why not try adding ingredients like coconut milk or almond extract for a twist?
Remember, the key is to enjoy yourself during the process! Share your creations with friends or family and inspire others to get creative in the kitchen too. For more great ideas, check out resources like Food Network or Serious Eats for additional flavor combinations and recipes to try!
PrintNinja Creami Recipe: Easy Ice Cream Bliss for Any Occasion

Enjoy a delightful and simple Ninja Creami recipe that brings joy to any gathering with its creamy texture and rich flavors.
- Prep Time: 15 minutes
- Total Time: 24 hours 15 minutes
- Yield: 4 servings
- Category: Dessert
- Method: Freezing
- Cuisine: American
- Diet: Gluten-Free
Ingredients
- 2 cups heavy cream
- 1 cup whole milk
- 3/4 cup granulated sugar
- 1 tsp vanilla extract
- 1/2 cup chocolate chips
Instructions
- In a large bowl, mix together heavy cream, whole milk, granulated sugar, and vanilla extract until the sugar is dissolved.
- Add in the chocolate chips and stir gently.
- Pour the mixture into the Ninja Creami container and freeze for at least 24 hours.
- After freezing, process in the Ninja Creami according to the manufacturer’s instructions.
- Serve immediately or refreeze for a firmer texture.
Notes
- For a dairy-free version, use coconut cream and almond milk instead of heavy cream and whole milk.
- Add your favorite mix-ins like fruits or nuts for additional flavor.
Nutrition
- Serving Size: 1/2 cup
- Calories: 300
- Sugar: 20g
- Sodium: 100mg
- Fat: 25g
- Saturated Fat: 15g
- Unsaturated Fat: 10g
- Trans Fat: 0g
- Carbohydrates: 30g
- Fiber: 0g
- Protein: 4g
- Cholesterol: 80mg


")