
Homemade Bread: The Comfort Food of Your Dreams
Why Homemade Bread is Worth the Effort
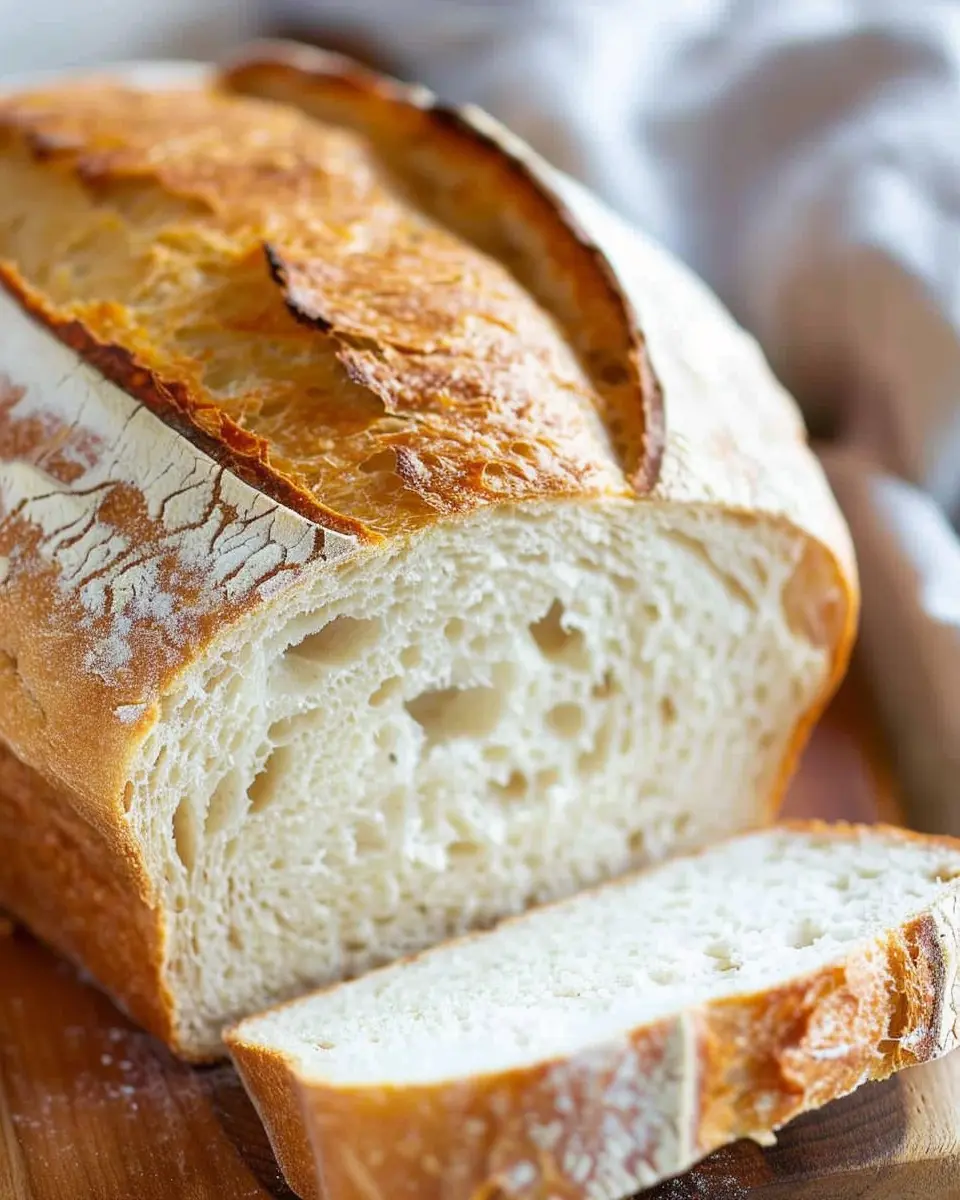
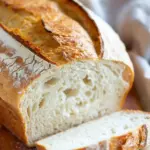
Have you ever walked into a kitchen and been enveloped by the warm, inviting aroma of fresh homemade bread? It’s a smell that instantly transports you to your childhood, reminiscent of family dinners and cozy afternoons. But beyond its nostalgic qualities, making your own bread is an incredibly rewarding process that offers more than just delicious results.
First and foremost, homemade bread is healthier than store-bought options. With full control over the ingredients, you can say goodbye to preservatives and unnecessary additives. By using whole grains or organic flour, you can elevate the nutritional value, making your bread not only delicious but also nourishing. Experts at the Whole Grains Council suggest that switching to whole grains can provide essential nutrients like fiber, iron, and B vitamins.
Another reason to embrace homemade bread? The sheer joy of creating something from scratch. Remember the satisfaction of kneading dough and watching it rise? There’s a meditative quality to bread-making that can serve as a wonderful escape from the hustle and bustle of daily life. Plus, it’s a fantastic way to impress friends and family. Whether it’s a cozy brunch or a casual get-together, nothing says “I care” quite like serving warm, homemade bread alongside your favorite spreads.
Let’s not forget the potential for creativity! Homemade bread offers endless possibilities. You can experiment with different flours, mix in herbs, seeds, or even add a touch of sweetness with honey. Feeling adventurous? Try pairing your homemade bread with turkey bacon or chicken ham for a delicious breakfast sandwich or artisan sandwiches for lunch.
Finally, making your own bread can be a cost-effective choice. Store-bought artisan loaves can often break the bank, while the ingredients for your homemade version are surprisingly inexpensive. Plus, think about all that money you’ll save by avoiding those frequent trips to the bakery!
So why not roll up your sleeves and embrace the art of bread-making? You may just find that it becomes a cherished part of your culinary routine.
For more tips and a fantastic recipe to get started, check out our detailed guide on making homemade bread!
Ingredients for Homemade Bread
Essential ingredients for delicious homemade bread
Making homemade bread is a rewarding experience that begins with just a handful of quality ingredients. Here’s what you’ll need:
- Flour: Choose all-purpose or bread flour for the perfect texture.
- Yeast: Opt for active dry yeast; it helps the dough rise beautifully.
- Water: Lukewarm water activates the yeast—too hot or cold can spoil the process.
- Sugar: A little sugar feeds the yeast and adds a subtle sweetness.
- Salt: Essential for flavor and controlling yeast activity.
- Oil or Butter: For a richer taste and softer crumb.
With these staples, you’re well on your way to baking a loaf that will fill your home with a delightful aroma.
Tips for selecting quality ingredients
When it comes to homemade bread, the quality of your ingredients greatly impacts the final product. Consider these tips for selecting top-notch components:
- Freshness is key: Always check your yeast expiration date; outdated yeast can lead to dense bread.
- High-protein flour: For better gluten formation and structure, opt for high-protein varieties.
- Filtered water: Using good quality water enhances flavor—something you wouldn’t think about but makes a difference.
- Local ingredients: When possible, choose local products to support your community and boost freshness.
Remember, your homemade bread journey starts with these thoughtful choices. Happy baking!
Step-by-Step Preparation of Homemade Bread
Making homemade bread can bring a sense of accomplishment and comfort that store-bought just can’t match. Let’s dive into the straightforward process that will reward you with warm, fluffy loaves perfect for sandwiches or just slathered in butter. Follow these steps, and you’ll be a bread-making pro in no time!
Prepare the yeast mixture
To get started, the first step is to activate the yeast. This simple mixture helps create those delightful bubbles that make our bread rise. Here’s what you’ll need:
- 2 ¼ teaspoons active dry yeast (one packet)
- 1 tablespoon sugar
- 1 cup warm water (around 110°F or 43°C)
In a small bowl, combine the yeast and sugar with the warm water. Stir gently and let it sit for about 5-10 minutes. You should notice it start to foam; this means your yeast is active and ready to work its magic! For more on yeast activation, check out this comprehensive guide on King Arthur Baking.
Combine wet and dry ingredients
Now that your yeast is bubbly, it’s time to bring the dough together. In a large mixing bowl, combine:
- 3 cups all-purpose flour (plus more for dusting)
- 1 teaspoon salt
- 1 tablespoon olive oil (or any cooking oil)
Pour the foamy yeast mixture into the flour mixture, followed by the olive oil. Use a wooden spoon or spatula to combine the ingredients until they form a shaggy dough. This is a fun moment, and you might want to get your hands in there for a bit of tactile fun!
Knead the dough
Once combined, it’s time to knead the dough. Lightly flour a clean surface and transfer the dough onto it. Here’s how to knead:
- Flatten the dough with your palms.
- Fold it in half.
- Rotate it a quarter turn.
- Repeat this process for about 8-10 minutes until the dough is smooth and elastic.
Kneading not only strengthens the gluten but also develops the dough’s structure. Remember to sprinkle with flour as needed to prevent stickiness.
First rise – letting the dough grow
After kneading, shape the dough into a ball and place it in a lightly greased bowl. Cover it with a clean kitchen towel or plastic wrap and let it rise in a warm, draft-free area for about 1-2 hours, or until it doubles in size. This is a great time to think about your favorite homemade bread toppings!
Shape the loaves
Once your dough has risen, gently punch it down to release air. Turn it out onto a floured surface and divide it into two equal portions for two loaves. Shape each portion into a loaf by flattening it and rolling it up tightly. Pinch the seams together and tuck the ends under.
Second rise – patience is key
Place your shaped loaves into greased bread pans or directly onto a baking sheet. Cover them again and allow them to rise for about 30-40 minutes. Keep a close eye as they puff up; this is when the magic happens!
Baking the bread to golden perfection
Your dough is now ready to be baked to a beautiful golden brown. Preheat your oven to 375°F (190°C). If you want a crisper crust, place a shallow pan filled with water in the bottom of the oven – it creates steam, leading to a crust you’ll love!
Bake for approximately 25-30 minutes, or until the loaves sound hollow when tapped on the bottom. Remove them from the pans and let cool on wire racks.
Now, the only thing left is to slice into your freshly baked homemade bread, enjoy, and perhaps share the joy of baking with friends or family. Remember, bread-making is an art, so don’t be afraid to experiment and find what works best for you!
Fun Variations on Homemade Bread
Exploring homemade bread variations can turn baking into a delightful adventure. Whether you want to fuel your morning routine or impress at a dinner party, here are two fantastic variations to consider.
Whole Wheat Homemade Bread
If you’re looking to infuse your day with healthy goodness, whole wheat homemade bread is the way to go. This variation packs more fiber and nutrients compared to traditional white bread, perfect for maintaining energy levels throughout your busy day.
- Additional Ingredients: Swap out half of your all-purpose flour for whole wheat flour. You can add ingredients like oats, seeds, or nuts to enhance texture and taste.
- Flavor Enhancements: Try incorporating a tablespoon of honey or maple syrup in the dough for a subtly sweet yummier loaf.
Whole wheat bread can be incredibly versatile, making it the ideal companion for avocado toast or a classic peanut butter sandwich.
For more whole grain tips, check out WholeGrainsCouncil.org.
Herb-Infused Homemade Bread
For those who crave a bit of zest in every bite, herb-infused homemade bread adds an aromatic flair to the standard loaf. This is an excellent choice for dinners or casual gatherings.
- Herb Choices: Fresh herbs like rosemary, basil, or thyme work wonders. A tablespoon or two mixed into the dough after you’ve combined the wet and dry ingredients can elevate your loaf.
- Optional Add-ins: Consider adding garlic or even grated cheese to take your herb bread to the next level.
Imagine breaking into a warm, herb-scented loaf at your next gathering! It pairs beautifully with soups and spreads like herbed butter or hummus.
Try these variations and let your homemade bread journey flourish! Do you have any unique creations? Share in the comments below!
Helpful Cooking Tips and Notes for Homemade Bread
Common Mistakes to Avoid
When making homemade bread, it’s easy to trip up on a few key points:
- Over-kneading: This can lead to a tough loaf instead of the desired light texture. Aim for just enough kneading until the dough is smooth.
- Incorrect yeast activation: Make sure your water is warm (not hot!) when activating yeast. Too hot will kill it. Aim for around 110°F.
- Skipping proofing: Don’t rush the rise! Allowing the dough to double in size is crucial for a fluffy result.
For more bread-making tips, consider checking resources like King Arthur Baking for expert advice!
Storing Your Homemade Bread for Freshness
Once your homemade bread is baked to golden perfection, you’ll want to keep it fresh. Here are some effective strategies:
- Cool completely: Let your bread cool on a wire rack before storage to prevent sogginess.
- Wrap it up: Use parchment paper or a kitchen towel for short-term storage, and plastic wrap or a bag for longer-lasting freshness.
- Freeze leftovers: If you can’t finish it in a few days, slice the bread and freeze it in an airtight container. It’ll taste just as delightful when you defrost it!
Embracing these practices will help you enjoy your homemade bread longer!
Serving Suggestions for Homemade Bread
Best toppings and spreads for your bread
When it comes to enjoying your homemade bread, the toppings can transform every slice into a delightful experience. Consider these delicious options:
- Avocado: Smash it up with a pinch of salt and lemon juice for a creamy, nutrient-rich spread.
- Hummus: Offer a protein-packed twist, perfect for vegetarians and those looking for a healthy snack.
- Turkey Bacon: Crispy slices make a fantastic topping, adding savory goodness.
- Chicken Ham: Elevate your sandwich game with this flavorful option.
- Simple butter or flavored spreads: Sometimes, classic is best—preparing flavored butters (like garlic or herb) can add a gourmet touch.
Pairing bread with meals for a complete experience
Imagine a warm slice of homemade bread accompanying your dinner. Whether it’s a hearty soup or a fresh salad, bread enhances the meal beautifully. Here are some ideas:
- Soups: Pair your bread with creamy tomato soup or a robust beef stew for a comforting meal.
- Salads: Use it to scoop up flavorful dressings from a fresh garden salad.
- Breakfast: Try it toasted with eggs (or Turkey Bacon for a healthier twist).
By thoughtfully combining flavors, your homemade bread becomes an integral part of your meals, creating a well-rounded dining experience. Explore more delicious twists on bread pairings at Bon Appétit. Enjoy the journey of flavors!
Time Breakdown for Homemade Bread
Preparation time
Making homemade bread is simpler than you might think! You’ll need about 15 to 20 minutes for mixing and kneading the dough. Gather your ingredients—flour, water, yeast, and salt—and let creativity flow!
Rising time
Patience is key here. Once your dough is mixed, give it approximately 1 to 2 hours to rise until it doubles in size. This step is essential for achieving that fluffy, light texture.
Baking time
Baking only takes about 30 to 35 minutes, depending on your oven. You’ll know it’s done when the bread has a golden crust and sounds hollow when tapped.
Total time
From start to finish, expect to spend around 2 to 3 hours on your homemade bread, including rising and baking. It’s well worth it for the delicious result!
For more tips on timing and techniques in baking, check out this article on Perfecting Your Baking Skills.
Nutritional Facts for Homemade Bread
When it comes to homemade bread, understanding its nutritional value can help you appreciate your creation even more. Here’s what you can expect per slice:
Calories per slice
A typical slice of homemade bread contains approximately 100-120 calories. Depending on the ingredients you use, this can vary slightly but remains a wholesome choice for your meals.
Protein content
Did you know each slice packs around 3-4 grams of protein? This makes it a great companion to your favorite spreads or fillings, enhancing your overall protein intake.
Key vitamins and minerals
Homemade bread is rich in essential nutrients. You’ll find significant amounts of B vitamins, iron, and magnesium. These vitamins play a crucial role in energy metabolism and overall health, according to Healthline.
By whipping up your own homemade bread, you’re not just treating your taste buds; you’re also nourishing your body!
FAQs about Homemade Bread
How can I tell if my bread is done baking?
Determining when your homemade bread is perfectly baked can be a bit tricky. One of the most reliable methods is the tap test: gently tap the bottom of the loaf; if it sounds hollow, it’s ready to come out of the oven. Another great indicator is the color—your bread should be golden brown. You can also use an instant-read thermometer; a loaf is done when it registers around 190°F (88°C) in the center. For more tips, check out King Arthur Baking.
What should I do if my bread doesn’t rise?
Ah, the frustration of dough that refuses to inflate! If your homemade bread isn’t rising, several factors may be at play. First, check the freshness of your yeast; expired yeast is a common culprit. Be sure to also let the dough rise in a warm, draft-free area. If it’s chilly, consider placing it in an oven that’s turned off but had the light on for a bit. Finally, ensure you’ve added enough kneading. Properly developed gluten helps your bread rise beautifully.
Can I make bread without yeast?
Absolutely! If you’re looking for an alternative, consider quick breads, which use baking powder or baking soda as leavening agents. These breads can be whipped up in no time and don’t require any rising time. Recipes for banana bread or soda bread can be a delightful change. If you’re interested, explore BBC Good Food for some fantastic options!
Conclusion on Homemade Bread
Embracing the Joy of Baking Bread at Home
Making homemade bread isn’t just about the final product; it’s an experience that can bring joy and satisfaction. The aroma of fresh bread baking is almost magical, transforming your kitchen into a comforting haven. Plus, there’s something incredibly rewarding about crafting your own loaf from scratch, knowing exactly what goes into it.
Whether you’re just starting out or refining your skills, your journey with homemade bread will undoubtedly enhance your culinary repertoire. So, gather your ingredients, don your apron, and relish the process. Remember, each loaf is a learning experience. For tips on perfecting your technique, check out resources from King Arthur Baking or the Bread Baker’s Guild. Happy baking!
PrintHomemade Bread: Easy Recipes for Delicious, Fresh Loaves
Learn how to make homemade bread with these easy recipes that will fill your home with the delightful aroma of fresh loaves.
- Prep Time: 20 minutes
- Cook Time: 35 minutes
- Total Time: 1 hour and 55 minutes
- Yield: 1 loaf
- Category: Baked Goods
- Method: Baking
- Cuisine: American
- Diet: Vegetarian
Ingredients
- 4 cups all-purpose flour
- 1 tablespoon sugar
- 2 teaspoons salt
- 1 tablespoon active dry yeast
- 1 and ½ cups warm water
- 2 tablespoons olive oil
Instructions
- In a large bowl, combine warm water, sugar, and yeast. Let it sit for about 5 minutes until frothy.
- Add olive oil, salt, and flour to the yeast mixture. Mix until a dough forms.
- Knead the dough on a floured surface for about 8-10 minutes until smooth.
- Place the dough in a greased bowl, cover, and let it rise until doubled in size, about 1 hour.
- Punch down the dough and shape it into a loaf. Place it in a greased loaf pan.
- Cover and let it rise again for about 30 minutes.
- Bake in a preheated oven at 375°F (190°C) for 30-35 minutes or until golden brown.
- Cool on wire rack before slicing.
Notes
- Experiment with different flour types for unique flavors.
- Add herbs or cheese for a twist on traditional bread.
Nutrition
- Serving Size: 1 slice
- Calories: 150
- Sugar: 1g
- Sodium: 250mg
- Fat: 3g
- Saturated Fat: 0.5g
- Unsaturated Fat: 2g
- Trans Fat: 0g
- Carbohydrates: 28g
- Fiber: 1g
- Protein: 5g
- Cholesterol: 0mg


")