
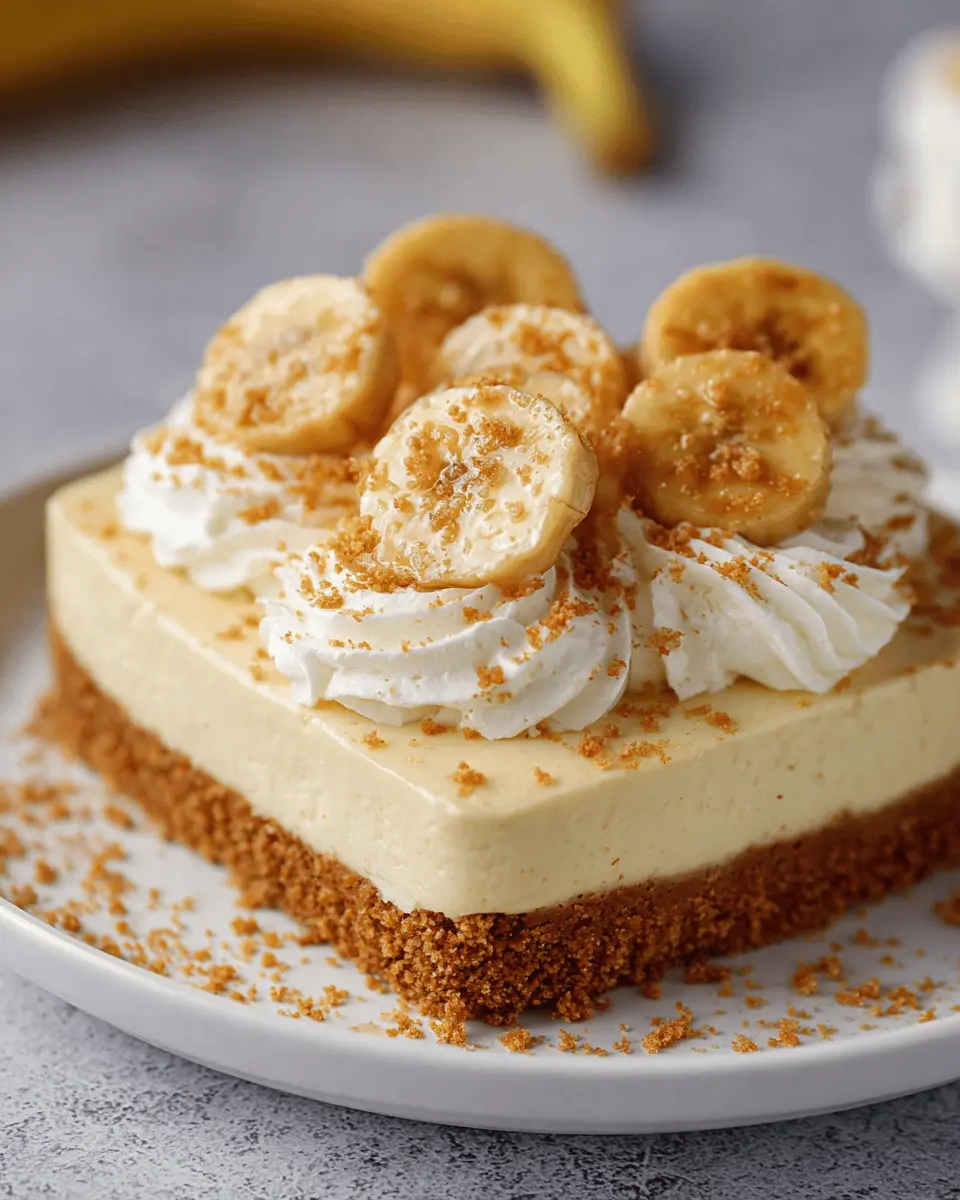
Introduction to No Bake Banana Pudding Cheesecake
When it’s time to unwind after a long day at work, few things are more satisfying than a dessert you can whip up without breaking a sweat. That’s where the no bake banana pudding cheesecake comes into play! Not only is it delicious and creamy, but it also allows you to indulge your sweet tooth without turning on the oven. As a young professional, you might be juggling a bustling career and a social life, making no bake desserts like this a perfect solution for satisfying cravings with minimal effort.
Why No Bake Desserts are Ideal for Busy Lifestyles
For those of us in our 20s and 30s, balancing work commitments with personal hobbies and social engagements can feel like a full-time job in itself. The last thing you want after a busy week is to spend hours in the kitchen. Here’s why no bake desserts are the ultimate choice:
-
Quick Preparation: A no bake dessert typically requires just a few steps, which means you can have your banana pudding cheesecake ready in under 30 minutes. Who wouldn’t love that on a weeknight?
-
Minimal Cleanup: With no baking involved, you won’t have to deal with a pile of pots and pans. A handful of mixing bowls and a spatula is all you need. This also lets you spend more time enjoying your dessert—and less time cleaning up.
-
Flexible Ingredients: More often than not, these desserts allow for ingredient swaps based on what you have on hand. For example, if you’re fresh out of vanilla wafers, crushed graham crackers work just as well!
Plus, the layering aspect of a no bake banana pudding cheesecake provides an opportunity for creativity. You can put your personal spin on it, whether that’s through fun toppings or extra flavorings. Not to mention, it’s a hit at gatherings, and you might just become the friend known for bringing the best treats!
So, whether you’re planning a small gathering or just want to treat yourself, this no bake dessert is your ticket to a delightful treat with minimal fuss. If you’re ready to dive into the recipe, check out sources like Food Network for tips on ingredient variations or serving suggestions that complement your cheesecake perfectly!
Ingredients for No Bake Banana Pudding Cheesecake
Creating the perfect no bake banana pudding cheesecake is a delightful experience, and it all starts with the right ingredients. Let’s break it down into essential components.
Essential ingredients for the crust
A great cheesecake begins with a delicious base. For this crust, you’ll need:
- Graham cracker crumbs: The foundation of your crust that adds flavor and crunch.
- Butter: Unsalted works best, as it binds the crumbs together and adds richness.
- Sugar: A little sweetness to elevate the flavor.
These simple ingredients come together to create a crunchy base that perfectly complements the creamy filling of your cheesecake.
Key components of the cheesecake filling
Now, let’s talk about what makes the filling truly irresistible:
- Cream cheese: The star of the show! Opt for full-fat for that rich, creamy texture.
- Banana pudding mix: This enhances the banana flavor and gives the filling that smooth consistency you crave.
- Heavy cream: Whipped to perfection, it adds lusciousness and body to your cheesecake.
- Fresh bananas: Sliced and layered, they bring a fresh taste and beautiful presentation.
With these ingredients on hand, you’re well on your way to crafting an unforgettable no bake banana pudding cheesecake. So, are you ready to get started? Check out our other related recipes for more inspiration!
Step-by-Step Preparation of No Bake Banana Pudding Cheesecake
Crafting a delectable no bake banana pudding cheesecake is not only a treat for your taste buds, but it’s also a surprisingly simple process that rewards you with a stunning dessert. Let’s dive into each step to make sure you nail it!
Create the crust with vanilla wafers
The foundation of any great cheesecake is its crust, and for this recipe, we’re going with classic vanilla wafers to give our no bake banana pudding cheesecake that sweet, nostalgic flavor.
- Gather your ingredients:
- 2 cups of vanilla wafer crumbs
- ½ cup of unsalted butter, melted
- ¼ cup of granulated sugar
-
Mix the ingredients: In a large mixing bowl, combine the vanilla wafer crumbs with granulated sugar. Slowly pour in the melted butter while stirring to ensure everything is evenly combined. The mixture should resemble wet sand when you’re finished.
-
Press into the pan: Grab a 9-inch springform pan (it’s perfect for this recipe) and firmly press the mixture into the bottom. Use the back of a measuring cup or your fingers to create an even layer. This is crucial because it will hold your cheesecake together!
-
Chill the crust: Pop that crust into the refrigerator while you prepare the filling. This will help it firm up nicely and provide a sturdy base for your creamy cheesecake.
Prepare the creamy cheesecake filling
Now that we have our crust ready, let’s whip up the filling. This part is incredibly satisfying and allows your creativity to shine through.
- Ingredients you’ll need:
- 2 (8 oz) packages of cream cheese, softened
- 1 cup of powdered sugar
- 1 teaspoon of vanilla extract
- 1 cup of heavy whipping cream
- 2-3 ripe bananas, sliced
-
Beat the cream cheese: In a large mixing bowl, beat the softened cream cheese until it’s smooth and creamy. This usually takes about 2-3 minutes.
-
Add sugar and vanilla: Gradually mix in the powdered sugar and vanilla extract. You’ll want this mixture to be sweet yet balanced.
-
Whip the cream: In another bowl, whip the heavy cream until stiff peaks form. This step adds a luxurious texture to the filling, so take your time—about 3-5 minutes.
-
Combine mixtures: Gently fold the whipped cream into the cream cheese mixture until well combined. It’s okay if you see some streaks; just be careful not to deflate the cream.
Assemble the cheesecake layers
Now comes the fun part—layering everything together. Your no bake banana pudding cheesecake will start taking shape, and before you know it, you’ll have a beautiful dessert ready to impress.
-
Layer the filling: Spread a layer of the cheesecake mixture over the chilled crust to create the first layer.
-
Add banana slices: Next, evenly distribute a layer of sliced bananas on top. This adds not only flavor but also visual appeal.
-
Repeat the process: Add another layer of cheesecake filling, followed by more banana slices. You can repeat this process to create as many layers as you’d like—just remember to leave some filling for the top!
-
Finish with a flourish: For the top layer, you could sprinkle some extra vanilla wafer crumbs or even add a drizzle of chocolate sauce if you’re feeling adventurous.
Chill and set for perfect texture
The final step in creating your no bake banana pudding cheesecake is all about patience.
-
Refrigerate: Cover the cheesecake with plastic wrap and place it back in the refrigerator. Ideally, you want to let it chill for at least 4 hours, but overnight is even better. This allows the flavors to meld together and the cheesecake to set properly.
-
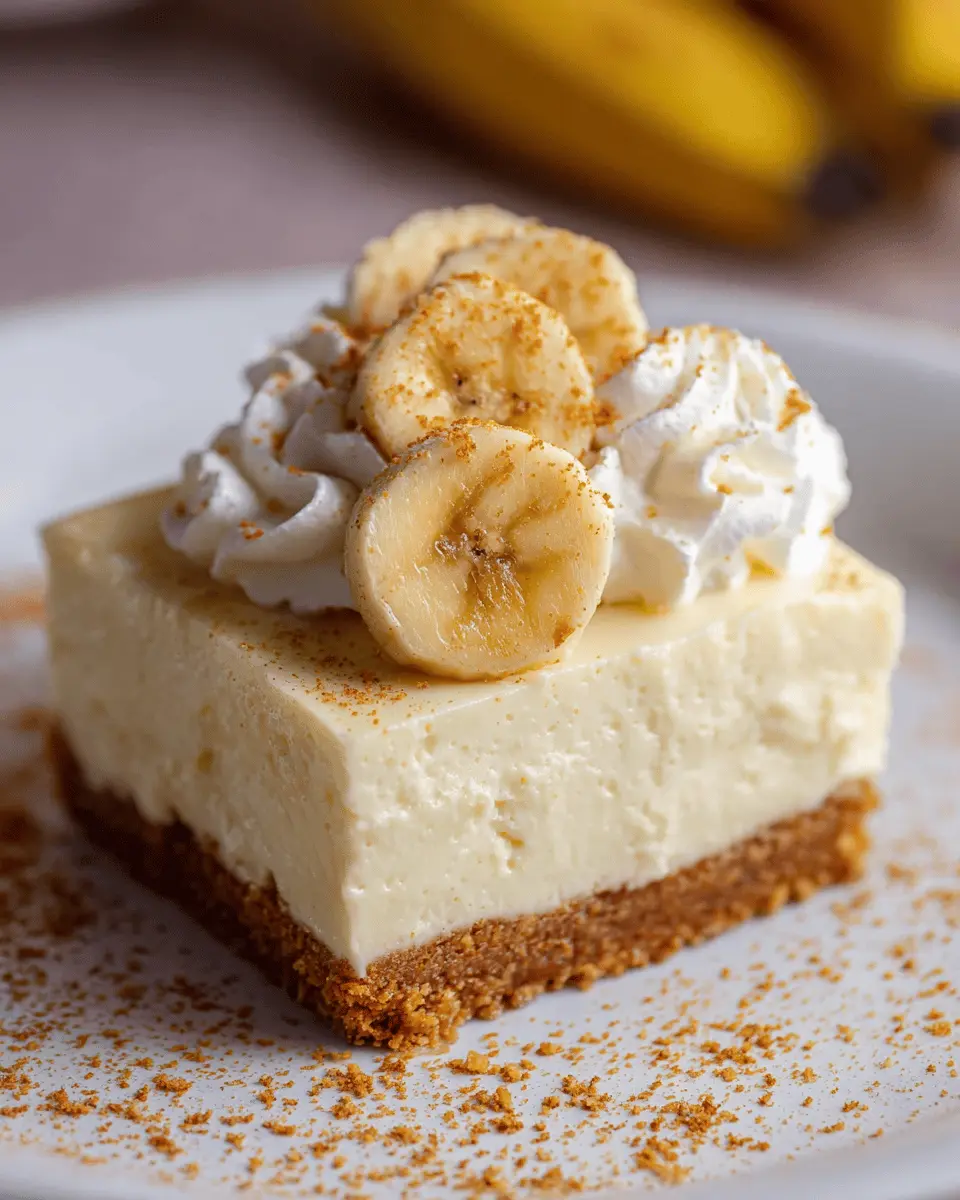
Serve and enjoy: Once set, carefully remove it from the springform pan, slice, and serve!
This hassle-free dessert is perfect for gatherings or just an indulgent treat after a long week. With these step-by-step instructions, you’ll definitely impress your friends and family. Enjoy!
Variations on No Bake Banana Pudding Cheesecake
Indulge in Chocolate Banana Pudding Cheesecake
For chocolate lovers, a twist on the classic no bake banana pudding cheesecake is just what you need! Swap some of the vanilla pudding mix for chocolate pudding. The result is a rich, velvety dessert that takes your banana pudding experience to a whole new level. You can even fold in chocolate chips or drizzle melted chocolate on top for an extra touch of decadence. Want to elevate it further? Use chocolate graham crackers for your crust! It adds a delightful contrast to the creaminess of the filling and the sweetness of the bananas.
Enjoy a Vegan No Bake Banana Pudding Cheesecake
If you’re looking for a plant-based option, a vegan no bake banana pudding cheesecake is super simple and satisfies those dessert cravings without the dairy! Instead of cream cheese, use blended cashews or coconut cream. Coconut milk can take the place of any milk in the recipe, and you can sweeten it with maple syrup or agave. This vegan version doesn’t skimp on flavor—it maintains that delightful banana creaminess. For a nutty crunch, consider adding some crushed nuts or granola to the top, so you can enjoy an excellent balance of texture along with those vibrant flavors.
Don’t forget to share your variations and experiment with flavors! Dream up your unique twist and feel free to let us in on your culinary creativity. Check out resources like Minimalist Baker for additional vegan baking ideas, or The Kitchn for a wealth of inspiration on desserts that wow.
Cooking Tips and Notes for No Bake Banana Pudding Cheesecake
Tips for Achieving the Perfect Crust
The crust is the foundation of your no bake banana pudding cheesecake, so let’s make it count! For that ideal balance of crunch and sweetness, use a mix of graham cracker crumbs and a pinch of salt. If you prefer a nutty flavor, consider adding finely chopped walnuts or almonds. Make sure to press the crust firmly into the bottom of your pan—this helps it hold its shape. A small tip: chill the crust in the fridge for about 30 minutes after assembling. It sets beautifully!
Notes on Ingredient Substitutions
Don’t have a crucial ingredient on hand? No problem! You can easily swap regular cream cheese for a lower-fat version or even use Greek yogurt for a tangy twist. If you want to keep it dairy-free, opt for coconut cream. Remember, ripe bananas are key for that natural sweetness and flavor, so don’t skimp here. Check out this guide on ingredient substitutions for more ideas.
Best Practices for Storage and Serving
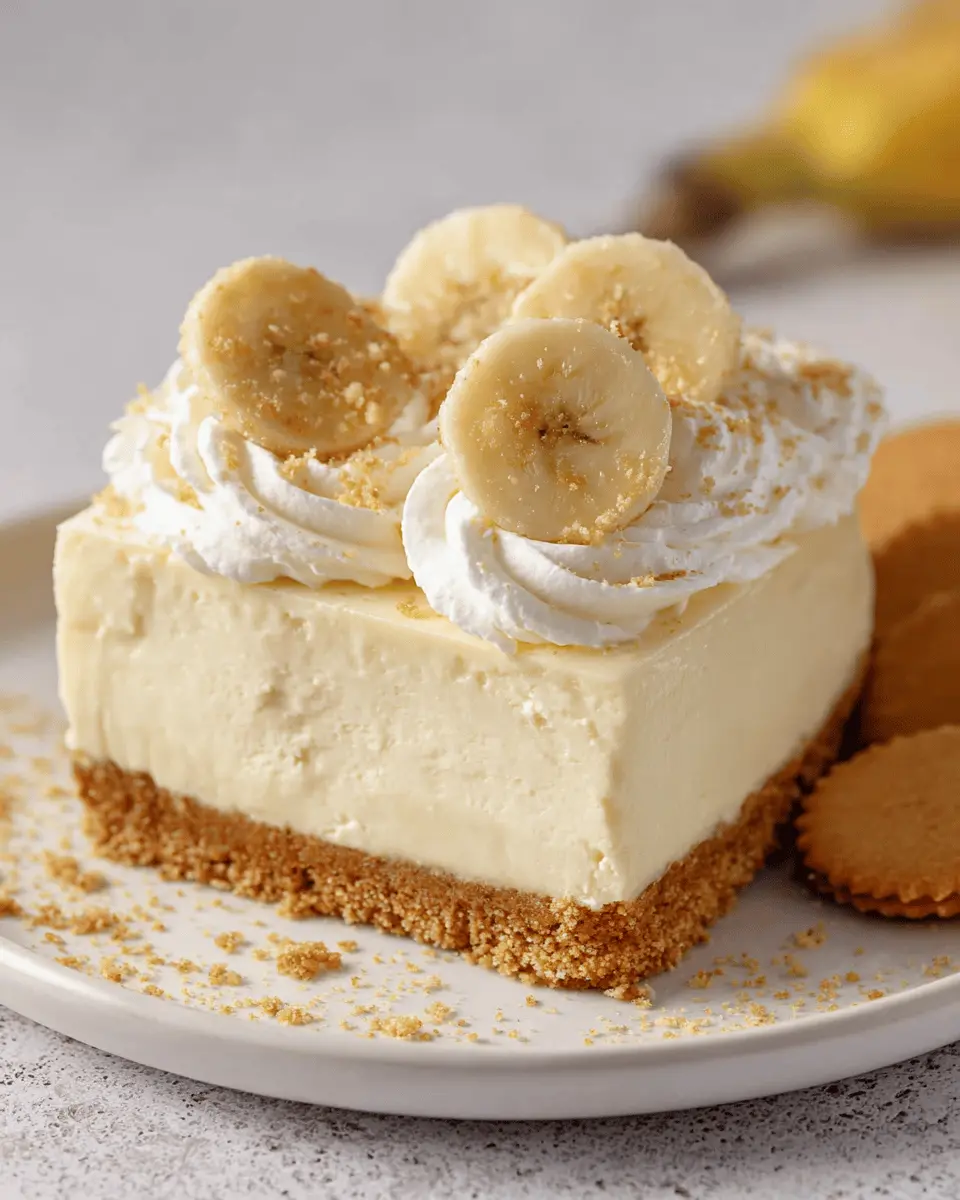
For the best results, store your no bake banana pudding cheesecake in an airtight container in the fridge. It typically keeps well for up to five days. When serving, slice with a hot knife for clean cuts—this method prevents the cheesecake from sticking. Top each slice with fresh banana slices to impress your guests. Serve it chilled for the most delightful experience!

Serving Suggestions for No Bake Banana Pudding Cheesecake
Elevate Your Presentation
Transform your no bake banana pudding cheesecake into an eye-catching centerpiece by layering slices or dollops in clear, festive cups. Top each serving with a banana slice, a drizzle of caramel, or crushed vanilla wafers for added texture. Imagine the delight of your guests as they dig into these individual delights at your next gathering!
Ideal Drink and Snack Pairings
For a refreshing drink option, why not serve iced chai tea or sparkling lemonade? These beverages balance the rich flavors of your cheesecake beautifully. Looking for a snack to complement it? Consider Turkey Bacon bites or Chicken Ham sliders on the side. Their savory profiles will create a fabulous contrast to the sweetness of the cheesecake.
Encourage your friends to explore different flavor combinations. After all, doesn’t everyone deserve a little creativity at dessert time? For more serving ideas, check out sources like Food Network or Epicurious, which often highlight popular flavor pairings and presentation techniques.
Time Breakdown for No Bake Banana Pudding Cheesecake
When you’re ready to indulge in a delicious no bake banana pudding cheesecake, it’s essential to know how to manage your time effectively. Let’s break it down so you can plan your baking session without any stress.
Preparation time
The preparation of your no bake banana pudding cheesecake will take approximately 20 minutes. This includes gathering all your ingredients, mixing the creamy filling, and assembling the crust and layers. Quick and easy!
Chilling time
Once you’ve popped your cheesecake in the fridge, be prepared to wait! The chilling time is crucial for setting the flavors and texture. Allow at least 4 hours (or overnight, if you can resist) for it to reach that perfect firmness.
Total time
All said and done, the total time for your no bake banana pudding cheesecake is around 4 hours and 20 minutes, including preparation and chilling. Perfect for a weekend treat or a special gathering!
For tips on maximizing chilling time, check out resources like Food Network for great insights. Enjoy your cheesecake adventure!
Nutritional Facts for No Bake Banana Pudding Cheesecake
Calories per serving
When you’re indulging in a delectable no bake banana pudding cheesecake, knowing its nutritional profile can help you enjoy it guilt-free. Each serving typically contains around 250 calories, making it a sweet treat that fits well into your dessert plan.
Key nutrition highlights
This delightful cheesecake isn’t just about taste—it also packs some nutritional benefits:
- Protein: With a sufficient amount of cream cheese and whipped toppings, you’re looking at about 4 grams of protein per slice, supporting muscle maintenance and growth.
- Calcium: The dairy components contribute to your daily calcium needs, promoting stronger bones and teeth.
- Vitamins: Bananas provide essential vitamins, particularly vitamin C and B6, which can help support your immune system and enhance your mood.
If you’d love to dive deeper into the benefits of bananas or dairy, check out resources from the Nutrition Data or the U.S. Department of Agriculture for comprehensive insights. Remember, moderation is key, so enjoy your no bake banana pudding cheesecake while staying mindful of portions!
FAQ about No Bake Banana Pudding Cheesecake
How do I prevent my cheesecake from becoming too runny?
One of the common concerns when making a no bake banana pudding cheesecake is achieving the perfect consistency. Here are some tips to ensure your cheesecake firms up nicely:
- Use the right cream cheese: Opt for full-fat cream cheese for a richer, thicker texture.
- Chill properly: After mixing your ingredients, let the cheesecake chill in the refrigerator for at least 4-6 hours. Overnight is even better!
- Incorporate gelatin: If you’re really worried about it being too runny, consider adding a little gelatin. Just make sure to follow the package instructions to maintain that luscious texture.
Can I make this cheesecake in advance?
Absolutely! Making your no bake banana pudding cheesecake in advance is a great idea. In fact, it often tastes better after sitting in the fridge for a day. Just be sure to:
- Cover well: Use plastic wrap or an airtight container to prevent any odors from affecting the flavor.
- Assemble just before serving: If you’re adding toppings like sliced bananas or whipped cream, save those for the day of serving to keep everything fresh and pretty.
What’s the best way to slice and serve this cheesecake?
For a beautiful serving experience, try these techniques:
- Warm knife: Run your knife under hot water before slicing, then wipe it dry. This helps create clean, smooth slices.
- Garnishing: Top with extra banana slices, crumbled wafers, or a drizzle of caramel for that extra wow factor.
For more tips on serving cheesecakes beautifully, you might check sources like The Spruce Eats or BBC Good Food. Happy baking!
Conclusion on No Bake Banana Pudding Cheesecake
Recap of Flavors and Ease of Preparation
In conclusion, this no bake banana pudding cheesecake is a delightful way to impress friends and family while sticking to a simple recipe. The creamy blend of cream cheese and whipped topping combines beautifully with layers of ripe bananas and sweet vanilla pudding, creating a heavenly dessert that’s as comforting as it is delicious.
What’s even better is the ease of preparation—no oven required! Just mix, layer, chill, and serve. This makes it perfect for spontaneous gatherings or a cozy night in. If you’re eager to dive deeper into similar no-bake recipes, check out this expert guide for more inspiration!
PrintNo Bake Banana Pudding Cheesecake: The Best Easy Dessert Delight
A delightful no-bake cheesecake featuring the flavors of banana pudding.
- Prep Time: 20 minutes
- Total Time: 4 hours 20 minutes
- Yield: 8 servings
- Category: Dessert
- Method: No Bake
- Cuisine: American
- Diet: Vegetarian
Ingredients
- 1 package graham cracker crumbs
- 1/2 cup unsalted butter, melted
- 1 cup powdered sugar
- 1 package (8 oz) cream cheese, softened
- 2 cups heavy whipping cream
- 1 package (3.4 oz) instant vanilla pudding mix
- 2 cups milk
- 3 ripe bananas, sliced
Instructions
- In a bowl, combine graham cracker crumbs and melted butter until mixed well. Press into the bottom of a 9-inch springform pan.
- In another bowl, beat together the cream cheese and powdered sugar until smooth.
- Add heavy whipping cream and beat until soft peaks form.
- Fold the cream cheese mixture into the whipped cream.
- Add in the instant pudding mix and milk, mixing until smooth.
- Pour half of the mixture over the crust, layer with sliced bananas, and then add the remaining mixture on top.
- Refrigerate for at least 4 hours or until set.
- Serve chilled and enjoy!
Notes
- For extra flavor, add a bit of vanilla extract to the cheesecake mixture.
- Use ripe bananas for better sweetness and flavor.
Nutrition
- Serving Size: 1 slice
- Calories: 350
- Sugar: 15g
- Sodium: 150mg
- Fat: 25g
- Saturated Fat: 15g
- Unsaturated Fat: 7g
- Trans Fat: 0g
- Carbohydrates: 30g
- Fiber: 1g
- Protein: 3g
- Cholesterol: 75mg


")