
Introduction to Homemade Bread
Why make homemade bread?
Have you ever considered why making homemade bread is worth your time? For many, it’s not just about the end product; it’s about the entire process. The act of kneading dough can be therapeutic, almost meditative. It allows you to disconnect from the hustle and bustle of daily life. And let’s be honest — there’s something incredibly satisfying about creating food from scratch.
Homemade bread allows you to control the ingredients. You can choose organic flours, clean yeast, and natural sweeteners, steering clear of additives or preservatives often found in store-bought varieties. A simple recipe can provide a healthier alternative and an opportunity to ditch processed options.
Want to learn more about the benefits of homemade bread? Check out this article from Healthline to dive deeper into the nutritional advantages.
The joy of the smell of fresh-baked bread
Now, let’s not forget one of the most delightful aspects of making homemade bread — the aroma that fills your home. Imagine the warmth as fresh dough enters the oven. It’s a scent that beckons anyone nearby, inviting friends and family to gather in your kitchen.
In fact, studies show that the smell of freshly baked bread can significantly impact your mood, creating a sense of comfort and happiness. It’s no wonder that bakeries often have their doors wide open! This olfactory delight can transform an ordinary day, making it special.
Additionally, sharing that first loaf with loved ones can be a heartwarming experience. Picture sitting down with a slice of warm, crusty bread, perhaps spread with your favorite topping, as you reminisce about the day.
Here’s a tip: Don’t hesitate to experiment with flavors! Add herbs, garlic, or even seeds to the mix, and each loaf can tell a different story.
So, whether you’re looking to tap into your culinary skills or create moments that nourish not just the body but also the soul, making homemade bread is an inspiring journey. Ready to embark on this baking adventure? Let’s dive right into the recipe!
Ingredients for Homemade Bread
Key Ingredients Needed
Making homemade bread is a delightful journey that rewards you with a delicious aroma and a sense of accomplishment. To get started, you’ll need a few key ingredients:
- Flour: All-purpose flour works well, but bread flour has a higher protein content for a chewier texture.
- Water: Use warm water to help activate the yeast.
- Yeast: Active dry yeast or instant yeast are both great choices for that perfect rise.
- Salt: This enhances flavor and regulates yeast activity.
- Sugar: Just a bit to feed the yeast and enhance browning.
Having these essentials on hand will kick off your baking adventure!
Optional Ingredients for Variations
Want to switch things up? Here are some optional ingredients to customize your homemade bread:
- Olive Oil or Butter: For added richness and a softer crumb.
- Seeds or Nuts: Incorporate sunflower seeds, flaxseeds, or walnuts for texture and flavor.
- Herbs and Spices: Experiment with rosemary, garlic powder, or even cheese for a unique twist.
- Whole Grains: For a healthier loaf, substitute part of your flour with whole wheat or rye flour.
Mix and match these ingredients to create a loaf that speaks to your taste buds. Who said baking couldn’t be fun? Check out King Arthur Baking for more insights on flour types and techniques!
Step-by-step Preparation of Homemade Bread
Making homemade bread is not just about mixing flour and water; it’s an art and a science that offers a rewarding experience. There’s something incredibly satisfying about pulling a fresh loaf from the oven and smelling that warm, yeasty goodness. This guide will take you through the steps to create beautiful, crusty loaves right in your own kitchen.
Preparing the dough
Let’s kick things off. First, gather your ingredients:
- 3 cups of all-purpose flour
- 1 packet (2¼ teaspoons) active dry yeast
- 1 teaspoon salt
- 1 tablespoon sugar
- 1 cup warm water (not too hot; think baby bath)
In a large mixing bowl, combine your warm water with the sugar and yeast. Allow it to rest for about 5–10 minutes until it becomes frothy; this means your yeast is alive and ready to work its magic! Next, add the salt and gradually mix in the flour, one cup at a time.
Remember, the dough should start to form a loose ball. If it feels too sticky, don’t hesitate to add a bit more flour. After mixing, you’ll have a rough, shaggy dough—perfectly normal for this stage.
Kneading the dough
Now we get to the fun part: kneading! Turn the dough out onto a lightly floured surface. With your hands, fold the dough over itself and push it down with the heels of your hands. Rotate it a quarter turn and repeat. Knead for about 8–10 minutes. You want to develop that gluten, which gives the bread its nice chewy texture.
Every few minutes, check to see if the dough is smooth and elastic. If it springs back when you poke it—congratulations! It’s ready for its first rise. If you find your arms getting tired, take a break and enjoy the process; good things come to those who wait.
First rise time and how to know it’s ready
Place your kneaded dough into a greased bowl, cover it with a damp cloth, and let it rise in a warm place for about an hour. This is when your dough expands, filled with tiny air bubbles. After an hour, gently poke the dough with your finger—if it springs back halfway, it’s ready to go. If it doesn’t spring back, give it another 10 minutes.
Shaping the loaves
Once your dough has risen, it’s time to punch it down (not too hard, it’s a gentle nudge). Turn it out onto a floured surface again and divide it into two portions if you’re making loaves. Shape each piece into a ball, then flatten slightly before rolling into a log shape. This creates tension in the dough, which aids in its final rise and texture.
Second rise and what to look for
Place your shaped loaves seam-side down in greased loaf pans or directly onto a parchment-lined baking sheet. Cover them again with a cloth and let them rise for about 30–45 minutes. You’re looking for the dough to puff up nicely, doubling in size.
Pro tip: If your home is on the cooler side, you can create a warm environment by preheating your oven to its lowest setting for a few minutes, then turning it off and placing your dough inside, away from drafts.
Baking the loaves to perfection
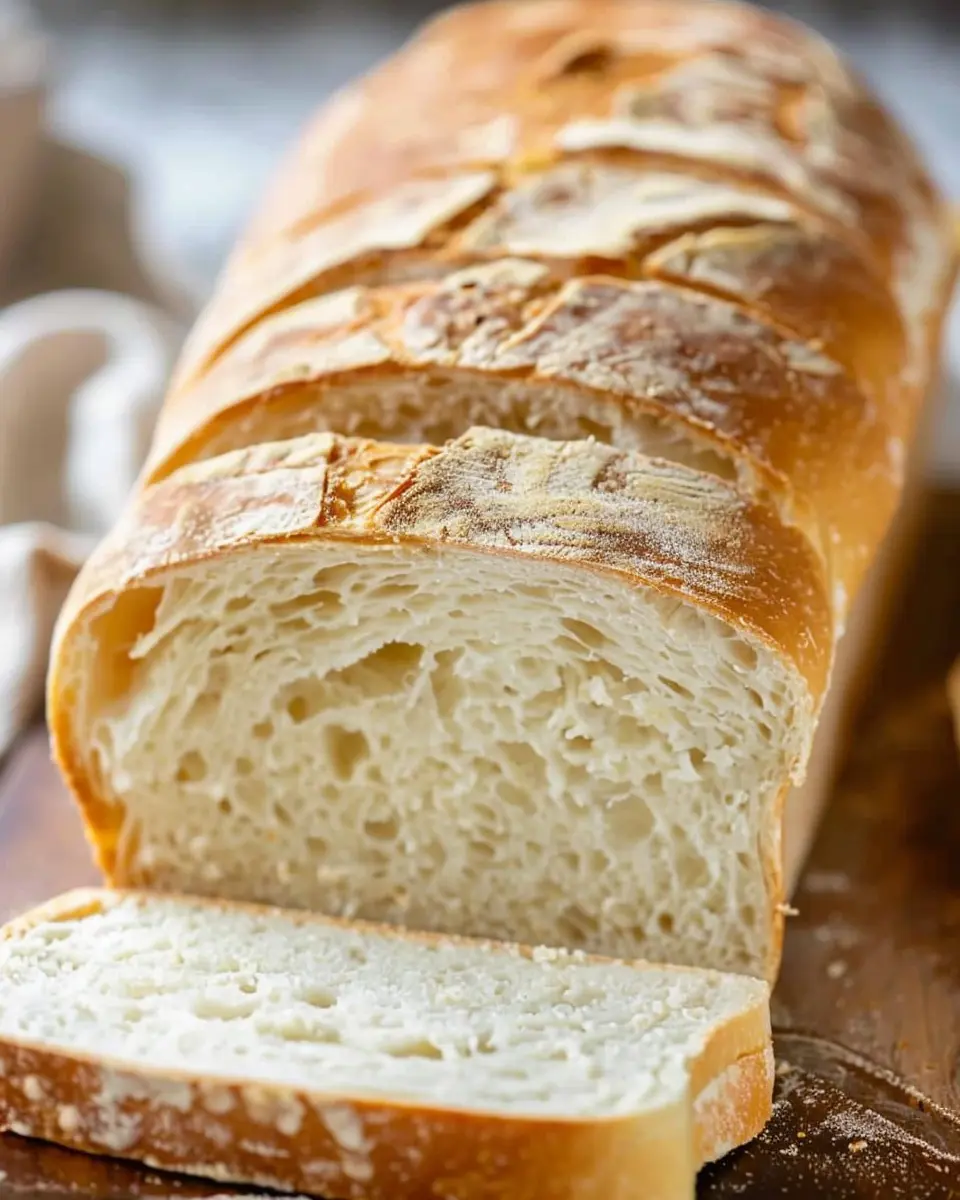
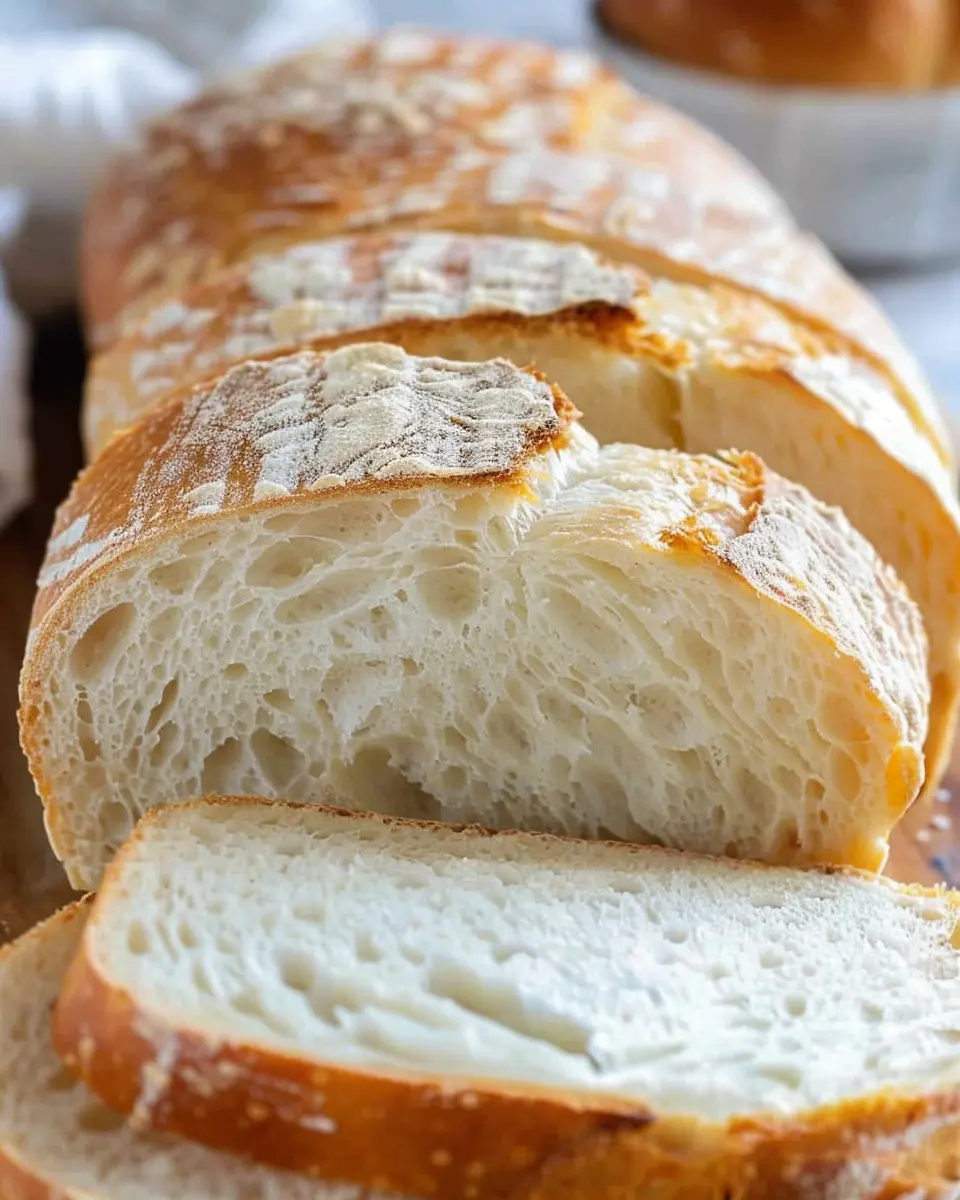
Now for the best part—baking! Preheat your oven to 375°F (190°C). Bake the loaves for 25–30 minutes or until they are golden brown and sound hollow when tapped on the bottom. For a crispy crust, place a pan with water on the bottom rack of your oven; the steam will work wonders!
Once baked, remove your loaves and let them cool on a wire rack (if you can resist the temptation to slice in while it’s still warm).
Making homemade bread may seem daunting at first, but with practice, you’ll refine your technique and create something truly delightful. Enjoy your baking journey, and don’t forget to share a slice with friends or family! For more insights on the benefits of homemade bread, visit King Arthur Baking. Happy baking!

Variations on Homemade Bread
When it comes to homemade bread, the possibilities are as vast as your imagination! Each variation brings its own unique twist, making it fun to experiment in the kitchen. Here are some delightful options to try.
Whole Wheat Homemade Bread
If you’re aiming for a healthier twist, consider making whole wheat homemade bread. The nutty flavor and denser texture will keep your taste buds satisfied while providing more fiber and nutrients compared to white bread. To get started, simply substitute half or all of the all-purpose flour in your basic recipe with whole wheat flour. A little extra water might be needed as whole wheat absorbs more moisture. Check out Healthline for the health benefits of whole wheat!
Herb-Infused Homemade Bread
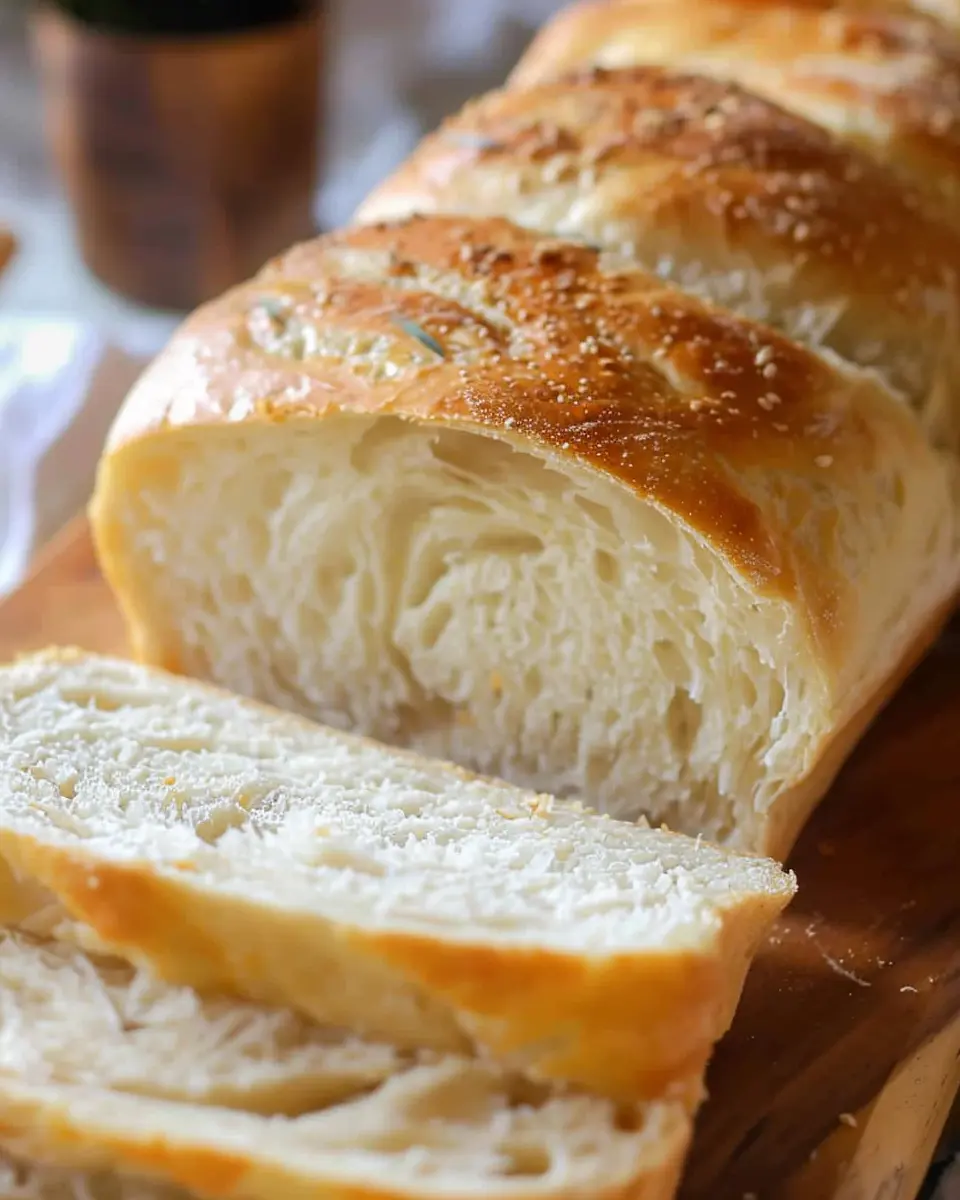
For a fragrant twist, try herb-infused homemade bread. Adding fresh or dried herbs like rosemary, thyme, or basil can elevate your bread to a whole new level. Start by mixing a tablespoon of your chosen herb into the dry ingredients. If you’re using fresh herbs, you might want to increase the amount slightly for that bold flavor. Imagine serving warm slices of this aromatic bread alongside your favorite soup or salad!
Sweet Bread Options
Who says homemade bread can’t be sweet? Incorporating sweet flavors can create a delightful treat. Think cinnamon swirl bread or honey-infused variants! For a cinnamon loaf, mix in a tablespoon of cinnamon with your dry ingredients, and layer in a sweet cinnamon-sugar mixture during the rolling process. Alternatively, a subtle drizzle of honey can work wonders, adding a light sweetness that complements butter beautifully.
No matter which variation you choose, you’ll find that baking homemade bread is not just about feeding your stomach, but also satisfying your soul. It’s an experience that warms your home and heart! Happy baking!
Baking Tips and Notes for Homemade Bread
When it comes to crafting the perfect homemade bread, a few tips can transform your baking experience from ordinary to extraordinary.
Common Mistakes to Avoid
- Skipping the Proofing: Always let your dough rise properly. Patience is key here! Under-proofed dough results in denser bread.
- Using the Wrong Flour: Not all flours are created equal. For best results, opt for bread flour that has a higher protein content for that delightful crust.
Troubleshooting Tips for Perfect Bread
- Dough Too Sticky?: Add flour gradually until it’s manageable. Remember, it’s easier to add than to remove.
- Bread Falls Flat?: Your yeast might be dead. Always check its expiration date or perform a quick test: mix it with warm water and sugar – if it bubbles, you’re good to go!
These insights can help boost your homemade bread endeavors. Want more baking tips? Check out resources like King Arthur Baking for expert advice!
Serving Suggestions for Homemade Bread
Homemade bread isn’t just a delicious treat; it’s an opportunity to elevate your meals with delightful toppings and pairings. Here are some suggestions to help you savor each slice.
Best toppings and spreads
When it comes to toppings, the options are endless! Consider trying:
- Avocado Smash: Mash ripe avocado with a sprinkle of sea salt and chili flakes for a creamy, nutritious spread.
- Honey Butter: Mix softened butter with honey for a sweet, decadent drizzle.
- Nut Butter: Almond or peanut butter adds a protein punch and pairs wonderfully with banana slices.
Each of these spreads enhances the flavor of your homemade bread, making the experience even more delightful.
Perfect pairings for sandwiches
Crafting sandwiches with your homemade bread can transform lunch or dinner. Here are some excellent combinations:
- Turkey Bacon and Avocado: Layer crisp turkey bacon with sliced avocado, tomatoes, and a smear of mayonnaise for a satisfying bite.
- Chicken Ham with Spinach: Combine chicken ham with fresh spinach and your favorite sauce for a hearty meal.
- Caprese Delight: Fresh mozzarella, tomatoes, and basil drizzled with balsamic glaze create a refreshing sandwich.
For more creative ideas, check out Food Network for inspiration. Enjoy your homemade bread journey!
Tips for Making Perfect Homemade Bread
Importance of Proper Measuring
When it comes to making homemade bread, accurate measuring is crucial. Even slight discrepancies in ingredients can change your bread’s texture and flavor. Invest in a digital kitchen scale for the best results. According to the American Test Kitchen, weighing your flour can lead to a more consistent dough. Remember, using the scoop-and-sweep method can introduce excess flour, so spoon the flour into your measuring cup instead. It may seem tedious, but trust me, your efforts will truly pay off in the end!
The Benefit of Patience During Rising
One of the key secrets to achieving that perfect loaf lies in being patient during the rising process. Don’t rush it! Letting your dough rise allows the yeast to work its magic, developing flavor and texture. The first rise typically takes about an hour, but don’t be surprised if it takes a little longer. Always ensure your dough doubles in size. If you rush this step, you could end up with dense bread that’s a tad disappointing. So, go ahead, maybe enjoy a cup of coffee while you wait!
Using the Right Baking Equipment
Having the right tools can significantly impact your homemade bread experience. A properly preheated oven, a baking stone, or a Dutch oven can help create a beautiful crust. Investing in a good quality bread pan can also make a big difference. As a bonus, using a baking thermometer can ensure your oven temperature is just right, preventing undercooked or burnt loaves. When you have the right setups, your homemade bread will rise to new heights—literally!
Time Breakdown for Homemade Bread
When diving into the delightful world of homemade bread, it’s crucial to understand the time commitment involved. This isn’t just a recipe; it’s a labor of love.
Preparation Time
The preparation phase generally takes about 15 minutes. This includes gathering your ingredients, measuring, and mixing them until you have that perfect dough. Don’t rush—this part sets the stage for delicious results!
Cooking Time
Once your dough has risen, the baking process will take approximately 30 minutes. You’ll want to keep an eye on it and enjoy that irresistible aroma wafting through your kitchen.
Total Time
All in all, expect to spend about 2 hours from start to finish, factoring in rising time and baking. But the joy of biting into warm, fresh homemade bread makes every minute worth it!
For more tips on bread-making, check out this detailed guide on perfecting your bread skills. You won’t regret adding this treat to your culinary repertoire!
Nutritional Facts for Homemade Bread
Calories
When crafting your own homemade bread, the caloric content can vary depending on the ingredients you choose. On average, a slice contains about 70-120 calories. Opting for whole grains can elevate your bread’s nutritional profile while keeping those calories in check.
Key Nutrients
Homemade bread is packed with essential nutrients:
- Carbohydrates: The primary energy source.
- Fiber: Particularly if you’re utilizing whole grains, which aids digestion and keeps you feeling full longer.
- Proteins: Important for muscle repair and growth.
- Vitamins & Minerals: Adding seeds or nuts can boost levels of magnesium, iron, and B vitamins.
For more in-depth nutrition insights, resources like USDA FoodData Central can offer detailed information.
Health Benefits of Homemade Bread
Making your own homemade bread not only allows you to control the ingredients but also offers several health perks:
- No Preservatives: Unlike store-bought options, your bread is free from unwanted additives.
- Adaptable Recipes: You can cater recipes to your dietary needs—gluten-free, low-carb, or high-fiber.
- Heart Health: Whole grain varieties contribute to better heart health, as supported by research from the American Heart Association.
So, the next time you’re pondering what to make, remember: not only is homemade bread delicious, but it can also be a nutritious choice for you and your loved ones!
FAQs about Homemade Bread
Baking homemade bread is a delightful journey filled with curiosity and exploration. Below are answers to some common questions that may pop up as you embrace this rewarding culinary adventure.
Why is my homemade bread dense?
If your homemade bread comes out dense instead of light and fluffy, it could stem from a few reasons:
- Wrong flour type: Using too much whole wheat flour can weigh down your loaf.
- Insufficient kneading: Proper kneading develops gluten, which helps the bread rise.
- Underproofing: If the dough doesn’t rise enough during fermentation, it won’t achieve that airy texture.
Consider checking baking resources such as King Arthur Baking for tips on perfecting dough texture.
Can I freeze homemade bread?
Absolutely! Freezing your homemade bread can preserve its taste and texture. Here’s how:
- Cool Completely: Let the bread cool entirely before wrapping it up.
- Wrap It Up: Tightly wrap your loaf in aluminum foil or freezer-safe plastic wrap, then place it in a freezer bag to prevent freezer burn.
You can freeze bread for up to three months, which is ideal for meal prep or avoiding waste. When you’re ready to enjoy it, simply thaw it at room temperature or pop it in the toaster.
How can I store my homemade bread?
To keep your homemade bread fresh:
- Breadbox or Paper Bag: If you plan to eat it within a few days, consider a breadbox or a paper bag to allow some airflow without drying it out.
- Plastic Bag: For longer storage, switch to a plastic bag, though keep in mind it may soften the crust.
Overall, store your bread in a cool, dry place. For more insights on bread storage, check out Food Safety.gov.
By tackling these common questions, you’re well-equipped to enjoy your homemade bread journey, making every loaf a delightful success!
Conclusion on Homemade Bread
Baking your own homemade bread can be an incredibly fulfilling experience. From the delightful aroma filling your kitchen to the satisfying crunch of a golden crust, it’s a sensory journey. Not only does homemade bread taste better than store-bought, but it also allows you to experiment with flavors and ingredients tailored to your preferences.
We’d love to hear your bread-baking experiences! What unique ingredients have you tried, or what memories do you associate with baking? Share your stories in the comments below—it’s a great way for us all to celebrate the joy of crafting fresh bread right in our own kitchens.
For more tips, check out resources like King Arthur Baking to inspire your next loaf!
PrintHomemade Bread: Easy Tips for Deliciously Fresh Loaves
Learn how to make delicious homemade bread with these easy tips and recipes.
- Prep Time: 15 minutes
- Cook Time: 35 minutes
- Total Time: 1 hour 50 minutes
- Yield: 1 loaf
- Category: Breads
- Method: Baking
- Cuisine: American
- Diet: Vegetarian
Ingredients
- 4 cups all-purpose flour
- 2 cups warm water
- 2 tablespoons sugar
- 1 tablespoon salt
- 2 teaspoons instant yeast
Instructions
- In a large bowl, combine warm water and sugar, then add yeast and let sit for 5-10 minutes.
- Add flour and salt to the mixture and stir until combined.
- Knead the dough for about 10 minutes until smooth.
- Place the dough in a greased bowl, cover, and let rise until doubled in size, about 1 hour.
- Punch down the dough, shape it into a loaf, and place it in a greased loaf pan.
- Allow the loaf to rise again until it reaches the top of the pan, about 30 minutes.
- Bake in a preheated oven at 375°F (190°C) for 30-35 minutes until golden brown.
- Cool before slicing and enjoy!
Notes
- For a crustier bread, add a pan of water to the oven while baking.
- Experiment with different flours like whole wheat or rye for unique flavors.
Nutrition
- Serving Size: 1 slice
- Calories: 120
- Sugar: 1g
- Sodium: 150mg
- Fat: 1g
- Saturated Fat: 0g
- Unsaturated Fat: 0g
- Trans Fat: 0g
- Carbohydrates: 24g
- Fiber: 1g
- Protein: 4g
- Cholesterol: 0mg


")