
Introduction to Mini Cheesecake Cups
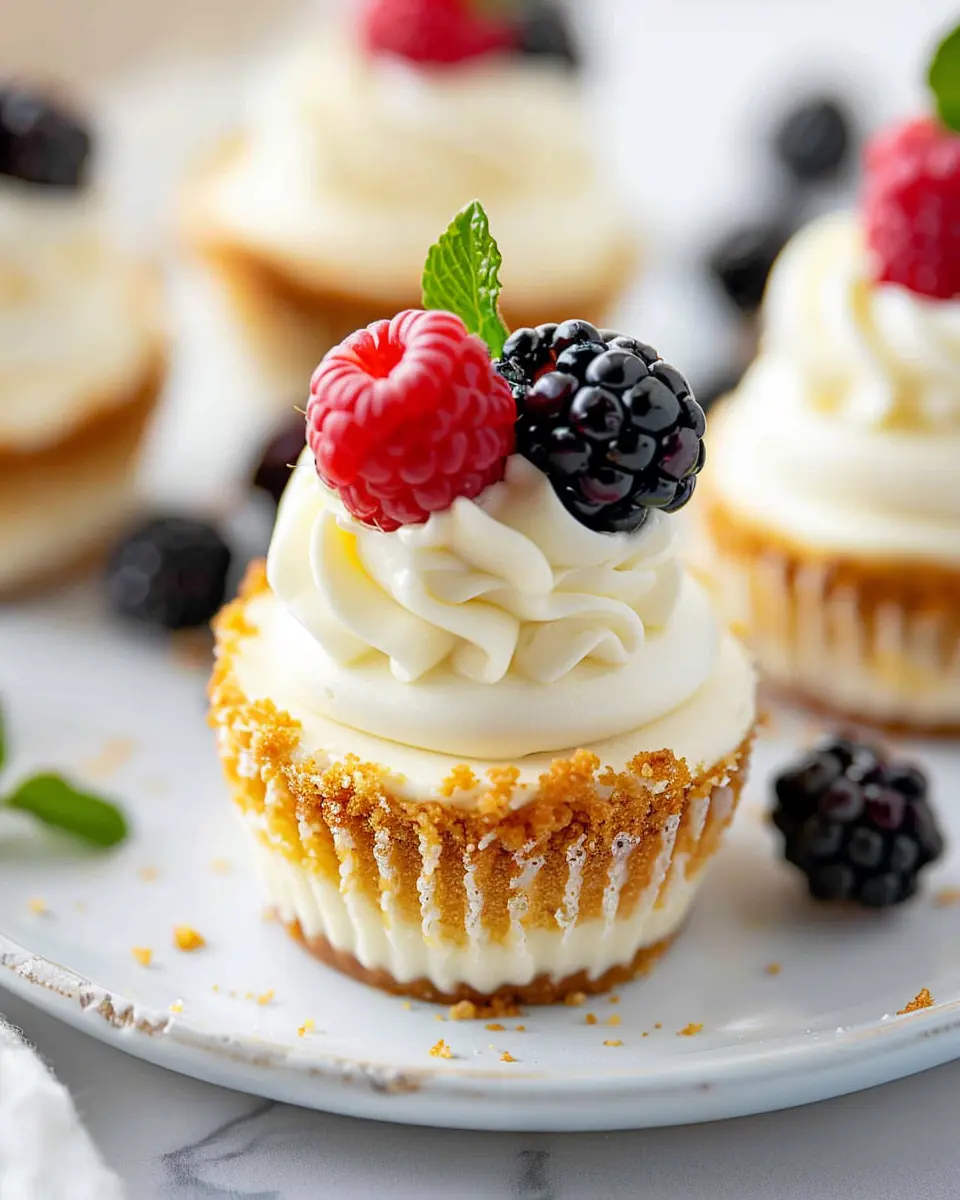
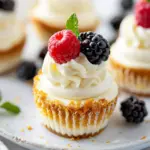
If you’re searching for the ultimate dessert that packs flavor into a single, adorable serving, look no further than mini cheesecake cups. These delightful little treats are not only scrumptious but also a fantastic way to satisfy your sweet tooth without going overboard. Imagine rich, creamy cheesecake nestled in a crunchy crust, all served in individual cups—talk about winning!
Why Mini Cheesecake Cups are the Perfect Dessert for You
Mini cheesecake cups make every gathering feel special, and here’s why they’re a must-try for everyone:
-
Portion Control: These cute desserts allow you to indulge without that guilty feeling of overindulgence. Paired with fresh fruit or a drizzle of chocolate, you can customize these treats to your liking while keeping an eye on portions.
-
Versatility: Want to experiment? The world is your oyster with flavors! From classic vanilla to tangy lemon or even a fun pumpkin spice for fall, the options are endless. You could even check out sources like The Spruce Eats for ideas that suit every palate.
-
Ideal for Gatherings: Whether it’s a birthday party, picnic, or cozy movie night at home, mini cheesecake cups are the perfect pick-me-up. They’re easy to grab and enjoy one at a time, ensuring your guests feel pampered without the fuss of slicing and serving.
-
Simple to Make: You don’t need to be a professional baker to whip up these beauties. With a handful of ingredients and some straightforward steps, you’ll have guests raving about your culinary skills. Check out some tips on food preparation to ensure your mini cheesecakes are not only delicious but also safe.
In a nutshell, mini cheesecake cups are not just desserts; they are experiences. You get a taste of decadence while keeping every bite manageable and fun. Plus, with the ease of making them in bulk, you’ll always have a delightful treat on hand for any occasion.
So, are you ready to dive into making your own mini cheesecake cups? Trust me, they’ll soon become a staple in your dessert rotation!
Ingredients for Mini Cheesecake Cups
Creating delightful mini cheesecake cups is a fantastic way to satisfy your sweet tooth while impressing your friends. The best part? This recipe requires simple ingredients that you probably have in your kitchen!
Essential Ingredients
- Cream Cheese: 16 oz, softened. This is the star of the show, providing that rich, creamy texture we all love in cheesecakes.
- Granulated Sugar: 1/2 cup. This sweetens the deal and balances the tanginess of the cream cheese.
- Vanilla Extract: 2 tsp for a warm, inviting flavor. A must-have in any cheesecake recipe!
- Sour Cream: 1/2 cup adds a bit of tang and creaminess.
- Heavy Cream: 1/2 cup, whipped to stiff peaks. This is the secret to creating a light and airy cheesecake.
- Graham Crackers: About 1 cup, crushed for the crust. You can also use store-bought or homemade alternatives.
- Butter: 1/4 cup, melted. This helps bind the crust and adds richness.
Gather these ingredients, and you’re one step closer to whipping up a batch of delectable mini cheesecake cups! For tips on choosing the best cream cheese, check out this helpful guide.
Once you have everything ready, you’re just moments away from indulging in delightful, bite-sized cheesecakes that are sure to be a hit at any gathering!
Preparing Mini Cheesecake Cups
Creating mini cheesecake cups is a delightful adventure that can fill your kitchen with warmth and tasty aromas. Not only are these treats perfect for gatherings or a sweet snack at home, but they’re also fun to make. Let’s dive in as we transform simple ingredients into beautifully crafted cheesecakes!
Gather Your Ingredients and Tools
Before we get our hands dirty, let’s ensure we have everything we need in one place. Here’s a checklist of ingredients and tools for your mini cheesecake cups:
Ingredients:
- 1 cup of graham cracker crumbs
- 1/4 cup of sugar
- 1/2 cup of melted butter
- 16 oz of cream cheese (softened)
- 1 cup of sugar (for cheesecake filling)
- 1 teaspoon of vanilla extract
- 3 large eggs
- 1 cup of sour cream
Tools:
- Muffin tin
- Cupcake liners
- Mixing bowl
- Electric mixer (or whisk)
- Measuring cups and spoons
- Rubber spatula
- Cooling rack
Having everything prepped makes the cooking process a lot smoother. Plus, it keeps things organized while you’re baking.
Make the Crust
Let’s start with the foundation—the crust! This provides the base for our mini cheesecakes and adds a delightful crunch.
- Mix the dry ingredients: In a mixing bowl, combine the graham cracker crumbs, 1/4 cup of sugar, and melted butter. Stir until the mixture resembles wet sand.
- Line the muffin tin: Place cupcake liners into the muffin tin. This not only makes removing the cheesecakes easier but also gives them a cute presentation.
- Add the crust: Spoon about a tablespoon of the mixture into each liner. Press down firmly to create a compact base — you can use the bottom of a glass for this.
Now that you’ve got a solid crust, it’s time to move on to the filling—arguably the most exciting part of making mini cheesecake cups!
Prepare the Cheesecake Filling
Crafting the cheesecake filling is where the magic happens. Here’s how to achieve that silky, creamy texture we all love:
- Blend the cream cheese: In a large mixing bowl, beat the softened cream cheese until smooth using an electric mixer. This step is crucial for avoiding lumps in your filling; nobody wants a bumpy cheesecake.
- Add sugar and vanilla: Gradually add 1 cup of sugar and 1 teaspoon of vanilla extract into the cream cheese, mixing until combined.
- Incorporate the eggs: Add the eggs one at a time, making sure to beat well after each addition. This helps incorporate air and ensures a fluffy texture.
- Finish with the sour cream: Gently fold in 1 cup of sour cream to add that wonderful tang and creaminess.
Your filling should now be velvety and smooth, enticing enough to scoop straight from the bowl!
Assemble the Mini Cheesecakes
Now comes the fun part—assembling your mini cheesecake cups!
- Spoon the filling: Carefully spoon the cheesecake mixture into each muffin liner, filling them about 3/4 full. Leave some space for the cheesecakes to rise slightly while baking.
- Tap the tray: Give the muffin tin a gentle tap against the counter. This helps release any air bubbles that may have formed.
Bake and Cool Your Mini Cheesecakes
Finally, it’s time to bring your creations to life!
- Preheat your oven: Set it to 325°F (160°C). This gentle temperature helps prevent cracks in your cheesecakes.
- Bake: Place the muffin tin in the oven and bake for about 18-20 minutes, or until the edges are set but the center still has a slight jiggle.
- Cool down: Remove the tin from the oven and let it cool at room temperature for about 30 minutes. Then transfer the mini cheesecake cups to the refrigerator for at least two hours (or overnight for best results).
And there you have it! Ready to impress your friends at your next gathering or simply treat yourself. Enjoy these delightful mini cheesecake cups topped with fresh fruit, whipped cream, or a drizzle of chocolate sauce for a personal touch. Happy baking!
Variations on Mini Cheesecake Cups
When it comes to mini cheesecake cups, the fun doesn’t stop at the classic recipe. You can create a delightful array of variations to suit any occasion or sweet tooth. Let’s dive into two popular variations that will make your dessert table the talk of the party!
Fruit-topped Mini Cheesecakes
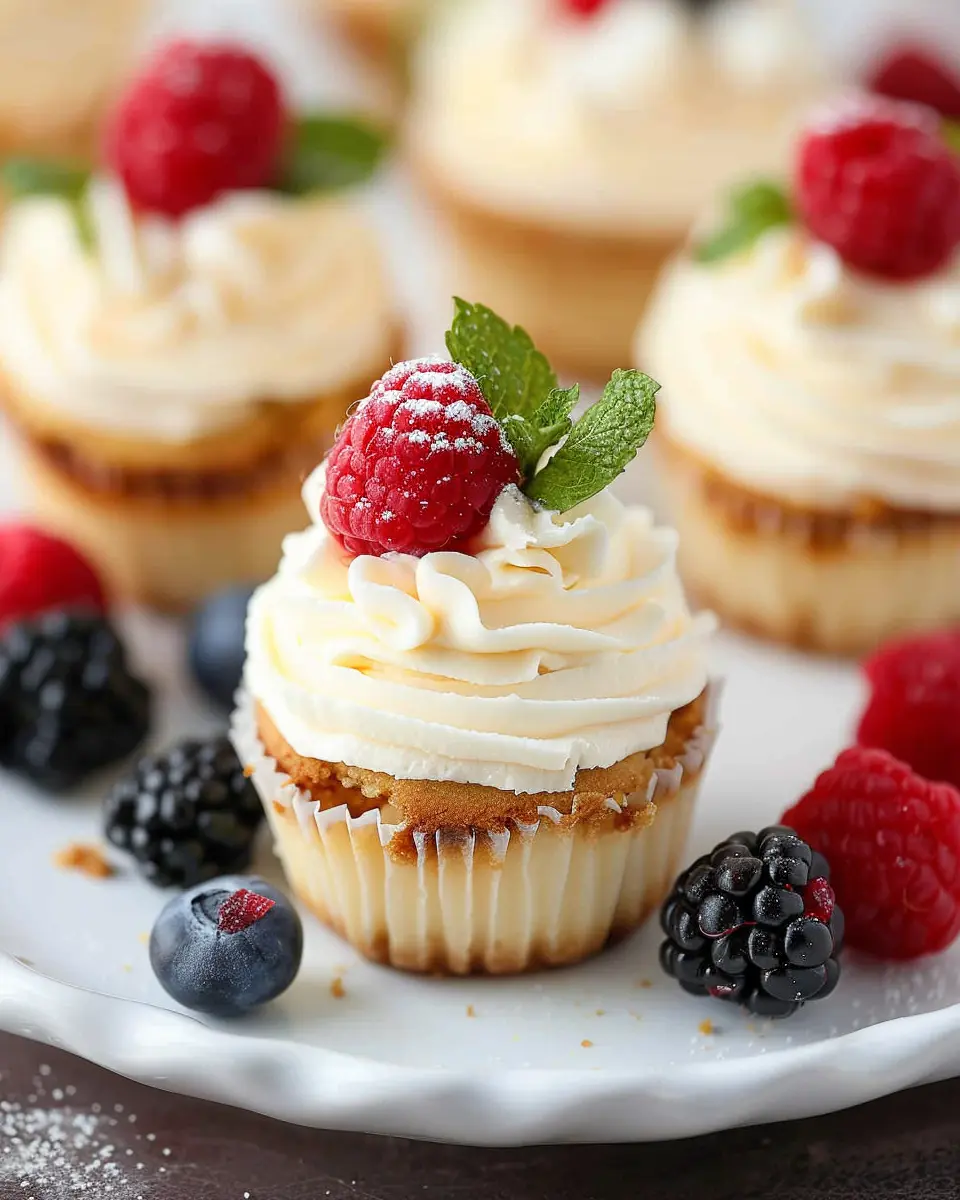
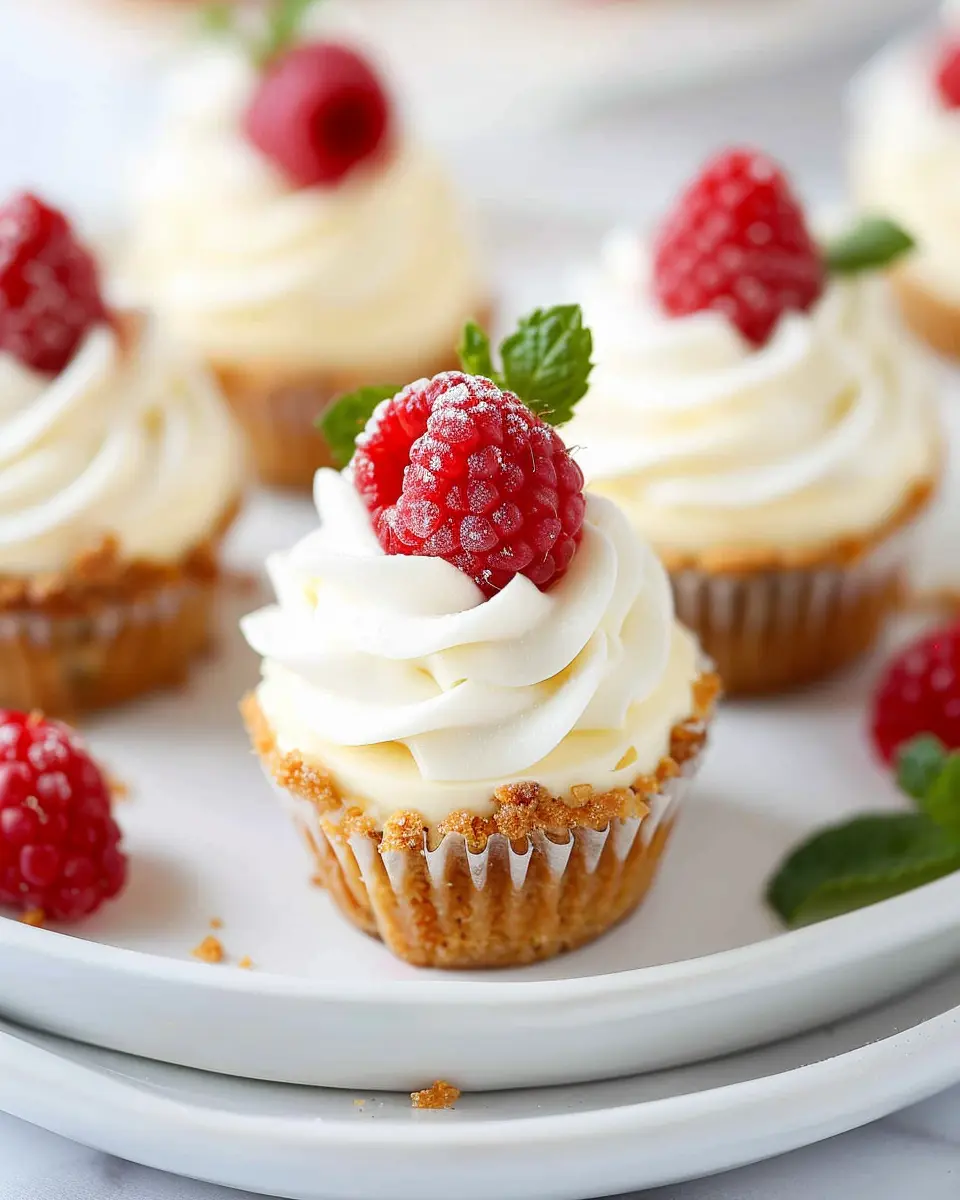
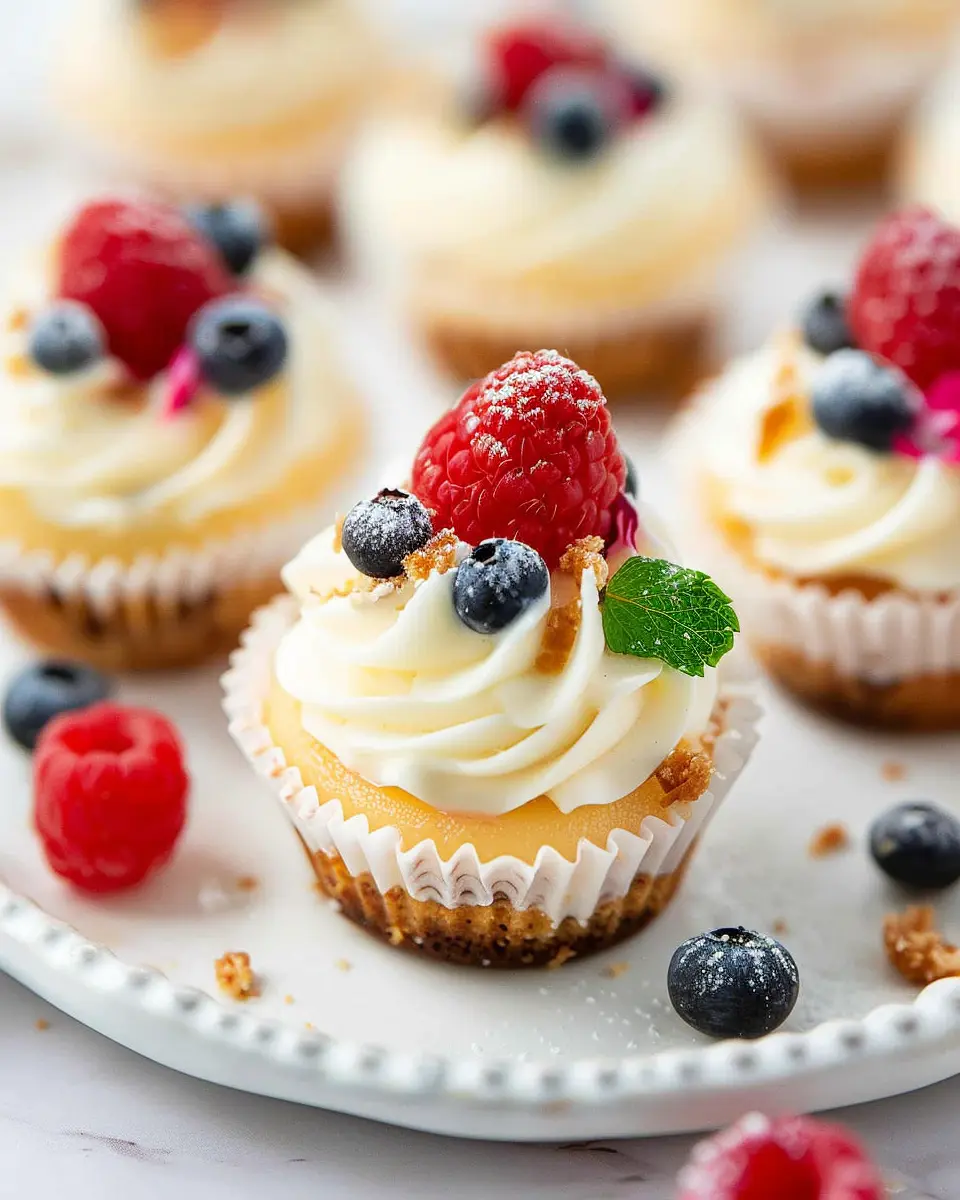
What’s better than the creamy richness of a mini cheesecake? Top it with fresh fruit! Think strawberries, blueberries, or kiwi for a burst of color and flavor. Fresh fruit adds a zesty contrast to the creamy filling, making every bite a refreshing experience.
- Berry Bliss: Create a berry compote by cooking down mixed berries with a bit of sugar and lemon juice. Spoon this over your cheesecake cups for a deliciously fruity finish!
- Tropical Twist: Try using diced pineapple or mango for a summery vibe. A sprinkle of toasted coconut on top takes it to the next level.
You can learn more about pairing flavors with fruit by visiting Food Network for tips and tricks.
Chocolate Ganache Mini Cheesecakes
If you’re a chocolate lover, these mini cheesecake cups should be your go-to choice. Rich chocolate ganache drizzled atop your cheesecake will create a decadent treat that’s hard to resist!
- Dark Chocolate Delight: Use dark chocolate for a sophisticated touch. Simply melt dark chocolate with heavy cream and pour this luscious mixture over the cooled cheesecake cups.
- Peanut Butter Bliss: Swirl in some peanut butter into the ganache before topping your cheesecakes. The combination of chocolate and peanut butter is a timeless classic that never disappoints!
For further inspiration, check out this insightful article on chocolate pairings from Serious Eats.
Whichever variation you choose, these mini cheesecake cups will surely satisfy your sweet cravings while impressing friends and family alike!
Cooking Tips and Notes for Mini Cheesecake Cups
Avoiding cracks in your cheesecake
Achieving the perfect mini cheesecake cups without cracks can be a bit of an art. To avoid this, consider the following tips:
- Room Temperature Ingredients: Ensure your cream cheese, eggs, and other ingredients are at room temperature. This helps them blend smoothly and prevents overmixing, which can introduce air and lead to cracks during baking.
- Water Bath Method: If you’re up for a little extra effort, try using a water bath! Wrapping your cupcake pan in aluminum foil and placing it in a larger pan filled with water will create gentle steam while baking, reducing temperature fluctuations and helping prevent cracks.
Storage tips for freshness
After you’ve whipped up those delicious mini cheesecake cups, storing them properly is key to keeping them fresh.
- Refrigeration: Store them in an airtight container in the fridge. They should last about 4–5 days, but I bet they won’t stick around that long!
- Freezing: For longer storage, consider freezing them. Just make sure they’re well-wrapped in plastic wrap or stored in a freezer-safe container. They can be enjoyed for up to three months. Allow them to thaw overnight in the refrigerator before serving.
For more in-depth tips on cheesecake storage, check out this expert guide. This will help you maintain flavor and texture, regardless of whether you’re in the mood for a snack or planning a delightful dessert spread.
Serving Suggestions for Mini Cheesecake Cups
Ideal pairings for your mini cheesecakes
When it comes to enjoying mini cheesecake cups, the key is in the pairing. Here are some delicious options to elevate your experience:
- Fresh fruits: Top with berries, sliced bananas, or even tropical options like mango for a refreshing contrast.
- Nut butters: Drizzle almond or peanut butter for a nutty flavor that complements the creamy cheesecake.
- Coconut flakes: Toasted coconut adds a delightful crunch and a hint of sweetness.
- Chocolate sauce: A rich chocolate drizzle takes these mini delights over the top!
These pairings not only amplify the flavors of the mini cheesecake cups but also add a colorful touch.
Presentation ideas for gatherings
Make your mini cheesecakes a centerpiece at your next gathering! Here are some fun ideas:
- Elegant cups: Use clear dessert cups to showcase the beautiful layers of your cheesecake.
- Mini cake stands: Arrange your mini cheesecakes on small cake stands for a chic display that will surely impress guests.
- Garnish with herbs: A sprig of mint or basil can add an unexpected twist and make your dessert feel gourmet.
For more presentation tips, consider exploring expert sources like The Kitchn, which offers fantastic ideas for making your desserts stand out.
Whether for a casual get-together or a fancy celebration, these serving suggestions will help your mini cheesecake cups shine!
Time Breakdown for Mini Cheesecake Cups
Preparation Time
Getting everything ready for your mini cheesecake cups is a breeze! You’ll need about 15-20 minutes to gather your ingredients, mix the base, and prepare the cheesecake filling. Don’t forget to preheat your oven!
Baking Time
Once your mixture is all set, pop them in the oven for about 15-20 minutes. This gives the cheesecake cups their delightful creamy texture and golden top.
Total Time
In total, you’re looking at around 35-40 minutes from start to finish. Perfect for a quick and satisfying dessert that will impress your friends. For tips on making the most of your mini cheesecake experience, check out this helpful guide on desserts! With such a manageable time commitment, you can whip these up any day of the week.
Nutritional Facts for Mini Cheesecake Cups
When indulging in mini cheesecake cups, it’s good to know what you’re putting in your body, right? Here’s a quick breakdown of their nutritional value.
Calories per Serving
Each mini cheesecake cup typically contains around 150 calories. A reasonable treat for satisfying your sweet tooth without the guilt!
Sugar Content
The sugar content is usually about 10 grams per serving. While you’ll enjoy the sweetness, it’s wise to balance it with a healthy diet throughout the day.
Protein Content
You’ll find approximately 3 grams of protein in each cup. This helps lift your spirits, especially as you savor that creamy texture on a busy afternoon!
These delightful mini cheesecake cups are perfect for a treat or a gathering. For more detailed nutritional information, consider checking resources like the American Heart Association to better understand your dietary choices. Remember, enjoying dessert can fit into a balanced lifestyle!
FAQs about Mini Cheesecake Cups
How long do mini cheesecakes last in the fridge?
If stored correctly, mini cheesecake cups can easily last about 4 to 6 days in the fridge. Make sure they’re covered tightly with plastic wrap or placed in an airtight container to maintain their freshness. Just remember, the longer they sit, the more the texture may change. So, if you can help it, enjoy them within the first few days for the best experience!
Can I freeze mini cheesecakes?
Absolutely! You can freeze your mini cheesecake cups for up to two months. To do this, first, allow them to cool completely. Then, wrap each cup individually in plastic wrap and place them in a freezer-safe container or bag. When you’re ready to indulge, simply take them out and let them thaw in the fridge overnight. You’ll have a delicious treat waiting for you whenever the craving hits!
What are some common mistakes to avoid?
Crafting the perfect mini cheesecake cups is easy, but a few common pitfalls can derail your efforts:
- Overmixing: When blending your cream cheese, avoid overmixing as this can lead to cracks and a dense texture.
- Skipping the water bath: For a smoother finish, consider using a water bath for your cupcakes while baking.
- Not chilling long enough: Patience pays off! Allowing them to chill adequately helps improve flavors and textures.
Knowing these tips can make all the difference in enjoying your next mini cheesecake batch. Interested in exploring more cheesecake variations? Check out this resource for inspiring ideas!
Conclusion on Mini Cheesecake Cups
Wrap-up
In summary, mini cheesecake cups are a delightful and versatile dessert that anyone can create at home. Whether you’re hosting a gathering or simply indulging yourself, these little treats are sure to impress. You can customize the flavors, toppings, and even the crust to suit your taste, making them perfect for any occasion.
Encouragement to Create Your Own!
So why not roll up your sleeves and give it a try? Remember, baking is all about experimenting and having fun—don’t be afraid to make it your own! For inspiration, check out sources like Food Network or Serious Eats for creative twists. Share your creations on social media; you might just inspire someone else to start making their own mini cheesecake cups!
PrintMini Cheesecake Cups: Easy and Indulgent Dessert for Everyone
These mini cheesecake cups are the perfect individual serving of creamy, delectable cheesecake, ideal for every occasion.
- Prep Time: 15 minutes
- Cook Time: 25 minutes
- Total Time: 2 hours 40 minutes
- Yield: 12 servings
- Category: Dessert
- Method: Baking
- Cuisine: American
- Diet: Vegetarian
Ingredients
- 8 ounces cream cheese
- 1/2 cup granulated sugar
- 1 teaspoon vanilla extract
- 1/2 cup sour cream
- 1/2 cup graham cracker crumbs
- 1/4 cup unsalted butter, melted
Instructions
- Preheat the oven to 325°F (160°C).
- In a mixing bowl, beat the cream cheese and sugar until smooth.
- Add the vanilla extract and sour cream, mixing until well combined.
- In another bowl, combine the graham cracker crumbs and melted butter, then press the mixture into the bottom of cupcake liners.
- Fill each liner with the cheesecake mixture and smooth the tops.
- Bake for 20-25 minutes, then let cool before refrigerating for at least 2 hours.
Notes
- For an extra kick, top with fresh fruit or chocolate sauce before serving.
Nutrition
- Serving Size: 1 mini cheesecake cup
- Calories: 180
- Sugar: 12 grams
- Sodium: 90 milligrams
- Fat: 10 grams
- Saturated Fat: 5 grams
- Unsaturated Fat: 4 grams
- Trans Fat: 0 grams
- Carbohydrates: 18 grams
- Fiber: 0 grams
- Protein: 3 grams
- Cholesterol: 30 milligrams


")