
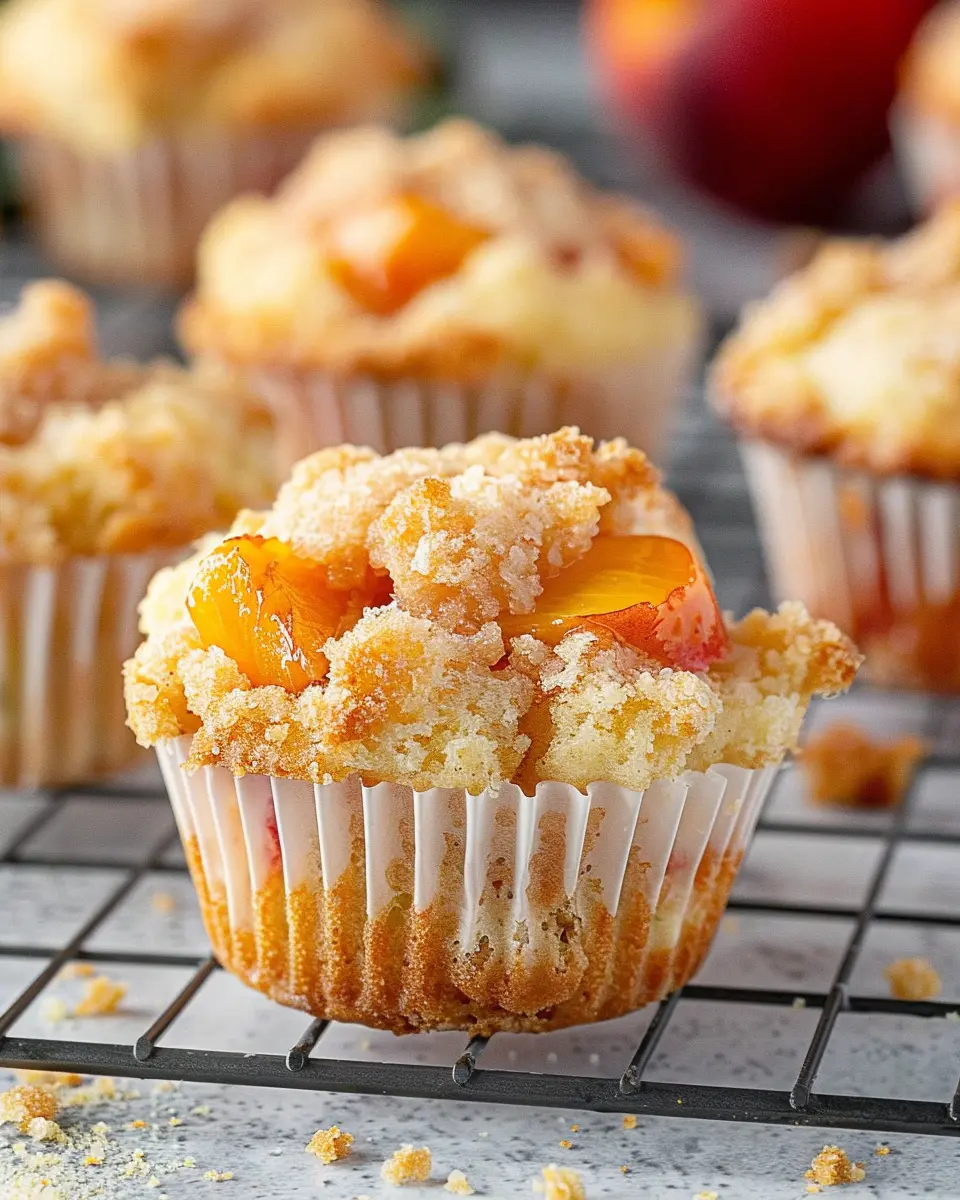
Introduction to Cannoli Cookies
The Delicious Fusion of Flavors
If you’re on the hunt for a delightful dessert that combines tradition with a twist, cannoli cookies may just be your new favorite treat. Imagine biting into a soft, chewy cookie that encapsulates all the beloved flavors of an Italian cannoli. This scrumptious fusion is not just a gimmick; it’s a brilliant reimagining of a classic that many of us adore.
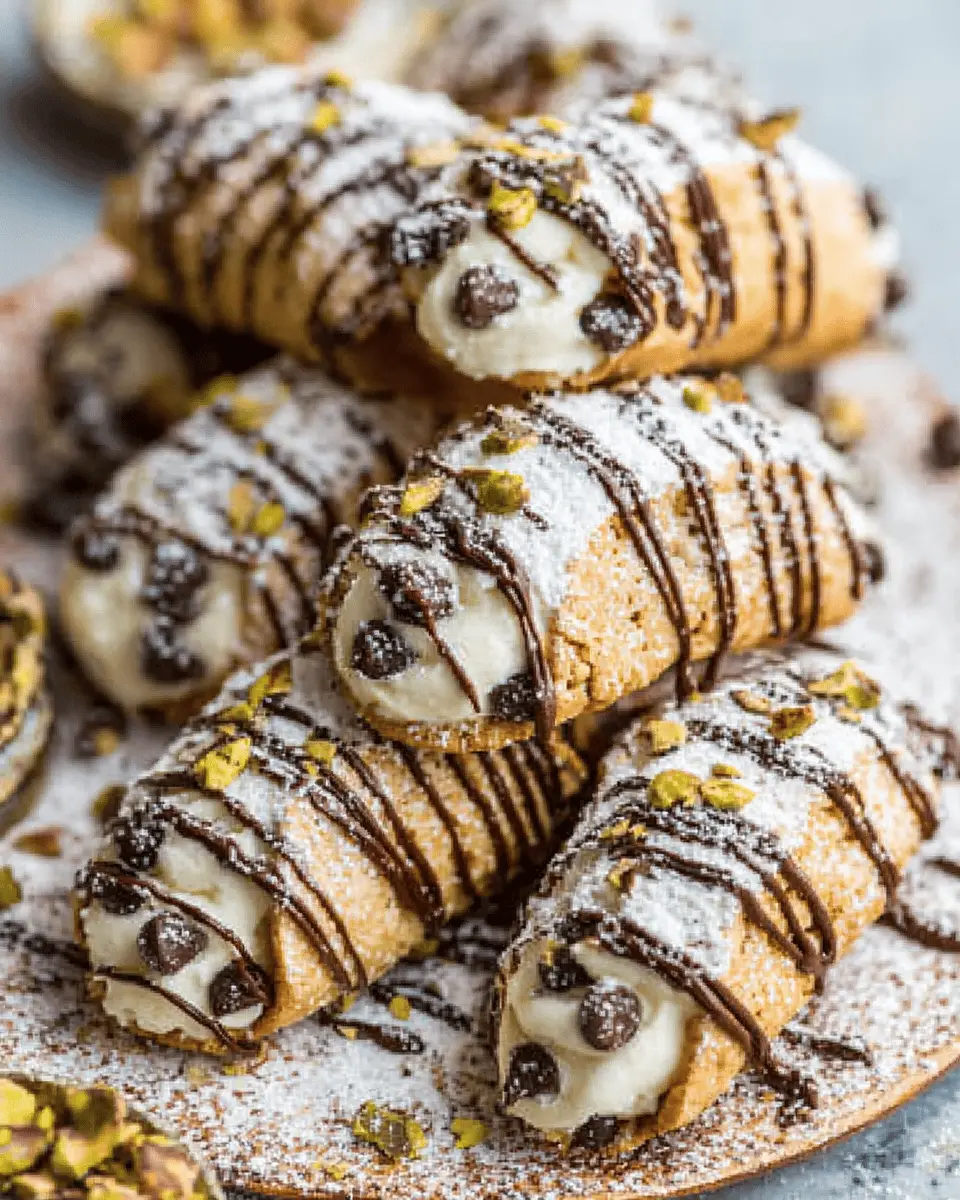
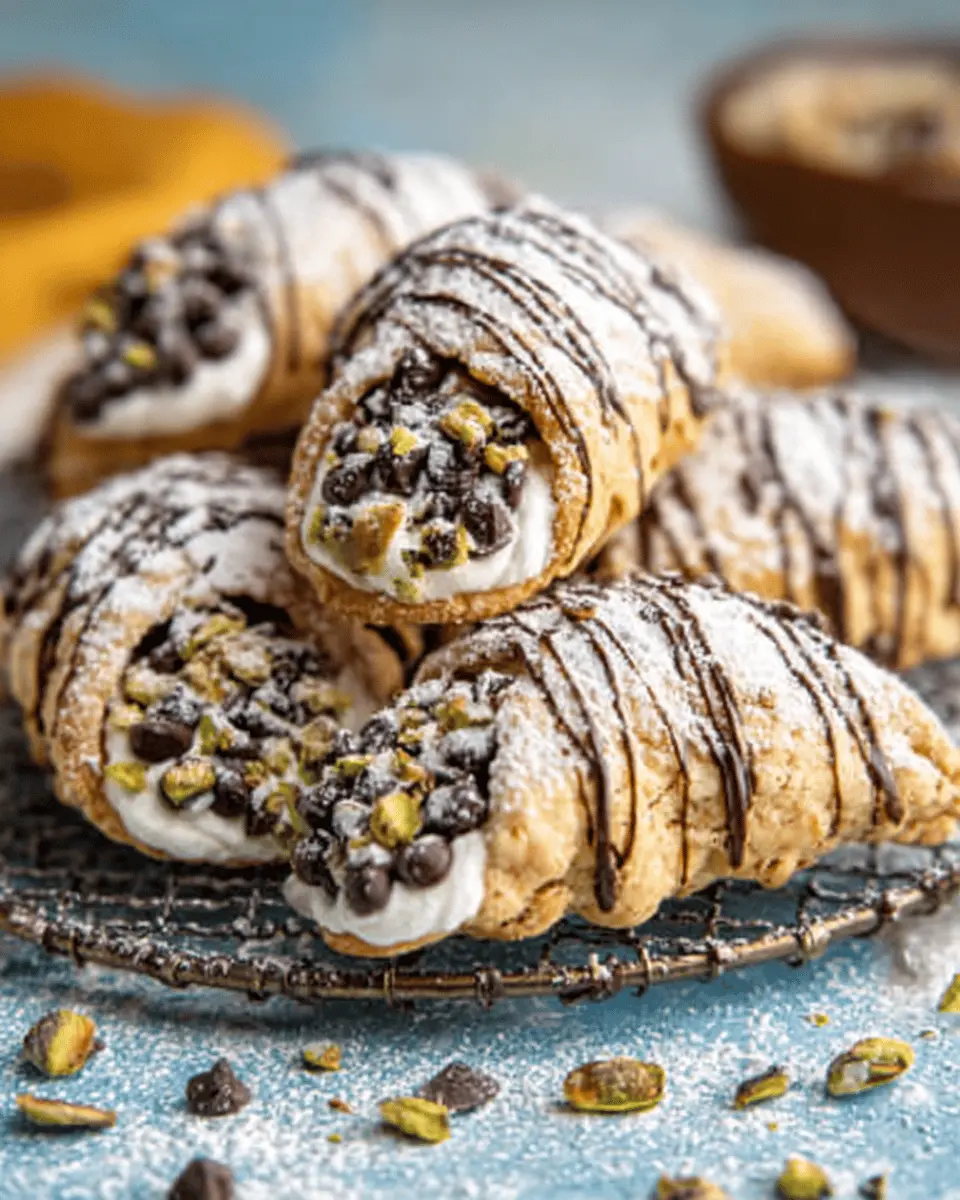
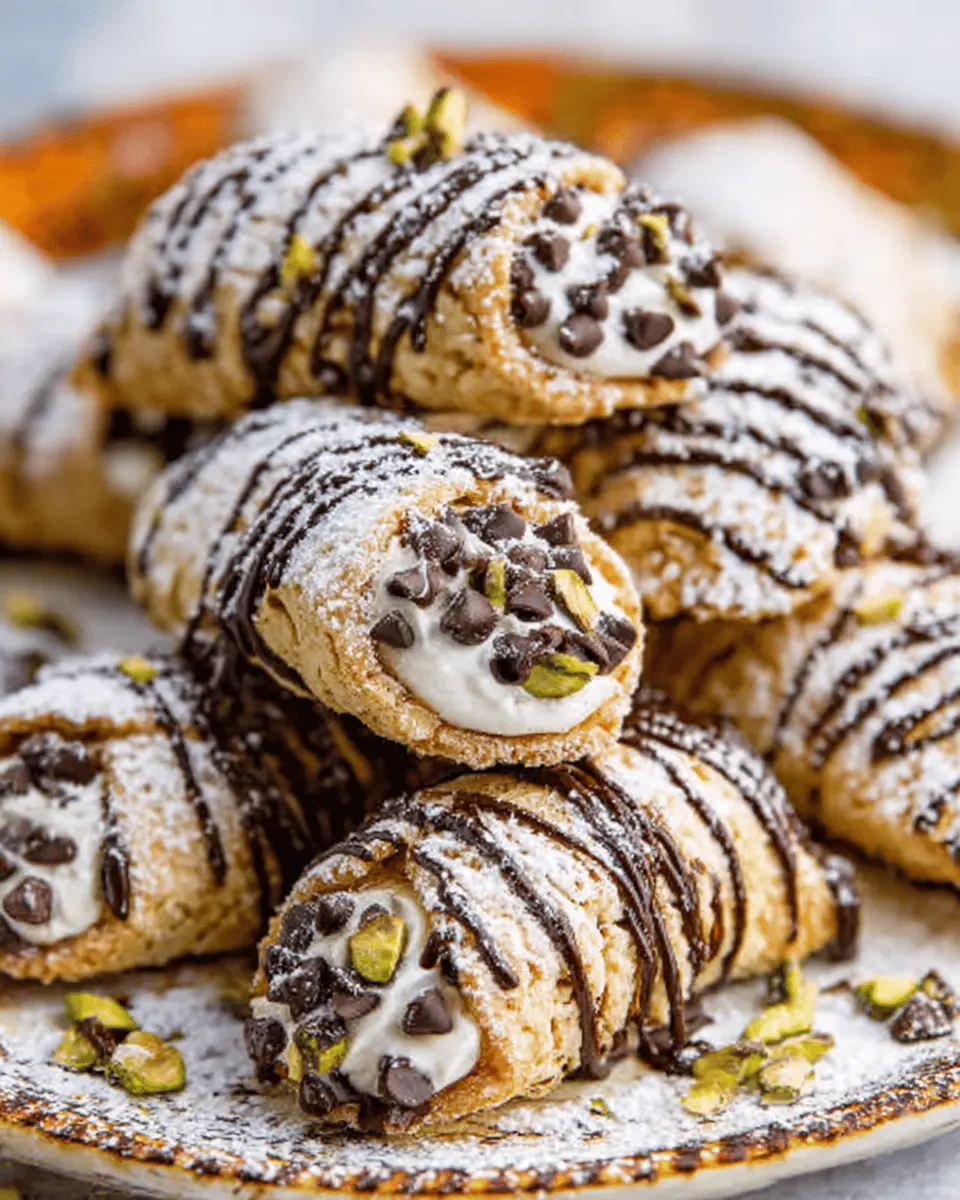
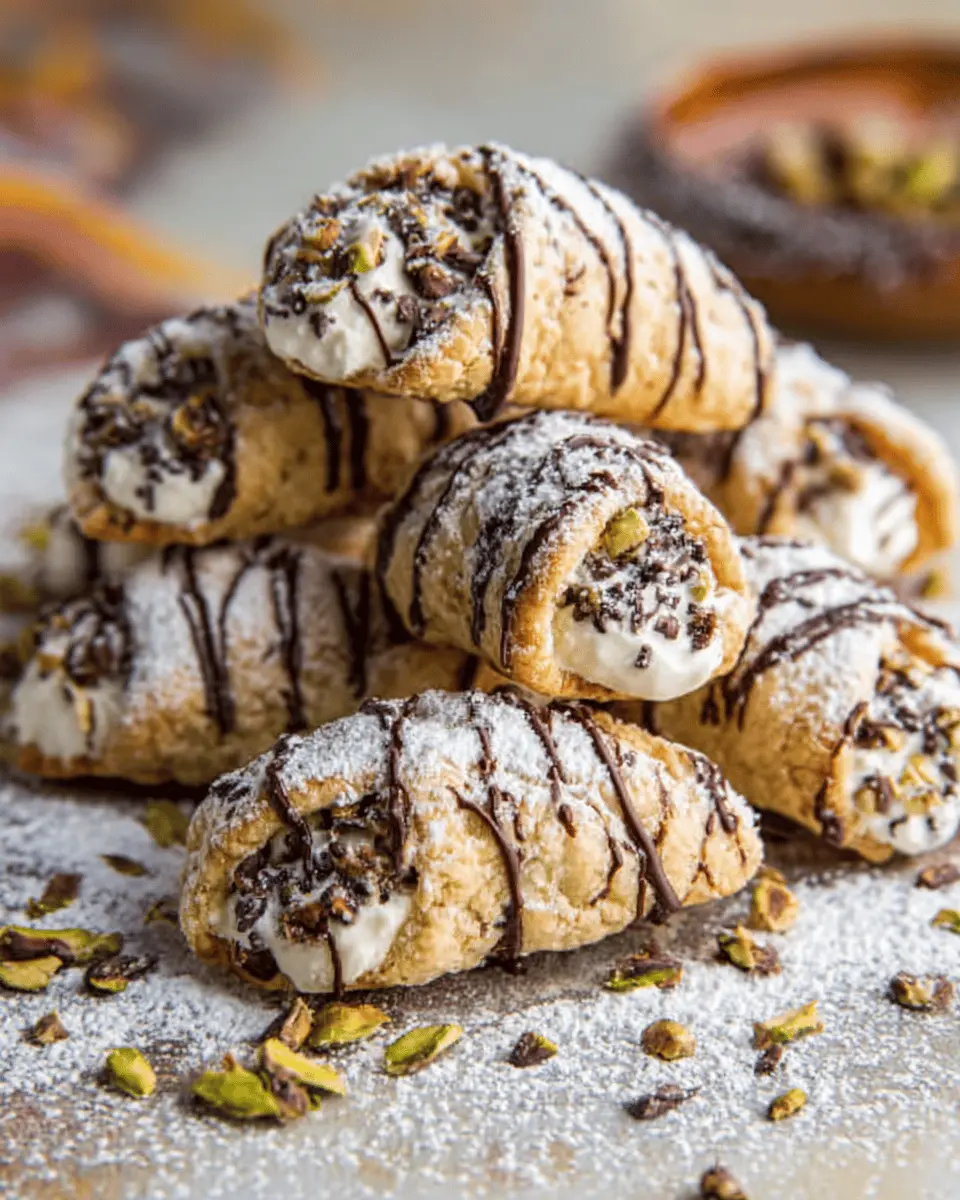
So, what makes cannoli cookies so special? For starters, they feature the iconic flavors of crispy cannoli shells filled with sweet, creamy ricotta cheese—blended beautifully with chocolate chips and a hint of orange zest. The texture is light yet satisfying, and the aroma of freshly baked cookies will leave your kitchen smelling irresistible.
Embracing Italian Heritage
These cookies pay homage to Italian cuisine, where desserts are often crafted with love and a deep understanding of flavor balance. Each bite transports you to a quaint Italian café, where you can almost hear the gentle clinking of espresso cups. Historically, cannoli have roots in Sicily, and understanding their place in Italian culture adds a beautiful layer to your baking experience.
You might be curious about the practicalities of making these cookies at home. The process is surprisingly simple and doesn’t require any special culinary skills—perfect for young professionals looking to impress friends or simply indulge in something sweet after a long day. Plus, they can be made with common pantry ingredients, which is a huge win for busy lifestyles.
Consider pairing these cookies with a cup of rich, dark coffee or a refreshing glass of milk: both enhance the sweet and creamy flavors beautifully. If you’d like a more adventurous pairing, think about serving them up with a fruity herbal tea.
In this article, we’ll take you step-by-step through crafting your very own cannoli cookies. Whether you’re a seasoned baker or a curious novice, I guarantee you’ll enjoy this delightful journey into flavor! Let’s get started!
Ingredients for Cannoli Cookies
To whip up a delightful batch of cannoli cookies, you’ll need a combination of traditional and modern ingredients that come together in perfect harmony. Let’s dive into what you’ll need:
- Flour: All-purpose flour is your base, giving structure to these cookies.
- Sugar: Granulated sugar adds sweetness—don’t skimp on this!
- Baking Powder: A key leavening agent that ensures your cookies are soft and fluffy.
- Butter: Use unsalted butter for that rich flavor. It’s like a warm hug for your taste buds!
- Eggs: These bind the ingredients together and help achieve that perfect texture.
- Ricotta Cheese: The star ingredient! It delivers the classic cannoli flavor and creamy texture.
- Chocolate Chips: A nod to traditional cannoli fillings; you won’t regret adding them in!
- Cinnamon: Just a pinch for warmth and depth in flavor.
Feel free to get creative with your mix-ins! For more on how these ingredients can come together, check out resources like King Arthur Baking or Serious Eats. The world of cookies is at your fingertips—let’s make it delicious!
Preparing Cannoli Cookies
Making cannoli cookies is a delightful way to bring a classic Italian dessert into your home. They’re crispy, sweet, and filled with creamy ricotta and a touch of chocolate. Ready to dive in? Let’s get you started with the simple steps you’ll need to follow.
Gather Your Ingredients
Before you start baking, it helps to have everything laid out and ready. Here’s what you’ll need for your cannoli cookies:
- 1 cup unsalted butter, softened
- 1 cup granulated sugar
- 1 cup ricotta cheese (drained)
- 1 large egg
- 2 teaspoons vanilla extract
- 2 cups all-purpose flour
- 1 teaspoon baking powder
- 1/2 teaspoon salt
- 1 cup mini chocolate chips
- 1/2 cup chopped pistachios or almonds (optional)
- Powdered sugar for dusting (optional)
As you gather these ingredients, take a look at CDC’s food safety tips to ensure everything is fresh and safe to use.
Cream the Butter and Sugar
Start by creaming the softened butter and granulated sugar together in a large mixing bowl. This step is crucial as it incorporates air into the mixture, giving your cannoli cookies a light and fluffy texture. Use an electric mixer on medium speed for about 3 minutes, or until the mixture is light and pale. If you don’t have a mixer, a sturdy wooden spoon will work just fine; it just requires a little extra elbow grease!
Mix in the Ricotta and Egg
Once your butter and sugar are properly creamed, it’s time to add the ricotta cheese and the egg. Beat them in until the mixture is smooth. The ricotta is what makes these cookies special, so don’t skimp on this ingredient! You could even experiment with flavored ricotta for some extra zing. And don’t forget to splash in the vanilla extract for that aromatic, sweet touch!
Combine Dry Ingredients
In a separate bowl, whisk together the all-purpose flour, baking powder, and salt. Gradually add this dry mixture to your wet ingredients. This is where your cannoli cookies start to shape up! Mix just until combined; over-mixing can lead to tough cookies, and nobody wants that.
Fold in the Tasty Additions
Now comes the fun part—fold in those mini chocolate chips. If you’re feeling adventurous, toss in some chopped pistachios or almonds for added texture and flavor. The beauty of cooking is making it your own, so feel free to swap ingredients. You can find more tips on customizing recipes at King Arthur Baking.
Drop the Dough on the Baking Sheet
Preheat your oven to 350°F (175°C). While it’s warming, prepare a couple of baking sheets by lining them with parchment paper. Using a spoon or ice cream scoop, drop tablespoon-sized balls of dough onto the sheets, leaving a couple of inches of space between each one. They’ll spread a bit, so don’t crowd them.
Bake the Cookies
Slide the sheets into the oven and bake for about 12-15 minutes, or until the edges are lightly golden. Your cannoli cookies will spread and puff up beautifully! Once they’re out, let them cool on the baking sheets for a few minutes before transferring them to a wire rack to cool completely. You can sprinkle powdered sugar on top for that classic cannoli finish if you like.
As you bake these cannoli cookies, you’ll fill your kitchen with that heavenly aroma reminiscent of Italian bakeries. It’s hard not to smile when you’ve got a tray of warm, gooey cookies cooling on the counter. Enjoy sharing (or maybe keeping them all to yourself). Happy baking!
Variations on Cannoli Cookies
Chocolate-Dipped Cannoli Cookies
If you’re looking to elevate your cannoli cookies, chocolate is always a winning addition. To create a batch of delicious chocolate-dipped versions, simply melt some dark or milk chocolate in a double boiler. Then, dip half of each cookie into the warm chocolate, allowing the excess to drip off before placing them on parchment paper to set. If you want to take it up a notch, sprinkle some crushed nuts or colorful nonpareils on the chocolate before it hardens. This not only adds a delightful crunch but also makes for a beautiful presentation—perfect for gatherings or as a sweet treat after a long day.
Nutty Pistachio Variations
For a nutty twist on your cannoli cookies, consider incorporating pistachios into the dough. Chopped pistachios can be mixed right in or used as a topping for added texture. Not only do they add an eye-catching green hue, but they also infuse the cookies with a rich, nutty flavor that pairs beautifully with the traditional sweet ricotta filling. If you want a fun way to serve these cookies, take a cue from Middle Eastern cuisine and drizzle some rose or orange blossom water over them after baking. You’ll create an exotic treat that’s sure to impress your friends and family.
Exploring variations of cannoli cookies allows you to play with flavors and textures, keeping each batch exciting. So next time you bake, don’t hesitate to experiment and make these cookies truly your own! For more inspiration, check out Serious Eats for additional ideas and flavor pairings.
Cooking tips and notes for Cannoli Cookies
Achieving the perfect texture
To create cannoli cookies that are crisp yet tender, the key is in the chilling process. Chill your dough for at least 30 minutes before baking. This not only helps the cookies maintain their shape but also allows the ingredients to meld beautifully, resulting in a more harmonious flavor. Ensure your baking sheet is lined with parchment paper for easy removal, giving you those deliciously perfect edges.
Flavor enhancements for your dough
Elevate the taste of your cannoli cookies by infusing the dough with unique flavors. Consider adding:
- A dash of cinnamon for warmth
- Vanilla extract for sweetness
- Zest from an orange or lemon for a refreshing kick
These simple additions can make a world of difference, turning an ordinary cookie into an extraordinary treat.
Feeling adventurous? Try incorporating mini chocolate chips or chopped nuts for added texture! For more inspiration on flavor pairings, check out this guide. Happy baking!
Serving suggestions for Cannoli Cookies
Perfect pairings for your cookies
When you bake delightful cannoli cookies, finding the perfect accompaniments can elevate your dessert experience. To complement these rich, creamy treats, consider serving them alongside:
- Fresh Fruits: Juicy berries or slices of citrus provide a refreshing contrast to the sweetness of the cookies.
- Nutty Accents: Pair with roasted almonds or hazelnuts for added crunch and flavor.
- Coffee or Tea: A robust espresso or a soothing chamomile can enhance the richness of the cookies. Looking for coffee inspiration? Check out this guide to find the perfect brew!
How to present your delicious treats
Presentation can transform your cannoli cookies from simple snacks to elegant offerings. Here are some tips:
- Serve on a Rustic Platter: A wooden board or slate adds charm to your display, while a sprinkle of powdered sugar can create a lovely visual effect.
- Add Decorative Touches: Use fresh mint or edible flowers to garnish, making each cookie pop.
- Cookie Boxes: For gifting, consider placing them in decorative boxes lined with parchment paper. Not only does this protect the cookies, but it also makes for a delightful surprise!
With these serving suggestions, your cannoli cookies are set to impress friends and family alike. Happy baking!
Time breakdown for Cannoli Cookies
When it comes to baking delightful cannoli cookies, knowing how much time you need is essential for a smooth experience in the kitchen. Let’s break it down!
Preparation time
You’ll need about 25 minutes to gather your ingredients and whip everything together. This includes mixing the ricotta and sugar until smooth, along with folding in those delicious mini chocolate chips that elevate your cookies.
Baking time
Once you’ve prepped your dough, the baking time is relatively quick. Expect around 12 to 15 minutes in the oven. You’ll want to keep an eye on them; the goal is golden edges that hint at the scrumptious texture inside.
Total time
From start to finish, you’re looking at approximately 40 minutes. This makes these cannoli cookies a fantastic option for last-minute dessert cravings or impromptu gatherings with friends. So, are you ready to fill your kitchen with sweet scents?
For more tips on baking time management, check out Epicurious for expert insights!
Nutritional Facts for Cannoli Cookies
Calories per cookie
Each cannoli cookie contains approximately 120 calories, making them a delightful treat that won’t break your calorie bank. It’s easy to indulge in these cookies, but they’re also light enough to enjoy without guilt.
Key nutritional values
When it comes to cannoli cookies, here are some highlights of their nutritional profile:
- Total Fat: 6g
- Saturated Fat: 3g
- Cholesterol: 25mg
- Sodium: 50mg
- Carbohydrates: 15g
- Dietary Fiber: 1g
- Sugars: 5g
- Protein: 2g
These cookies are not just tasty; they provide a nice balance of flavor and texture. If you’re curious about how these numbers stack against other desserts, check out resources like the USDA FoodData Central for more comprehensive information. Enjoy your cannoli cookies guilt-free, knowing they fit into a balanced lifestyle!
FAQs about Cannoli Cookies
Can I substitute ricotta cheese?
Absolutely! While ricotta cheese is traditional for cannoli filling, you can use other creamy ingredients for your cannoli cookies if you’re feeling adventurous. Try mascarpone for a richer flavor, or even cream cheese for a tangy twist. Just ensure you maintain the right texture — you want it to be thick enough to hold its shape but creamy enough to blend well with the dough.
How do I store leftover cookies?
If you’re lucky enough to have leftover cannoli cookies, congrats! To keep them fresh, place them in an airtight container at room temperature for about 3-5 days. If you need them to last even longer, consider freezing them. Just make sure they’re well-wrapped in plastic wrap or foil to prevent freezer burn. You can simply thaw them at room temperature when you’re ready for a sweet treat again.
What else can I add to these cookies?
The beauty of cannoli cookies lies in their versatility! Here are some delightful additions you can experiment with:
- Chocolate chips: A classic choice for added sweetness.
- Chopped nuts: Pistachios or almonds can introduce a lovely crunch.
- Dried fruit: Raisins or dried cherries can complement the sweetness beautifully.
- Spices: A pinch of cinnamon or nutmeg can elevate the flavor profile.
Want more inspiration? Check out this article for additional creative ideas! Remember, the goal is to make these cookies your own while honoring that delicious Italian inspiration. Happy baking!
Conclusion on Cannoli Cookies
Celebrate with homemade cannoli cookies!
There’s something truly magical about cannoli cookies. They embody the rich flavors and textures of traditional cannoli while being easy to share and enjoy. Whether you’re hosting a dinner party or just indulging in a sweet treat for yourself, these cookies are sure to impress. The creamy filling and crispy exterior create a delightful pairing that resonates with both nostalgia and creativity.
So, roll up your sleeves and treat those taste buds! For a stress-free baking experience, check out sources like Food Network or Serious Eats for tips. Dive into this sweet adventure and celebrate life’s moments, big and small, with your homemade cannoli cookies!
PrintCannoli Cookies: Easy Indulgence for Your Homemade Treats

Indulge in the delightful fusion of classic cannoli and cookies with this easy recipe for Cannoli Cookies.
- Prep Time: 20 minutes
- Cook Time: 18 minutes
- Total Time: 38 minutes
- Yield: 24 cookies
- Category: Dessert
- Method: Baking
- Cuisine: Italian
Ingredients
- 1 cup ricotta cheese
- 1 cup powdered sugar
- 1 teaspoon vanilla extract
- 2 cups all-purpose flour
- 1/2 teaspoon baking powder
- 1/4 teaspoon salt
- 1/2 cup mini chocolate chips
- 1 teaspoon orange zest
Instructions
- Preheat the oven to 350°F (175°C).
- In a bowl, mix ricotta cheese, powdered sugar, and vanilla until smooth.
- In another bowl, combine flour, baking powder, and salt.
- Slowly add dry ingredients to the ricotta mixture, mixing until combined.
- Fold in chocolate chips and orange zest.
- Drop spoonfuls of dough onto a baking sheet.
- Bake for 15-18 minutes or until lightly golden.
- Allow to cool before serving.
Notes
- For extra flavor, add a sprinkle of cinnamon.
- Serve with a dusting of powdered sugar on top.
Nutrition
- Serving Size: 1 cookie
- Calories: 120
- Sugar: 9g
- Sodium: 50mg
- Fat: 4g
- Saturated Fat: 2g
- Unsaturated Fat: 1g
- Trans Fat: 0g
- Carbohydrates: 18g
- Fiber: 0g
- Protein: 2g
- Cholesterol: 10mg


")