
Introduction to No-Bake Avalanche Cookies
What are No-Bake Avalanche Cookies?
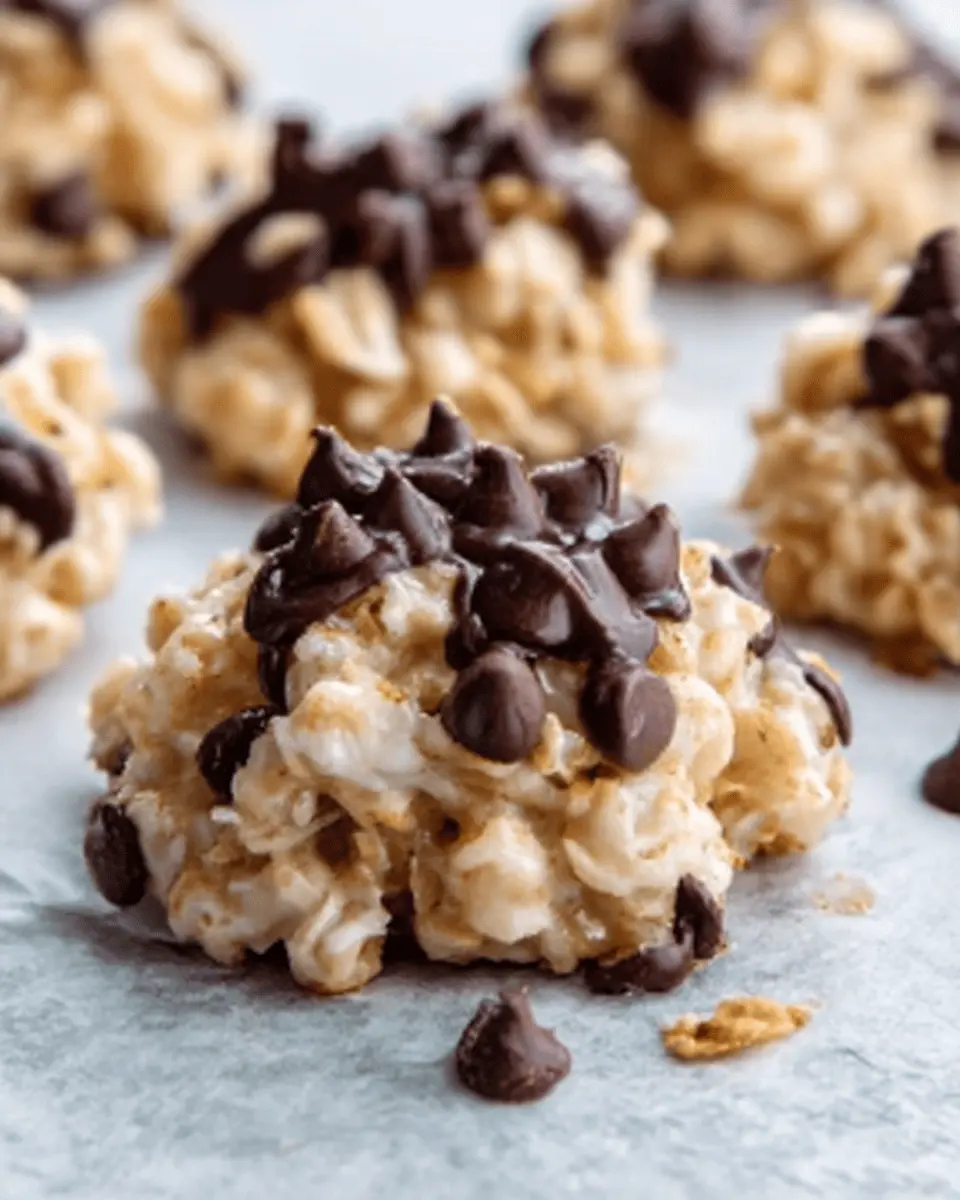
If you’re a fan of delightful, easy-to-make treats, then no-bake avalanche cookies are about to become your new go-to dessert. These irresistible cookies combine creamy peanut butter, rich chocolate, and crispy textures, all without turning on the oven. Imagine a cookie that feels indulgent but is also quick and fuss-free—perfect for those busy weeknights or spontaneous gatherings with friends. With just a handful of ingredients and no baking involved, you can whip up a batch in no time.
But what exactly goes into these cookies? Typically, you’ll find them made with oats, chocolate chips, and a melty mix of peanut butter and marshmallows. The result is a delectable treat that’s not only sweet but also offers a satisfying crunch. Every bite leads to an explosion of flavors that will have everyone asking for the recipe.
Why Choose No-Bake Cookies?
You might wonder, why opt for no-bake cookies in the first place? Well, here are a few compelling reasons:
- Quick and Easy: With minimal prep time, you can have these cookies ready in under 30 minutes.
- No Oven Required: Perfect for summer when you want a treat but don’t want to heat up your kitchen.
- Fun to Customize: Feel free to throw in your favorite add-ins, like dried fruits or nuts, making every batch unique!
Moreover, the appeal of no-bake cookies lies in their versatility. Whether you’re hosting a casual get-together or need a last-minute gift for a friend, no-bake avalanche cookies are a surefire crowd-pleaser. Plus, they’re a fantastic way to involve kids in the kitchen—let them mix, scoop, and even decorate!
For a deeper look into the world of no-bake sweets, check out this wonderful guide on no-bake desserts from Serious Eats. Embrace the joy of creating something delicious without the hassle of baking, and you’ll discover just how fun and rewarding these treats can be!
Ingredients for No-Bake Avalanche Cookies
Making no-bake avalanche cookies is not only quick and easy, but it’s also incredibly satisfying to see the delightful results come together in no time. Here’s what you’ll need to whip up these delicious bites.
Essential ingredients
- Oats: Rolled oats add texture and heartiness.
- Peanut Butter: Choose creamy or crunchy, depending on your preference.
- Chocolate Chips: Semi-sweet or dark chocolate chips add a rich sweetness.
- Turkey Bacon: Cooked and crumbled, it brings a savory note to balance the sweetness.
- Honey or Maple Syrup: These natural sweeteners help bind the mixture.
- Vanilla Extract: Just a splash for that warm richness.
Optional add-ins for a personal touch
Feel free to customize your no-bake avalanche cookies with a few additional ingredients:
- Nuts: Chopped almonds or walnuts for a crunch.
- Coconut Flakes: Unsweetened for a tropical twist.
- Dried Fruits: Raisins or cranberries for a chewiness.
- Protein Powder: Add a scoop to amp up the nutrition.
Try mixing and matching these ingredients to find your perfect blend. The beauty of no-bake avalanche cookies lies in their versatility! For more tips on customizing your baking, check out this guide. Enjoy creating your unique version!
Step-by-Step Preparation of No-Bake Avalanche Cookies
No-bake desserts are a lifesaver, especially when you want something quick yet decadent. And if you haven’t tried no-bake avalanche cookies, you are in for a treat! These cookies are not only delightful but also incredibly simple to whip up. Let’s dive into the preparation process so you can enjoy these crunchy, sweet bites in no time.
Gather Your Supplies
First things first, let’s make sure you have everything you need. Here’s a quick checklist:
-
Ingredients:
-
2 cups white chocolate bark
-
3 cups crispy rice cereal (like Rice Krispies)
-
2 cups mini marshmallows
-
1 cup peanut butter (creamy or crunchy as per your preference)
-
1 teaspoon vanilla extract (optional)
-
Tools:
-
Microwave-safe bowl
-
Mixing spoon
-
Baking sheet
-
Parchment paper
Having everything in front of you not only saves time but makes the whole process feel seamless. Have you ever found yourself rummaging through the pantry halfway through a recipe? Not fun!
Melt the White Chocolate Bark
Start by breaking the white chocolate bark into smaller pieces for easy melting. Place those chunks in a microwave-safe bowl. Heat them in the microwave in 30-second intervals, stirring after each one to prevent any burning. You want the chocolate to be smooth and velvety.
If you’re curious about the science behind melting chocolate, check out this guide on chocolate melting basics. Trust me; it pays to give it attention!
Combine the Cereal and Marshmallows
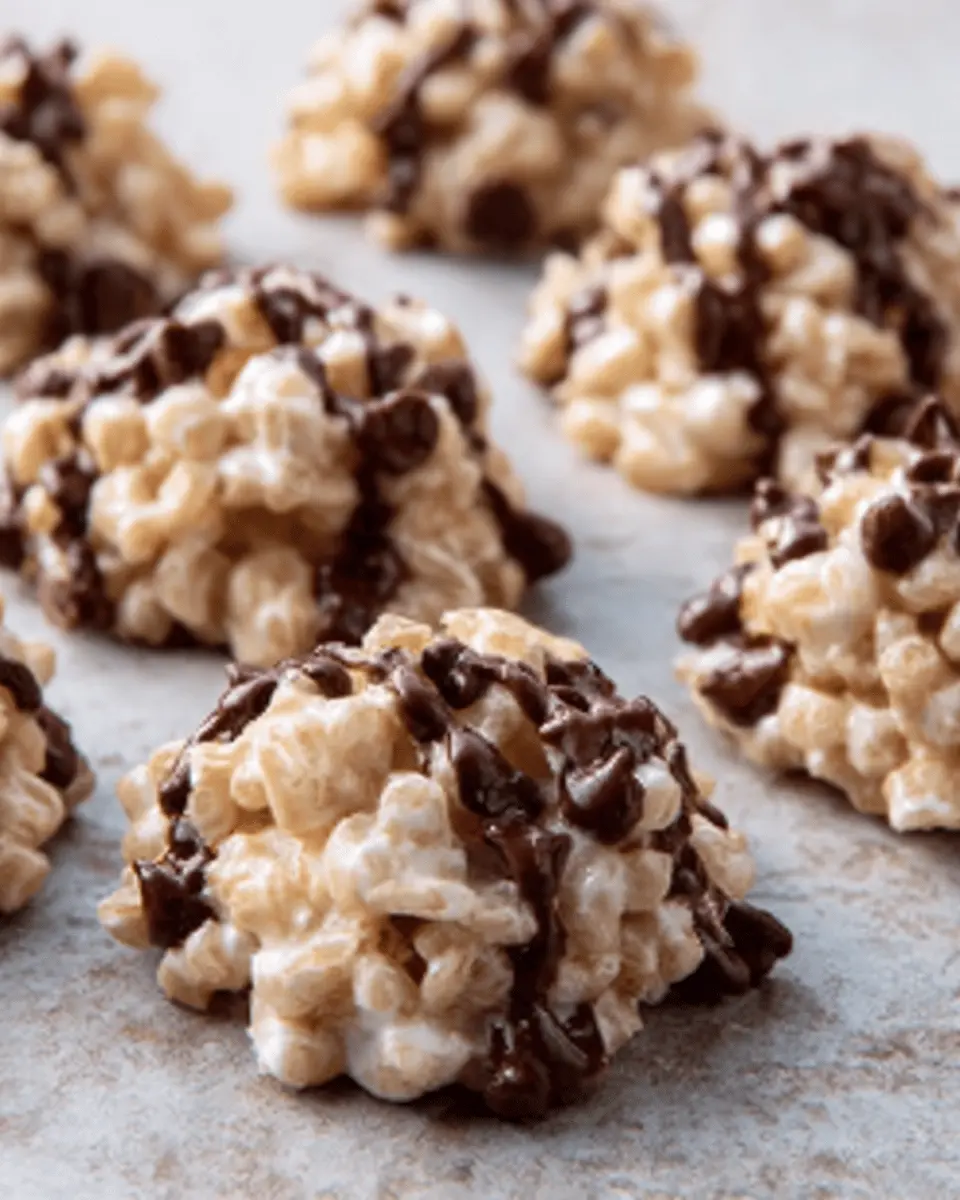
While your white chocolate is cooling slightly, grab a large mixing bowl. Add the 3 cups of crispy rice cereal and 2 cups of mini marshmallows. The combination of these two will give your no-bake avalanche cookies that satisfying crunch and delightful chewiness.
It’s important to mix them well so that the cereal gets adequately coated in the chocolate later. Plus, who doesn’t love a bowl of marshmallows and cereal? It’s practically a childhood dream!
Fold in the Melted Chocolate and Peanut Butter
Once your white chocolate is melted and slightly cooled (you don’t want to melt the marshmallows too quickly), pour it into the bowl with the cereal and marshmallows. Now, add in the peanut butter and, if you like, the vanilla extract.
Using a mixing spoon or spatula, gently fold everything together until the cereal and marshmallows are evenly coated. This can be a bit sticky, so take your time! You want to ensure that every crunchy piece is covered in that rich chocolate-peanut buttery goodness.
Form the Cookies
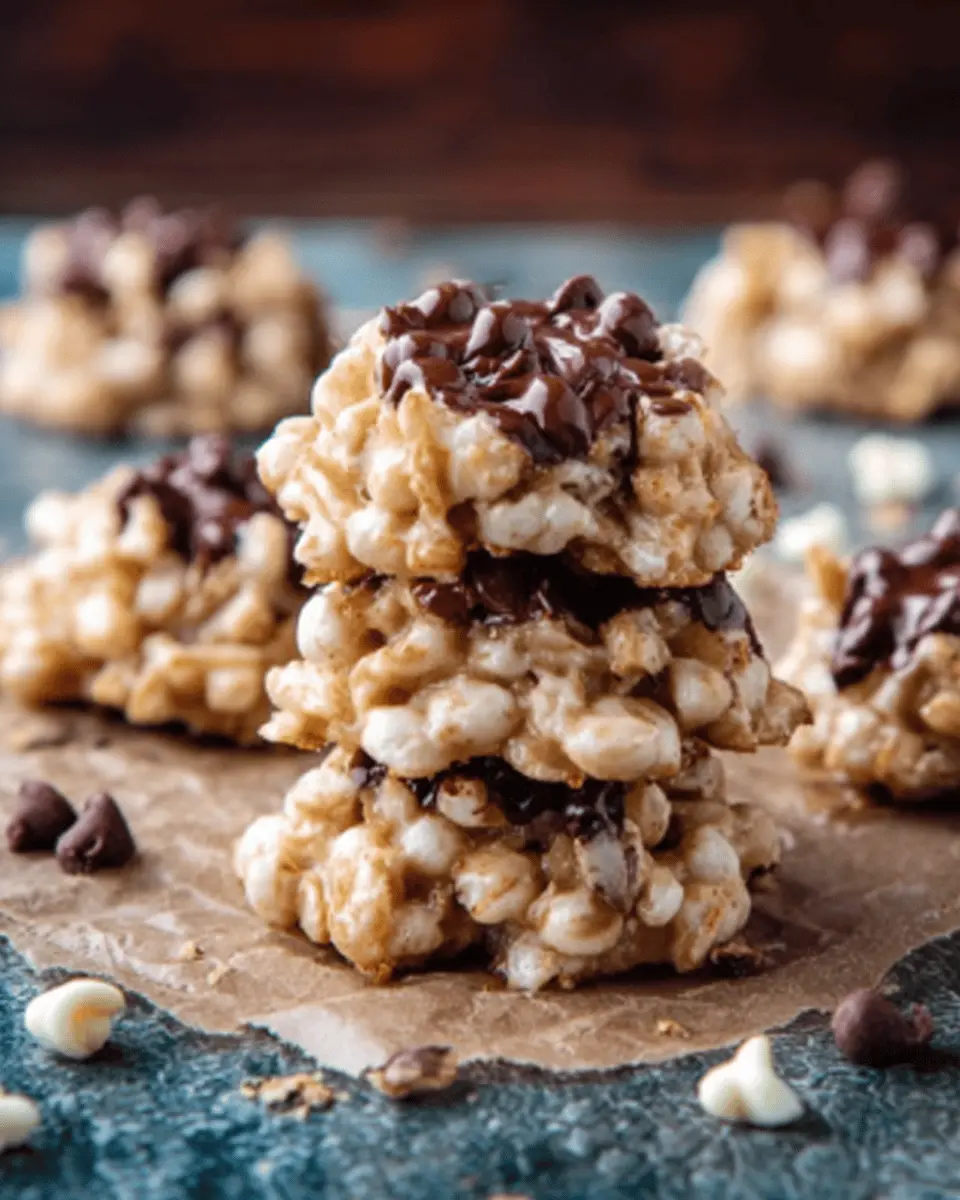
With your mixture well combined, it’s time to form your cookies. Line a baking sheet with parchment paper for easy cleanup. Using your hands or a scoop, take portions of the mixture and shape them into balls or mounds. Don’t worry about them being perfect; the beauty of no-bake avalanche cookies is in their homemade charm.
Space them evenly on the lined baking sheet. If the mixture feels too sticky, dampen your hands slightly with water or cooking spray to make shaping easier.
Chill Until Set
Now for the hardest part: waiting! Place the baking sheet in the refrigerator for at least an hour (or until you’re ready for that first bite). This chilling period allows the cookies to set and bind together perfectly.
While you wait, why not prepare a cup of tea or coffee? Nothing pairs better with sweet treats than a nice warm beverage.
After an hour, your no-bake avalanche cookies should be ready to enjoy. And there you have it—simple, quick, and absolutely delicious! Dive in and relish the crunchy, chewy, chocolatey goodness you’ve just created. Happy snacking!

Variations on No-Bake Avalanche Cookies
No-bake avalanche cookies are already a treat, but why not elevate them with a few creative twists? Here are some delightful variations that can add a personal touch to your cookie-making experience.
Adding Extra Flavor with Nuts
If you’re a fan of texture and crunch, consider incorporating nuts into your no-bake avalanche cookies. Chopped pecans, walnuts, or even almonds can enhance your cookies with a rich, nutty flavor. Not only do they add a nice crunch, but they also provide a source of healthy fats and protein. You might even try roasting the nuts lightly before mixing them in. This can help bring out their natural flavors and create an irresistible aroma that’ll have your taste buds dancing.
A Touch of Decadence with Caramel
Looking to turn your cookies into an even more decadent delight? Drizzling some caramel sauce over your no-bake avalanche cookies can do the trick! A touch of warm, gooey caramel adds a sweet richness that perfectly complements the chocolate and marshmallows. A simple homemade caramel can be whipped up in just 10 minutes; just be sure to keep an eye on it to avoid burning. For an extra special treat, consider layering caramel between the cookie mixture when forming them. It’s a small change that can transform your cookie from good to utterly irresistible.
With these variations, your no-bake avalanche cookies will never feel boring! Whether you’re catering to a crowd or treating yourself, feel free to experiment with your favorite mix-ins. Who knows? You just might discover your new go-to recipe!
Cooking Tips and Notes for No-Bake Avalanche Cookies
Preventing Sticking
One of the biggest challenges with no-bake avalanche cookies is preventing the mixture from sticking to your hands and utensils. To avoid this, lightly grease your hands and utensils with cooking spray or a bit of oil before shaping the cookies. Using parchment paper on your baking sheet can also help minimize sticking, ensuring your cookies maintain their shape. If you’re ever in doubt, a sprinkle of powdered sugar on your hands can work like magic!
Achieving the Perfect Texture
When it comes to the perfect texture, balance is key. For no-bake avalanche cookies, you want a chewy yet crunchy outcome. Make sure to let your mixture cool slightly before forming the cookies. This allows the ingredients to bind better. Another tip is to fold in your chocolate chips and mini marshmallows gently to maintain their shape. If you’re experimenting, feel free to check out some expert tips on making no-bake treats from reliable sources like Food Network or AllRecipes for inspiration!
With these pointers, you’ll be well on your way to creating delicious no-bake avalanche cookies that impress your friends and family!
Serving Suggestions for No-Bake Avalanche Cookies
Perfect pairings for your cookies
When it comes to enjoying your no-bake avalanche cookies, think beyond just coffee! These sweet treats pair beautifully with:
- Milk varieties: Try almond or oat milk for a nutty twist.
- Fresh fruit: Strawberries or bananas add a refreshing contrast to the rich flavors.
- Nut butter spreads: A layer of peanut or almond butter can elevate the experience, providing a creamy texture that complements the crunch.
Feeling adventurous? According to experts at the Food Network, pairing sweet with savory can create a truly unique flavor profile, so consider serving your cookies with slices of turkey bacon or chicken ham for a delightful mix.
Creative presentation ideas
Presentation can turn your no-bake avalanche cookies from simple snacks to eye-catching desserts. Consider these fun ideas:
- Cookie jars: Layer the cookies in a mason jar with decorative ribbon for a charming gift.
- Platter art: Arrange cookies on a colorful plate, surrounding them with fresh fruits and nuts for texture.
- Dipped delights: Double dip half of each cookie in white or dark chocolate and sprinkle with coconut for a delicious twist.
These little touches not only enhance the aesthetic appeal but also make them a talking point for gatherings! Dive into more creative serving ideas on Taste of Home and impress your friends at your next get-together.
Time Breakdown for No-Bake Avalanche Cookies
When you’re in the mood for something sweet and satisfying without the hassle of baking, no-bake avalanche cookies are a fabulous choice. Let’s break down the time needed for this delightful treat.
Preparation Time
Making these cookies is a breeze and only takes about 15 minutes. You’ll be mixing together simple ingredients like oats, peanut butter, and mini marshmallows in no time. Have your measuring cups ready!
Chilling Time
After you prepare your cookie mixture, you’ll want to chill them in the refrigerator for about 30 minutes. This step is crucial, as it helps the cookies set perfectly, giving you that satisfying crunch and gooey texture.
Total Time
In total, you’re looking at around 45 minutes from start to finish. It’s an efficient treat that requires minimal effort while delivering maximum flavor—ideal for busy young professionals. For more recipe insights and cooking strategies, explore resources like Serious Eats or Food Network.
Nutritional Facts for No-Bake Avalanche Cookies
When it comes to no-bake avalanche cookies, it’s essential to understand their nutritional profile. Whether you’re indulging for a special occasion or just treating yourself after a long week, knowing what these cookies contain can guide your choices.
Calories
One serving of no-bake avalanche cookies typically packs around 150 calories. This makes them a satisfying yet manageable treat when enjoyed in moderation.
Carbohydrates
Each cookie usually contains about 20 grams of carbohydrates. Most of these come from oats and coconut, providing a nice energy boost, especially for those busy afternoons.
Sugars
With roughly 8 grams of sugar per cookie, it’s important to keep track of your overall intake. Opt for natural sweeteners like honey or maple syrup to add a healthier twist.
For more insight, you might want to check out resources like the USDA Food Data Central for detailed nutritional breakdowns. By being mindful of what you’re consuming, you can enjoy these delightful treats without guilt.
FAQs about No-Bake Avalanche Cookies
How long do no-bake cookies last?
A common question about no-bake avalanche cookies is their shelf life. If stored properly in an airtight container at room temperature, these cookies can last up to a week. However, for the best flavor and texture, try to enjoy them within the first few days. If you notice any changes in texture or an unusual smell, it’s best to discard them. Learn more about cookie storage here.
Can I freeze these cookies?
Yes, you can definitely freeze your no-bake avalanche cookies! In fact, freezing is a great way to extend their life. Wrap each cookie individually in plastic wrap or place them in a freezer-safe container. When you’re ready to enjoy them, simply let them thaw at room temperature for about 30 minutes. You’ll be amazed at how delicious they taste even after freezing! For more tips on freezing cookies, check out this helpful guide.
What can I substitute for peanut butter?
Not everyone loves peanut butter, and that’s okay! If you need a substitute for your no-bake avalanche cookies, try using:
- Almond butter: Offers a similar texture with a slightly different flavor.
- Sunflower seed butter: Great for nut allergies!
- Coconut butter: Adds a tropical twist and sweetness.
Just keep in mind that some of these substitutions may alter the flavor profile a bit, but they can still yield a delicious cookie. Feel free to experiment and find what works best for you! For more ideas on ingredient substitutions, visit Cooking Light.
These tips should help you whip up the perfect batch of no-bake avalanche cookies every time! Happy baking!
Conclusion on No-Bake Avalanche Cookies
Why You Should Try Making These Cookies at Home
There’s something truly magical about no-bake avalanche cookies. Not only do they come together in a flash, but they also require minimal cleanup. This makes them perfect for busy young professionals looking for a sweet treat after a long day.
When you whip up these cookies, you’re not just indulging your sweet tooth; you’re also creating something delightful that you can share with friends or enjoy during a movie night at home. Plus, customizing them with your favorite ingredients is a fun way to make the recipe your own.
Have you ever wondered how a homemade treat can elevate your mood? Science suggests that baking can be a stress reliever, transforming your kitchen into a mini sanctuary. So why not try making these cookies with a friend or loved one? The process can be as enjoyable as the final product!
For more insights on the joy of cooking and delicious recipes, check out sources like The Kitchn or Serious Eats. They offer wonderful tips and delicious recipes that’ll inspire your culinary adventures!
PrintNo-Bake Avalanche Cookies: The Best Treat for Sweet Cravings
These No-Bake Avalanche Cookies are a delicious treat that will satisfy any sweet craving. Perfect for parties, gatherings, or a simple dessert at home!
- Prep Time: 15 minutes
- Cook Time: 5 minutes
- Total Time: 20 minutes
- Yield: 12 cookies
- Category: Dessert
- Method: No-Bake
- Cuisine: American
- Diet: Vegetarian
Ingredients
- 2 cups crispy rice cereal
- 1 cup mini marshmallows
- 1 cup white chocolate chips
- 1/2 cup peanut butter
- 1/4 cup butter
- 1/2 teaspoon vanilla extract
Instructions
- In a saucepan over low heat, melt the butter and peanut butter together.
- Once melted, remove from heat and stir in the vanilla extract.
- Add the white chocolate chips and stir until melted.
- Add the crispy rice cereal and marshmallows, mixing until evenly coated.
- Drop spoonfuls of the mixture onto a lined baking sheet and let them cool completely before serving.
Notes
- For extra flavor, consider adding chocolate chips or nuts.
- These cookies can be stored in an airtight container for up to a week.
Nutrition
- Serving Size: 1 cookie
- Calories: 150
- Sugar: 10g
- Sodium: 50mg
- Fat: 8g
- Saturated Fat: 3g
- Unsaturated Fat: 5g
- Trans Fat: 0g
- Carbohydrates: 18g
- Fiber: 1g
- Protein: 2g
- Cholesterol: 10mg


")