
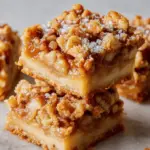
Introduction to Apple Bars
If you’re on the hunt for a delicious homemade treat that combines simplicity and irresistible flavor, look no further than apple bars. These delightful squares are not only easy to make but also bursting with the sweet, warm flavors of cinnamon and fresh apples.
Why Apple Bars are the Perfect Homemade Treat
When you think of comfort food, apple desserts often spring to mind. These apple bars take that comforting experience and make it easy to enjoy—whether you’re hosting friends, looking for a quick dessert for the family, or simply want to indulge yourself. But what makes them stand out?
-
Ease of Preparation: Unlike pie, which has a reputation for being labor-intensive, apple bars come together in just a few simple steps. You can use store-bought ingredients or whip up your own crust, saving time without sacrificing flavor.
-
Versatility: They’re perfect for any occasion! Enjoy them as a cozy fall snack, a potluck dessert, or even a sweet breakfast option paired with a warm cup of coffee. Feeling adventurous? Add in some nuts or a drizzle of caramel for that extra touch.
-
Nutritional Benefits: Packed with apples, these bars bring along a wealth of nutrients, like fiber and vitamins. Apples have long been touted for their health benefits—it’s true what they say about an apple a day keeping the doctor away. To learn more about the benefits of apples, check out sources like Healthline for some eye-opening facts.
-
Shareable Fun: One of the most enjoyable aspects of baking is sharing your creations. Apple bars are easy to cut into portion-sized squares, making them perfect for sharing with coworkers or friends.
As you gather your ingredients, think about personal touches you can add. Perhaps a sprinkle of oats in the crust or some lemon juice to enhance the apple flavor? How you customize your apple bars is part of what makes them uniquely yours!
In the upcoming sections, we’ll dive into the specifics of crafting your own apple bars—from selecting the best apples to baking tips that ensure they come out perfectly every time. So roll up your sleeves, and let’s get baking!
Essential Ingredients for Delicious Apple Bars
Creating scrumptious apple bars is all about using the right ingredients that complement the sweetness of apples while adding texture and flavor. Here’s a breakdown of what you’ll need to whip up these delightful treats.
-
Fresh Apples: The star of the show! Opt for a mix of tart and sweet varieties like Granny Smith and Fuji for a balanced flavor. Did you know that apples are packed with dietary fiber and Vitamin C?
-
All-Purpose Flour: This forms the base of your bars, giving them body and structure.
-
Granulated Sugar: A sprinkle of sugar enhances the natural sweetness of the apples.
-
Brown Sugar: It brings a depth of flavor with its molasses undertones—perfect for that comforting taste.
-
Cinnamon: A classic spice that adds warmth; it’s almost a must for apple bars.
-
Butter: For a rich flavor and flaky texture, use unsalted butter at room temperature.
-
Eggs: These are essential for binding everything together.
-
Oats (optional): A great addition for texture and a wholesome feel.
Each ingredient plays a role in making your apple bars irresistible. If you’re looking for some tips on how to pick the perfect apples, check out this guide for expert advice! Now, who’s ready to bake?
Preparing Apple Bars
Gather Your Ingredients
Before diving into the joy of baking, let’s take a moment to gather everything you need to make the most delightful apple bars. Here’s a quick checklist to ensure you’re fully prepared:
-
For the dough:
-
2 ½ cups all-purpose flour
-
1 cup unsalted butter (chilled and diced)
-
1 cup sugar
-
1 egg
-
1 tsp vanilla extract
-
1 tsp baking powder
-
A pinch of salt
-
For the apple filling:
-
4 medium apples (like Honeycrisp or Granny Smith)
-
½ cup sugar
-
1 tsp cinnamon
-
1 tbsp lemon juice
-
1 tbsp cornstarch (for thickening)
Having all your ingredients laid out helps streamline the process and makes it far less chaotic, allowing you to fully enjoy the creation of your apple bars. Fun fact: Did you know that apples are one of the most popular fruits worldwide? There’s a world of flavors and textures in just one fruit!
Make the Dough
Now that you’ve assembled your ingredients, let’s get to making the dough. Start by combining the flour, sugar, baking powder, and salt in a mixing bowl. Once mixed, add in your chilled butter. It’s best to use a pastry cutter or your hands to create a crumbly texture, similar to pea-sized crumbs. This will ensure a wonderfully flaky crust.
Next, incorporate the egg and vanilla extract. Mix until everything is combined but be careful not to overmix; a little lumpiness is perfectly fine. Once the dough comes together, divide it into two halves. Wrap each half in plastic wrap and refrigerate for about 30 minutes. This chilling phase is crucial; it helps solidify the butter for that golden flakiness when baked.
Prepare the Apple Filling
While your dough is chilling, let’s whip up that delicious apple filling. Start by peeling and slicing the apples. The key here is to aim for even slices—you want your apple bars to have a consistent texture throughout. Place the sliced apples in a bowl and toss them with sugar, cinnamon, lemon juice, and cornstarch. The cornstarch will help absorb any excess moisture, keeping your bars from becoming soggy.
Take a moment to taste the mixture; this is your chance to adjust the sweetness. If you like it a bit sweeter, add a touch more sugar. For a tangy twist, squeeze in a little extra lemon juice. This sweet-and-tart balance will elevate your apple bars to another level.
Assemble Your Apple Bars
Now that we have our dough and filling ready, it’s time to put it all together. Preheat your oven to 350°F (175°C) while you roll out one of the dough halves on a floured surface. Make sure it’s large enough to cover the bottom of your baking dish. Gently place the rolled dough in your greased 9×13 inch pan, pressing it down evenly across the base.
Next, spread the apple filling evenly over the crust, ensuring every bite has that delightful apple goodness. Roll out the second half of dough and place it over the apple filling. You can create slits or cut a lattice pattern in the top layer of dough for an appealing finish—it allows steam to escape and adds to that homemade look!
Bake Your Apple Bars to Perfection
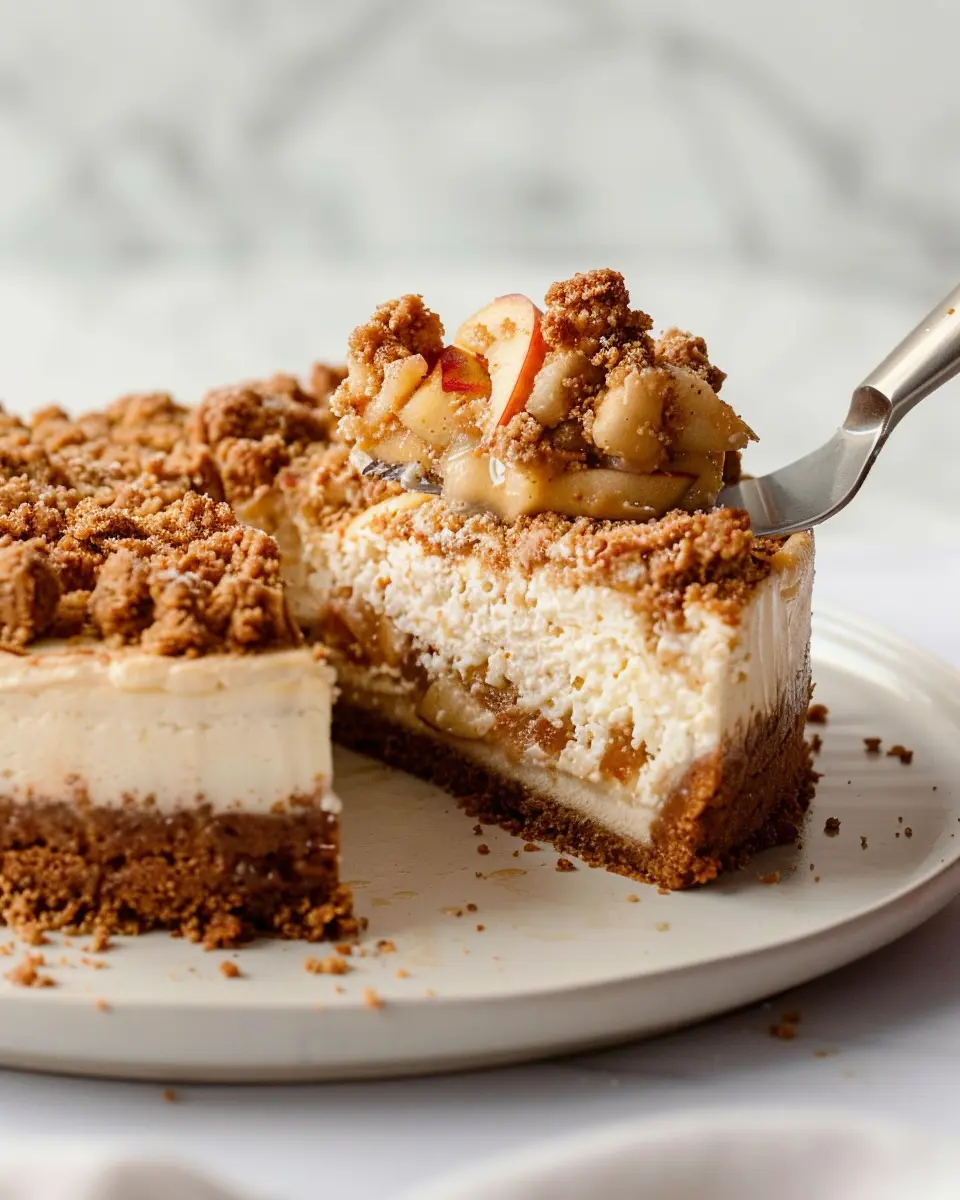
Finally, it’s time for the best part—baking! Place your assembled apple bars in the preheated oven and bake for about 35-40 minutes or until the top is lightly golden and the filling is bubbly. The aroma will be irresistible! Once done, let them cool for at least an hour before slicing. This cooling time is important as it allows the filling to set, making serving much neater.
Each bite of your freshly baked apple bars should be a perfect blend of buttery crust and tender apples, bursting with flavor. Serve them warm or at room temperature, perhaps with a scoop of vanilla ice cream or a drizzle of caramel for that extra touch.
If you want to explore more variations or tips on baking, check out resources like Food Network or Serious Eats. Happy baking!
Variations on Apple Bars
Gluten-Free Apple Bars
For those avoiding gluten, creating apple bars that everyone can enjoy is easier than you might think! A simple swap can transform your recipe—from traditional flour to gluten-free alternatives like almond flour or oat flour. These options not only cater to gluten-sensitive diets but also add a delightful nutty flavor.
When substituting, keep the following in mind:
- Almond Flour: It lends a rich taste and requires less moisture.
- Oat Flour: Offers a fantastic texture without compromising flavor.
Additionally, ensure that your oats are certified gluten-free if using them in your apple bar base. For more guidance on gluten-free ingredients, check out resources from the Celiac Disease Foundation.
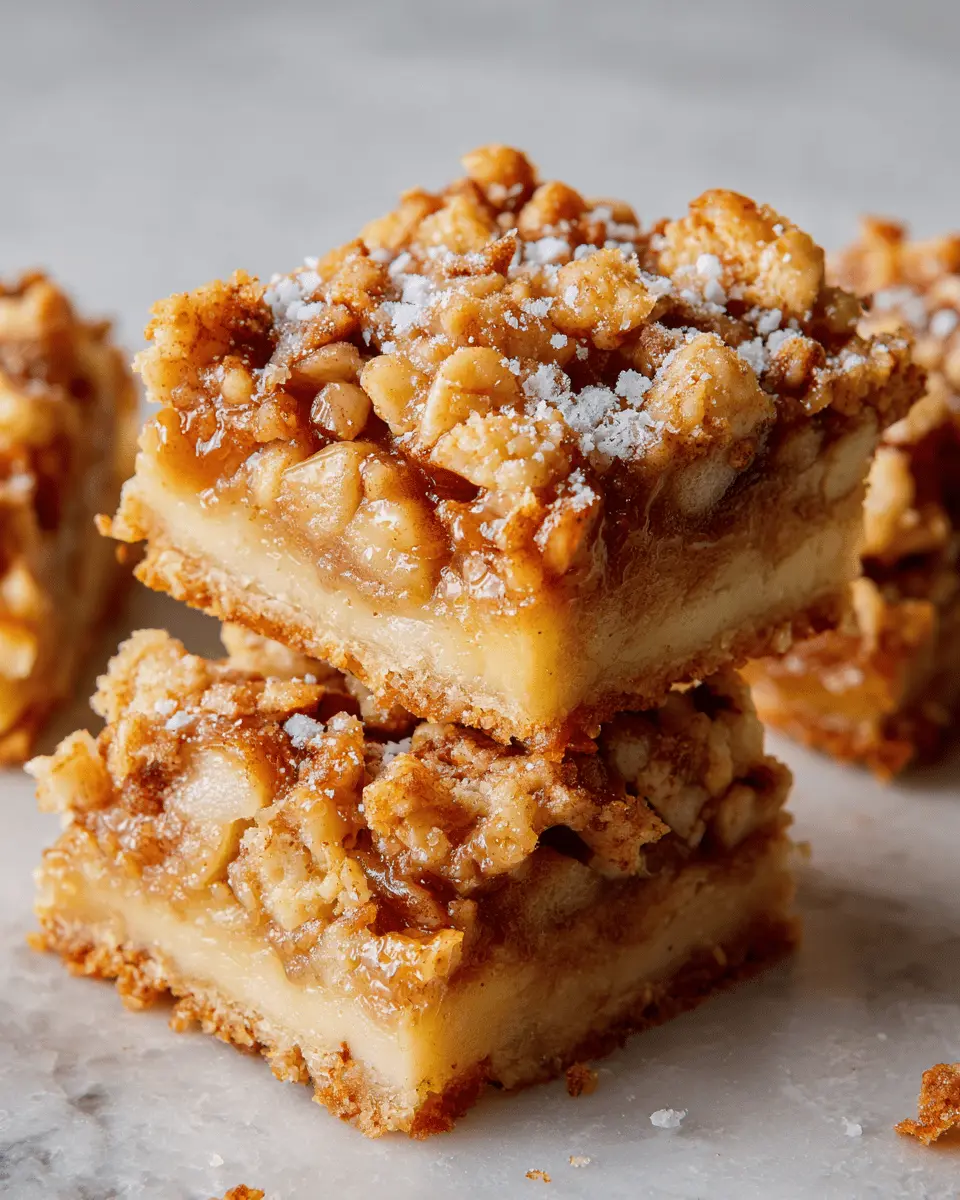
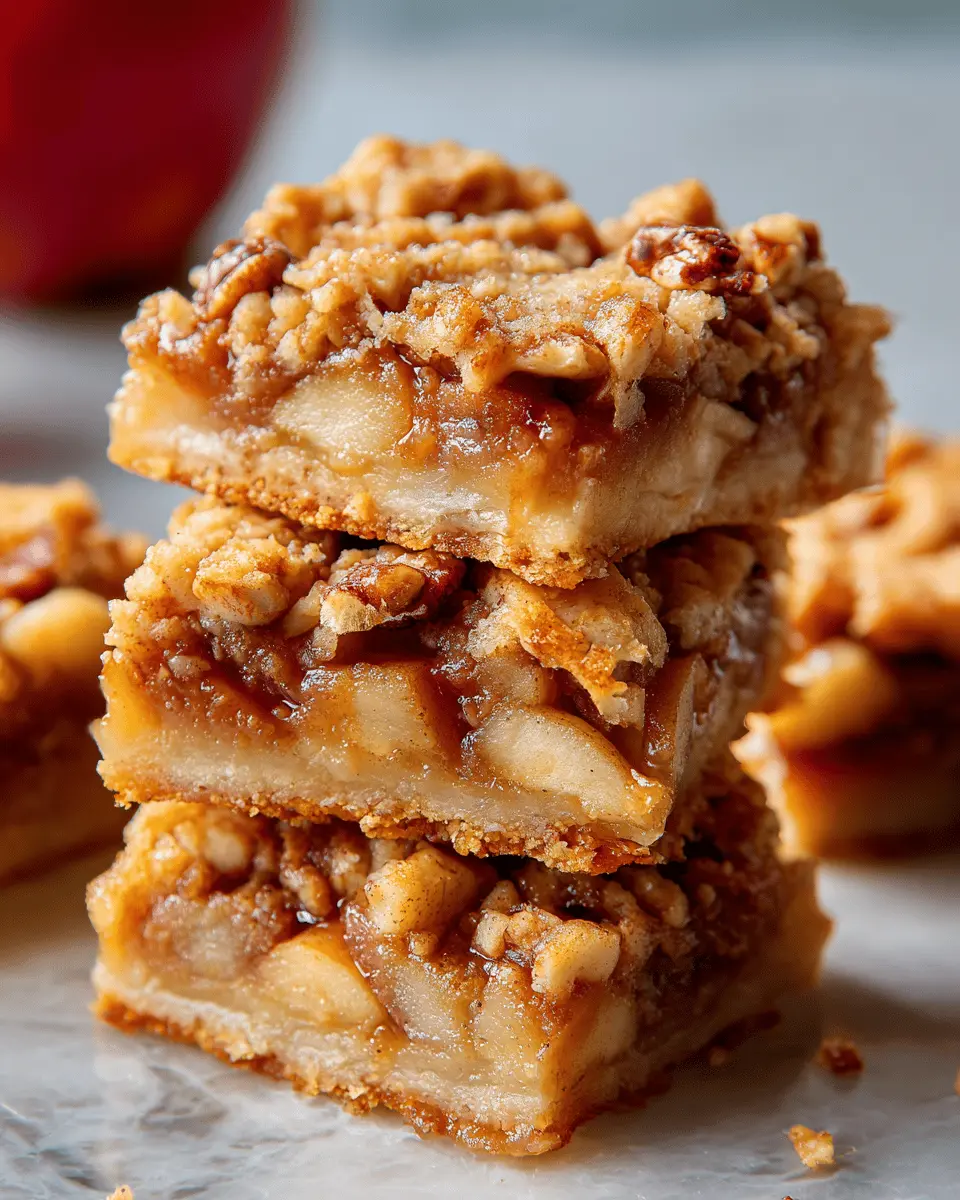
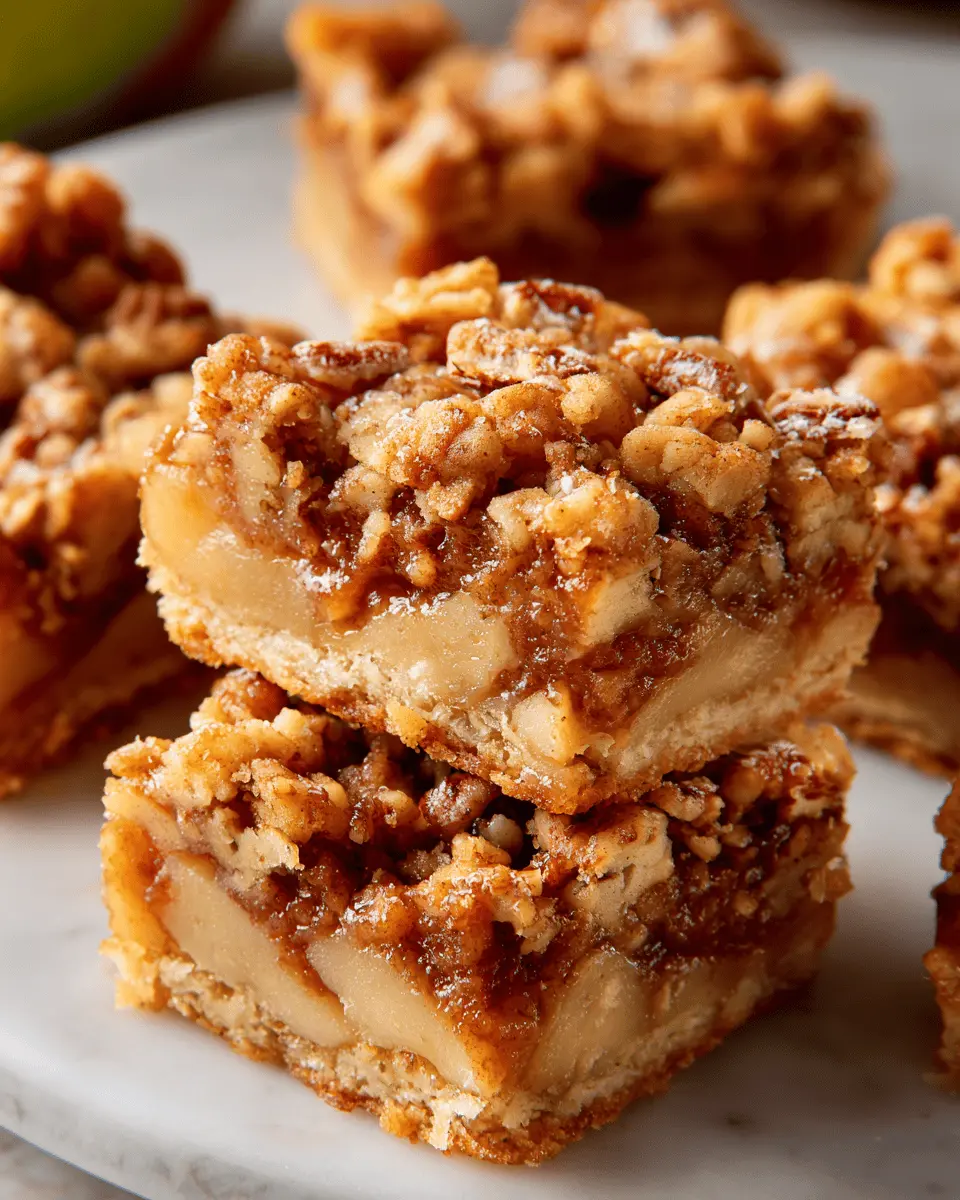
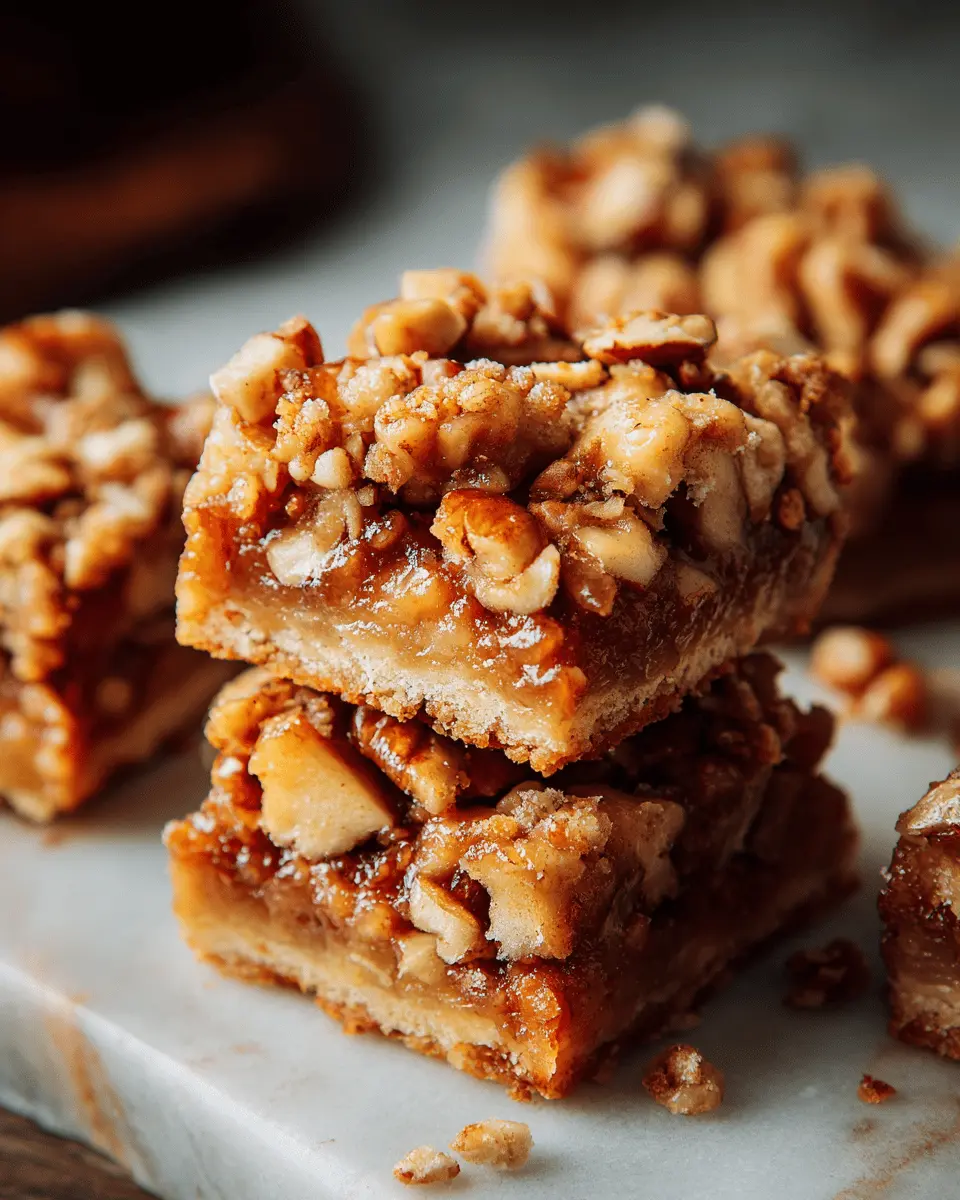
Apple Bars with Nuts or Dried Fruits
Looking to elevate your apple bars? Adding nuts or dried fruits can introduce new flavors and textures. Pecans, walnuts, or almonds add a satisfying crunch, while dried cranberries or raisins complement the sweet tartness of the apples.
Here’s how you can customize:
- Nuts: Toss some chopped walnuts or pecans into the apple mixture for added richness.
- Dried Fruits: Mix in some chopped dried apricots or cranberries for a sweet contrast.
Imagine biting into a warm, gooey apple bar, where every mouthful has layers of flavor from both the apples and the delightful additions. It’s a culinary experience that’s both comforting and indulgent!
Experimenting with these variations will not only satisfy your taste buds but also keep your apple bars interesting and diverse. Ready to get baking? Your new favorites await!
Cooking Tips for Apple Bars
Tips for a Perfect Crust
Achieving a perfect crust for your apple bars is essential for that delightful textural contrast. Start by chilling your butter and mixing it until it’s light and creamy before adding in flour. This helps to keep the crust flaky. An excellent trick is to use a blend of all-purpose and whole wheat flour—I promise it adds an amazing depth of flavor! Make sure to avoid over-mixing; otherwise, you risk a tough crust. For extra richness, consider adding a pinch of salt and a tablespoon of sugar to enhance the sweetness of your apple bars.
Tips for Choosing the Right Apples
Selecting the right apples can transform your apple bars from good to spectacular. Aim for a mix of sweet and tart apples. Popular options include Granny Smith for tartness and Fuji or Honeycrisp for sweetness. Did you know mixing varieties can create a more complex flavor profile? According to the USDA, using fresh, local apples can also lead to a more vibrant taste. Remember, freshly picked apples not only enhance flavor but often have a firmer texture, perfect for baking!
Combine these tips, and you’ll create delicious apple bars that will impress your friends and family. Happy baking!
Serving Suggestions for Apple Bars
Pairing with Ice Cream or Whipped Cream
When it comes to serving apple bars, nothing elevates their deliciousness like a generous scoop of vanilla ice cream or a dollop of whipped cream. The creamy texture beautifully contrasts the warm, spiced flavors of the bars. If you want to be adventurous, try flavors like caramel or cinnamon ice cream for an added twist. Did you know that pairing warm desserts with cold ice cream can actually enhance the overall tasting experience? This delightful combo is perfect for hosting friends or simply treating yourself.
Creative Serving Ideas for Guests
Looking to impress? Here are some fun ways to serve apple bars that will leave a lasting impression:
- Mini Dessert Plates: Cut the bars into smaller portions and serve on cute mini plates with a side of fresh fruit.
- Apple Bar Sundae: Layer a warm apple bar with ice cream, drizzle with caramel sauce, and top with nuts for a decadent sundae.
- Personalized Toppings: Set up a toppings bar with options like chopped nuts, dried fruit, or a sprinkle of cinnamon for a DIY experience.
These options not only make your gathering more interactive but also add a personal touch that friends will appreciate. For more serving ideas and tips, check out this great resource on dessert pairings for endless inspiration!
Time Breakdown for Apple Bars
Preparation Time
Making apple bars is a delightful experience that only requires about 15 minutes of your time. During this stage, you’ll chop those crisp apples, measure out your ingredients, and mix everything beautifully. It’s quick and allows you to savor the fresh ingredients, setting the stage for a delicious treat.
Cooking Time
The cooking time for your apple bars is approximately 25-30 minutes. This is when the magic happens—the aroma of baked apples and cinnamon will fill your kitchen, teasing your taste buds and making the wait all the more delightful.
Total Time
In total, you’re looking at just around 45-50 minutes from start to finish. That’s less time than it takes to binge-watch an episode of your favorite show! These homemade apple bars are well worth the effort. Want more quick recipes? Check out sources like BBC Good Food for inspiration.
Nutritional Facts for Apple Bars
When you whip up a batch of apple bars, it’s good to know what’s inside these delightful treats. Here’s a friendly breakdown of their nutritional content to help you make informed choices.
Calories per Serving
Each serving of homemade apple bars typically contains around 150–200 calories. This can vary based on the ingredients used, making portion control key if you’re watching your caloric intake.
Sugars and Carbs
You’ll find that one serving boasts about 20 grams of sugars, primarily from natural apple sugars and added sweeteners. The carbohydrate content is roughly 30 grams, making these bars a quick source of energy—perfect for a busy day!
Healthier Substitute Options
Looking to lighten up your apple bars? Here are some easy swaps:
- Use whole wheat flour instead of all-purpose flour for added fiber.
- Try honey or maple syrup in place of refined sugar for a natural sweetness.
- Consider using Turkey Bacon or Chicken Ham for an added protein boost!
For more nutritional insights, check out resources like the USDA FoodData Central or Healthline.
These tips will not only help you enjoy your treats but also keep your health goals in check!
FAQs about Apple Bars
Can I use frozen apples for the filling?
Absolutely! Using frozen apples is a convenient option if fresh ones aren’t available. Just remember to thaw and drain them well to avoid excess moisture in your apple bars. This will help maintain the perfect texture. If you want to add a bit of zing, consider tossing them with a touch of lemon juice before using them in your filling.
How do I store leftover Apple Bars?
Storing your leftover apple bars is simple! Allow them to cool completely, then place them in an airtight container. They can be stored at room temperature for a day or two, but for longer freshness, refrigerate them. If you’re looking to store them for an extended period, consider freezing them. Just wrap them individually in plastic wrap and place them in a freezer-friendly bag. They should keep well for up to three months.
Can I make Apple Bars ahead of time?
Definitely! Making apple bars ahead of time is a great way to save time, especially if you’re preparing for a gathering. You can bake them a day in advance and store them tightly covered in your kitchen. When you’re ready to enjoy them, simply warm them in the oven for a few minutes to bring back that fresh-baked taste. Need tips on reheating? Check out this guide on the best methods for reheating baked goods.
Feel free to dive into these tasty treats anytime; they’re a delight that’s worth savoring, no matter when you enjoy them!
Conclusion on Apple Bars
The Last Bite: Enjoying Your Homemade Apple Bars
As you savor the last bite of your homemade apple bars, take a moment to appreciate the delightful combination of flavors and textures. The warm spices, the tender apples, and that perfectly crumbly crust create an experience that can turn any ordinary day into something special.
These apple bars are not just about satisfying your sweet tooth; they can be a wonderful way to bond with friends or family. Invite them over for a cozy afternoon, serve with a cup of coffee or tea, and watch the magic unfold. Want to take it a step further? Try pairing them with a scoop of vanilla ice cream for an irresistible treat!
For more delicious dessert ideas, check out King Arthur Baking for inspiration that will impress your guests and elevate your baking skills. There’s nothing quite like sharing homemade goods—so dig in, relax, and enjoy the fruits of your labor!
PrintApple Bars: Easy and Indulgent Treats for Cozy Days
Delicious and comforting apple bars that are perfect for cozy days.
- Prep Time: 20 minutes
- Cook Time: 45 minutes
- Total Time: 1 hour 5 minutes
- Yield: 12 bars
- Category: Dessert
- Method: Baking
- Cuisine: American
- Diet: Vegetarian
Ingredients
- 3 cups sliced apples
- 1 cup sugar
- 2 teaspoons cinnamon
- 1 cup flour
- 1/2 cup butter, softened
- 1 egg
- 1/2 teaspoon baking powder
Instructions
- Preheat the oven to 350°F (175°C).
- In a bowl, mix the apples, sugar, and cinnamon.
- In another bowl, combine flour, butter, egg, and baking powder to form a dough.
- Press the dough into a greased baking dish.
- Layer the apple mixture on top of the dough.
- Bake for 40-45 minutes until golden brown.
Notes
- Serve with vanilla ice cream for added indulgence.
- Store leftovers in an airtight container.
Nutrition
- Serving Size: 1 bar
- Calories: 250
- Sugar: 30g
- Sodium: 150mg
- Fat: 10g
- Saturated Fat: 6g
- Unsaturated Fat: 4g
- Trans Fat: 0g
- Carbohydrates: 38g
- Fiber: 2g
- Protein: 3g
- Cholesterol: 30mg


")