
Introduction to Nun’s Puffs
What are Nun’s Puffs and Where Do They Come From?
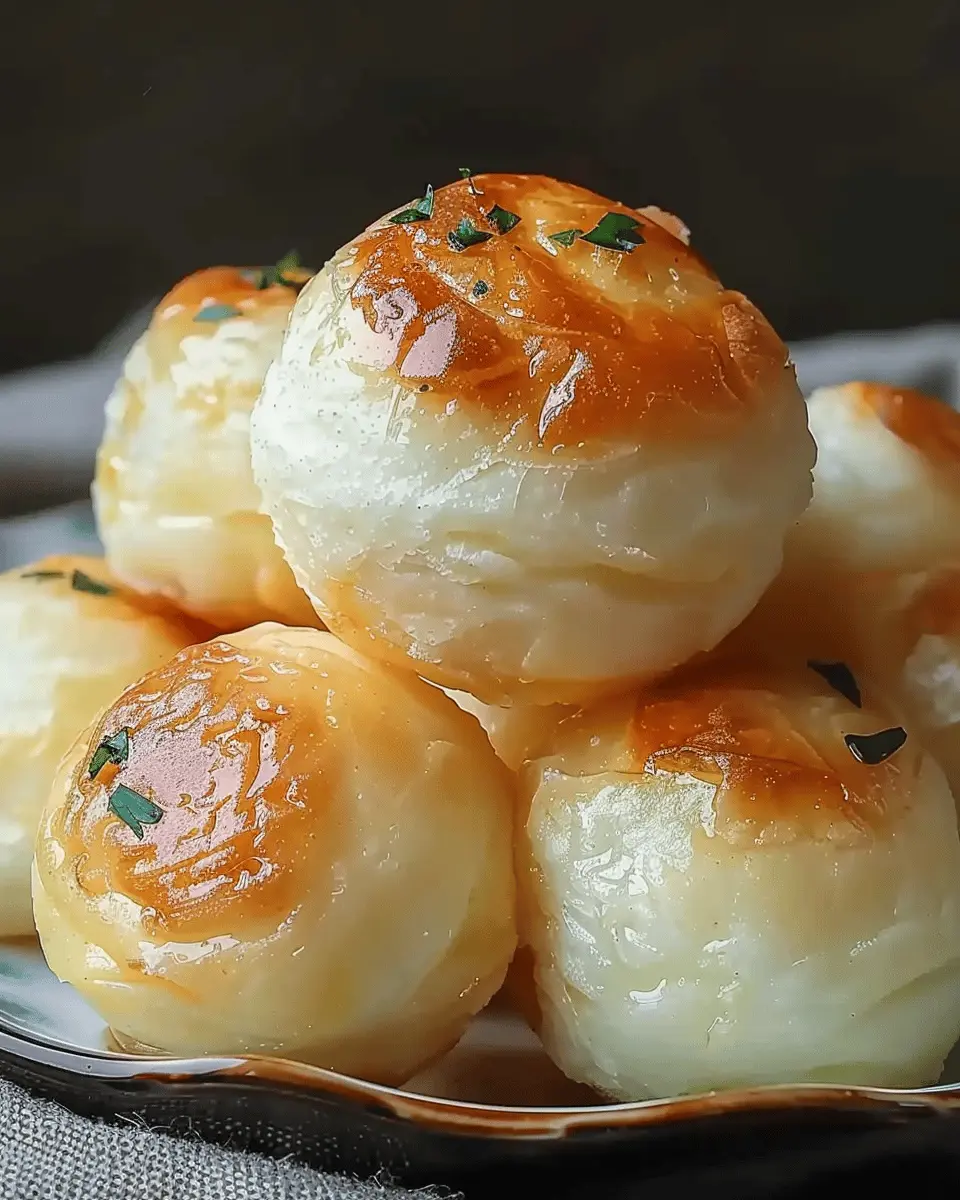
Have you ever heard of nun’s puffs? If not, you’re in for a delightful treat! These air-light, custardy pastries have a fascinating history that dates back centuries, offering a unique blend of flavors and textures that are sure to satisfy your sweet tooth. Originating in France, with ties to the culinary traditions of nuns, these delectable morsels were created as a way to use up leftover pastry dough and egg whites. It’s fascinating how such an unintended combination could lead to something so beloved!
Nun’s puffs are essentially a type of choux pastry, similar to cream puffs or éclairs, but with a twist. The key ingredients are simple: flour, eggs, butter, and milk, often sweetened with sugar and sometimes flavored with vanilla or citrus zest. The natural rise of the batter during baking creates a delightful puff that’s hollow in the center, making these treats perfect for filling with a variety of sweet creams or enjoying as they are.
These airy pastries are not just limited to their French roots. They have managed to spread across various cultures, appearing in slightly adapted forms in many cuisines worldwide. You can even find recipes that incorporate local spices and flavors, giving them a unique spin that reflects the place they’re made. For instance, in some countries, you might see variations filled with rich creams, fresh fruits, or even chocolate ganache.
If you’re looking to impress at your next gathering or simply want a comforting snack at home, nun’s puffs are an excellent choice. Imagine the reaction when you tell your friends you made these fluffy, irresistible treats from scratch. Want to learn more about French pastry techniques? Check out this comprehensive guide on techniques that can help elevate your baking skills.
As you can see, nun’s puffs are more than just a delicious pastry; they’re a testament to the creativity of culinary traditions throughout history. So, are you ready to give these delightful puffs a try in your kitchen? Let’s dive into the recipe and get baking!
Ingredients for Nun’s Puffs
If you’re ready to whip up some delicious nun’s puffs, let’s talk about the essentials you’ll need!
Main Ingredients
To create these delightful treats, gather the following main ingredients:
- 1 cup of water: This will be the base for your dough, helping to create that light puffiness.
- 1/2 cup of unsalted butter: Adds richness and flavor.
- 1 cup of all-purpose flour: The heart of your puffs.
- 4 large eggs: These will give your puffs that airy texture.
- 1/2 cup of grated cheese: For a savory twist, opt for cheddar or your favorite cheese!
- Salt to taste: A pinch enhances all the flavors beautifully.
Optional Ingredients
While the basic recipe is fantastic, you might want to customize it a bit. Consider adding:
- Turkey bacon or chicken ham: These can bring a savory, protein-packed punch.
- Chopped herbs: Fresh parsley or chives can brighten the flavor profile.
- A touch of hot sauce: For those who enjoy a little kick.
Feel free to mix and match these options to create your perfect nun’s puffs! Check out this link for more inspiration on variations!
Preparing Nun’s Puffs
Trying your hand at nun’s puffs? You’re in for a delightful treat! These airy, puffed pastries make for an elegant dessert or even a special brunch item. They might look complex, but I promise the process is simple. Let’s get started!
Preheat and Grease the Muffin Tin
Before diving into the cooking, it’s essential to prep your tools. You’ll want to preheat your oven to 400°F (200°C). This ensures that the heat is just right when you’re ready to bake your nun’s puffs.
While the oven warms up, take a moment to grease a muffin tin. This is crucial because the batter needs room to expand and rise without sticking. Use a non-stick spray or brush each cup with melted butter. Consider using parchment paper liners for an extra layer of insurance: they can help make cleanup a breeze later on.
Melt the Butter and Heat the Milk
Next up is the magic of butter and milk. In a medium saucepan, melt 1 cup of butter over low heat. Once it’s just melted, add in 1 cup of milk. Stir the mixture gently as it warms up; aim for a bubbly, creamy consistency. This combo is the flavorful base that will give your nun’s puffs that rich taste you crave. Want to make it even creamier? Consider substituting half the milk with heavy cream. This will take your puffs to the next level!
As a tip, using room-temperature milk can speed up this step, keeping your workflow efficient. When everything is combined, remove the saucepan from the heat and let it cool slightly while you tackle the dry ingredients.
Combine Flour and Form the Dough
Now it’s time for a bit of mixing. In a large bowl, you’ll need to combine 1 ½ cups of all-purpose flour with a pinch of salt. It’s crucial not to skip the salt, as it enhances the flavors. Gradually pour your warm butter and milk mixture into the flour. Stir until everything is just combined. Don’t overmix; a few lumps are OK in the dough.
Fun fact: nun’s puffs originated in French cuisine, reflecting a delicious fusion of culture and culinary technique. You’d be surprised how much flavor lives in such a simple dough!
Add Eggs and Mix Thoroughly
Next, it’s time to introduce some eggs—specifically, 4 large eggs. Crack them into the dough bowl and mix thoroughly. You can use a whisk or a spatula, whichever you prefer. The goal is to achieve a smooth and slightly thick batter that flows lightly off the spoon.
This step is crucial because the eggs are what help your nun’s puffs rise and take on that signature airy texture. If you’ve never made a batter like this before, it can feel a bit strange at first, but trust me, it will all come together beautifully!
Fill the Muffin Cups and Bake
With your batter ready, it’s time for the fun part—filling those muffin cups! Use a spoon or a piping bag to fill each greased muffin cup about two-thirds full. This ensures that they have enough room to puff up without overflowing.
Pop them into your preheated oven and set a timer for about 20-25 minutes. Golden-brown tops will be your indicator that they’re done. They’ll puff up magnificently, and the aroma wafting through your kitchen will be utterly irresistible!
Once you take them out, give them a few minutes to cool before gently removing them from the tin. If you want, sprinkle a bit of powdered sugar on top for that extra touch. Serve warm and prepare for everyone to ask for the recipe!
Making nun’s puffs is not just about following a recipe; it’s an experience that invites you to savor each step. I hope these tips make your baking journey delightful and successful!
Variations on Nun’s Puffs
When it comes to nun’s puffs, the possibilities are nearly endless. Whether you crave something sweet or prefer a savory bite, these delightful puffs can accommodate your taste. Let’s dive into some delicious variations that can elevate your cooking game.
Sweet variations: flavored Nun’s Puffs
Sweet nun’s puffs are perfect for satisfying your dessert cravings. Consider these fun flavors to try:
- Vanilla Almond: Add a splash of almond extract to your batter for a delightful twist on the classic flavor.
- Cocoa Chocolate: Mix in some cocoa powder for a rich chocolate experience. A sprinkle of chocolate chips before baking makes these even more indulgent.
- Cinnamon Sugar: Before baking, sprinkle the puffs with a mixture of cinnamon and sugar for a warm, comforting taste.
While creativity in the kitchen is encouraged, don’t forget to explore flavor compatibility through resources like The Flavor Bible.
Savory options: cheese and herb Nun’s Puffs
If savory treats are more your style, wow your friends with cheese and herb nun’s puffs. Here’s how:
- Cheddar and Chive: Mix sharp cheddar cheese with finely chopped chives for a punchy flavor that pairs perfectly with a brunch spread.
- Feta and Spinach: Crumbled feta cheese combined with fresh spinach creates a Mediterranean flair that’s hard to resist.
- Turkey Bacon and Cheese: Diced turkey bacon gives these puffs a satisfying crunch. Pair it with a mild cheese like mozzarella for the ultimate comfort food.
Exploring different ways to enhance your nun’s puffs not only brings variety but also introduces new flavor profiles. Remember, cooking should be fun! Feel free to experiment and make these delicious bites your own. Happy baking!
Cooking tips and notes for Nun’s Puffs
Common mistakes to avoid
When making nun’s puffs, many home chefs stumble on a few key areas. Here are some pitfalls to watch out for:
- Not preheating your oven: This is crucial for achieving that puffed-up effect. A hot oven helps the dough rise quickly.
- Skipping the whisking: Make sure to thoroughly whisk the eggs into the mixture; this adds air and lightness.
- Over or underbaking: Keep an eye on the timer. Nun’s puffs should be golden brown, not too dark or pale.
Important notes for perfect texture
To get that delightful texture in your nun’s puffs, consider these tips:
- Use fresh ingredients: Fresh eggs and high-quality cheese make a noticeable difference.
- Let the batter rest: Allow it to sit for about 10 minutes before scooping onto the baking sheet; this helps enhance the texture.
- Experiment with fillings: Try using turkey bacon or chicken ham for a savory twist. You can even go sweet with fruit fillings!
For more insights on baking techniques, check out King Arthur Baking and America’s Test Kitchen. Happy baking!
Serving suggestions for Nun’s Puffs
Toppings to enhance your Nun’s Puffs
When it comes to nun’s puffs, the right toppings can elevate these delightful pastries from good to unforgettable. Consider adding a sprinkle of powdered sugar for that sweet touch, or perhaps a drizzle of honey or maple syrup for a rich flavor. Fresh berries, such as strawberries or blueberries, not only add a burst of color but also a refreshing tartness that complements the sweetness beautifully. You could even whip up a simple lemon glaze for a zesty finish.
Ideal pairings for a complete meal
Looking to craft a complete meal around your nun’s puffs? Start with a light salad featuring mixed greens and a tangy vinaigrette to balance the richness of the puffs. For the main course, consider serving them alongside a savory dish like Turkey Bacon or Chicken Ham. These protein-packed options add a savory element that makes the meal satisfying yet light.
If you’re feeling adventurous, try pairing your nun’s puffs with some roasted veggies for a beautiful color contrast and a nutrient boost. Want to sip something refreshing? A cold herbal tea or sparkling water with a slice of lemon would be perfect!
Feel free to explore more ideas on how to pair foods effectively at reputable resources like Epicurious and Serious Eats.
Time Breakdown for Nun’s Puffs
When diving into the delightful world of nun’s puffs, it’s essential to plan your time effectively. Here’s a handy breakdown to help you manage your kitchen adventure!
Preparation Time
Getting everything ready for your nun’s puffs will take about 15 minutes. This includes measuring ingredients, mixing the batter, and preheating your oven. It’s a simple process, but it pays to be organized!
Cooking Time
Let those puffs rise and shine in the oven for approximately 20 minutes. Keep an eye on them during this time; you want a lovely golden-brown finish. The aroma wafting through your kitchen will be irresistible!
Total Time
In total, you’re looking at about 35 minutes to bring these delicious treats to life. Perfect for a quick dessert that’s bound to impress friends or family!
If you’re eager to explore more about nun’s puffs, consider checking out What is a Nun’s Puff? for a deeper dive into this delectable dish. Happy baking!
Nutritional Facts for Nun’s Puffs
When indulging in nun’s puffs, it’s always good to be mindful of their nutritional content. Here’s a quick breakdown to help you enjoy them in moderation without sacrificing taste.
Calories
A serving of nun’s puffs typically contains around 120 calories. This makes them a delightful treat that can fit nicely into most diets without overwhelming your daily calorie intake.
Carbohydrates
These fluffy little pastries generally contain about 15 grams of carbohydrates per serving. They mainly come from the flour and sugar, giving you that delicious sweetness while also providing energy for your day.
Protein
If you’re looking to add some protein to your snacks, each serving of nun’s puffs offers roughly 2 grams. While they aren’t a primary source of protein, you can pair them with protein-rich foods like Greek yogurt or sliced turkey bacon for a more balanced treat.
For more detailed nutritional information, consider visiting reputable sources like the USDA FoodData Central or nutrition-focused websites such as Healthline. Enjoy your nun’s puffs without guilt, knowing where they fit into your nutritional goals!
FAQ about Nun’s Puffs
Can I make Nun’s Puffs ahead of time?
Absolutely! One of the best things about nun’s puffs is that you can prepare the batter in advance. Whip it up the night before and store it in an airtight container in the refrigerator. This makes your morning routine easier and allows the flavors to meld beautifully. Just be sure to bring it to room temperature before baking for the best results.
How do I store leftover Nun’s Puffs?
If you find yourself with leftover nun’s puffs, first of all, congratulations—that’s a great problem to have! To store them, place the puffs in an airtight container at room temperature for up to two days. If you want to keep them fresh for a bit longer, you can refrigerate them for up to a week. Just remember, while they can be stored, the lovely airy texture may change slightly over time.
What’s the best way to reheat them?
Reheating nun’s puffs can be simple and effective. Preheat your oven to 350°F (175°C) and warm the puffs for about 5–10 minutes. This method helps restore their delightful crispiness. Alternatively, you can briefly microwave them for about 15-20 seconds, but the oven is usually the best option for keeping that amazing texture intact.
For additional tips on food storage and reheating, check out resources like FoodSafety.gov for expert guidelines. Happy baking!
Conclusion on Nun’s Puffs
Why you should try making Nun’s Puffs today!
If you’re looking to elevate your snack game, nun’s puffs are a delightful choice that merges simplicity with incredible flavor. These airy pastries, often filled with delightful flavors, have a way of impressing friends and family alike.
- Quick Preparation: They’re surprisingly easy to whip up, making them a perfect option for impromptu gatherings.
- Versatility: You can fill them with Turkey Bacon, Chicken Ham, or even a rich cheese blend – the options are endless!
- Crowd-Pleaser: With their light texture and savory taste, they’re bound to become a favorite.
So why wait? Try making your own nun’s puffs today and discover why they’ve been loved for generations! If you’re eager for tips on perfecting the recipe, check out Cooking Techniques for more insight.
PrintNun’s Puffs: The Easy Indulgent Treat Everyone Will Love

Discover the delightful sweetness of Nun’s Puffs, a treat that promises to indulge your taste buds and impress your guests.
- Prep Time: 15 minutes
- Cook Time: 25 minutes
- Total Time: 40 minutes
- Yield: 20 puffs
- Category: Dessert
- Method: Baking
- Cuisine: French
- Diet: Vegetarian
Ingredients
- 1 cup flour
- 1 cup milk
- 1/2 cup unsalted butter
- 1 cup sugar
- 4 eggs
- 1 teaspoon vanilla extract
- 1/4 teaspoon salt
Instructions
- Preheat the oven to 375°F (190°C).
- In a saucepan, combine the butter and milk. Bring to a boil.
- Remove from heat and stir in the flour and salt until smooth.
- Mix in the eggs one at a time, then stir in vanilla.
- Drop spoonfuls onto a baking sheet.
- Bake for 20-25 minutes until golden brown.
Notes
- These puffs are best served warm for optimal taste.
- Enjoy with a sprinkle of powdered sugar on top.
Nutrition
- Serving Size: 1 puff
- Calories: 150
- Sugar: 10g
- Sodium: 50mg
- Fat: 9g
- Saturated Fat: 5g
- Unsaturated Fat: 3g
- Trans Fat: 0g
- Carbohydrates: 15g
- Fiber: 0g
- Protein: 2g
- Cholesterol: 60mg


")